I just got my Satiator and inted to use it for the rest of my life. love swapping cartridges even if they suck and don’t work. I love managing memory saves even if they will die in a year because I forgot to swap cartridges and they’re left on system memory with no backup.
3 Likes
Been a while since I did any mods, and really I haven’t this time, but I thought “She’s almost 30, she looks not clean, she needs a clean.” And so I’ve been working on that the past few weeks.
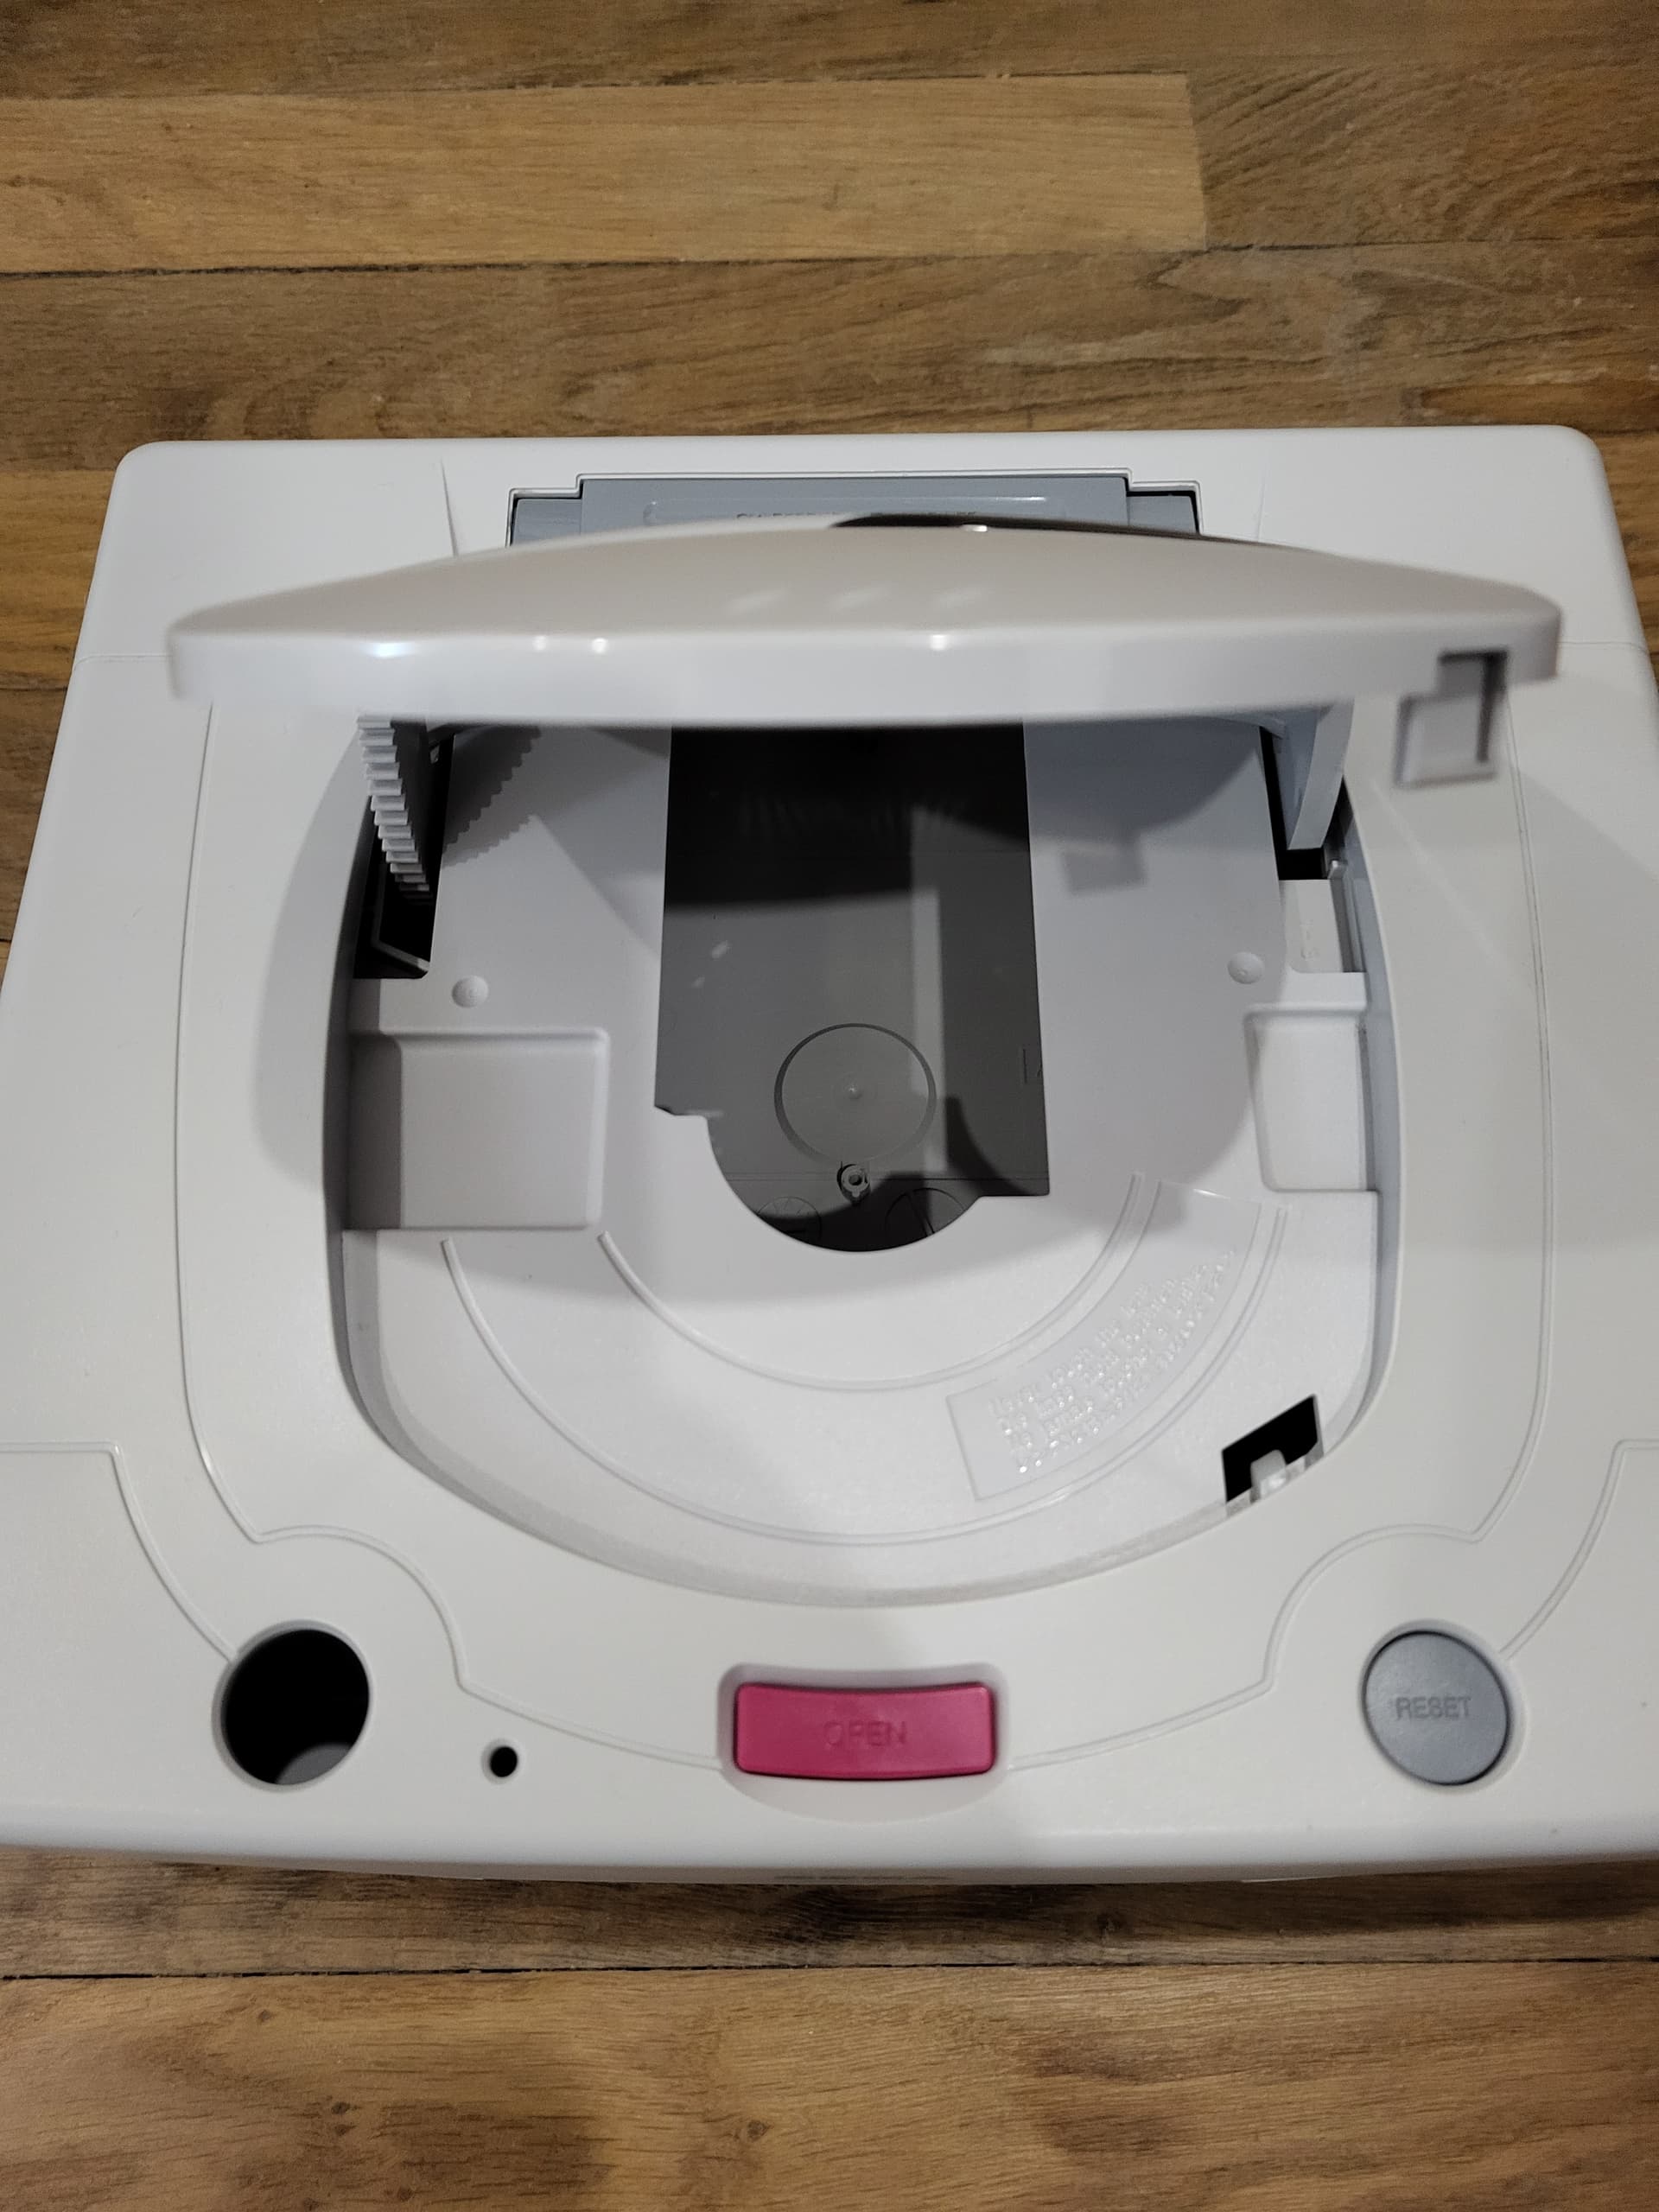
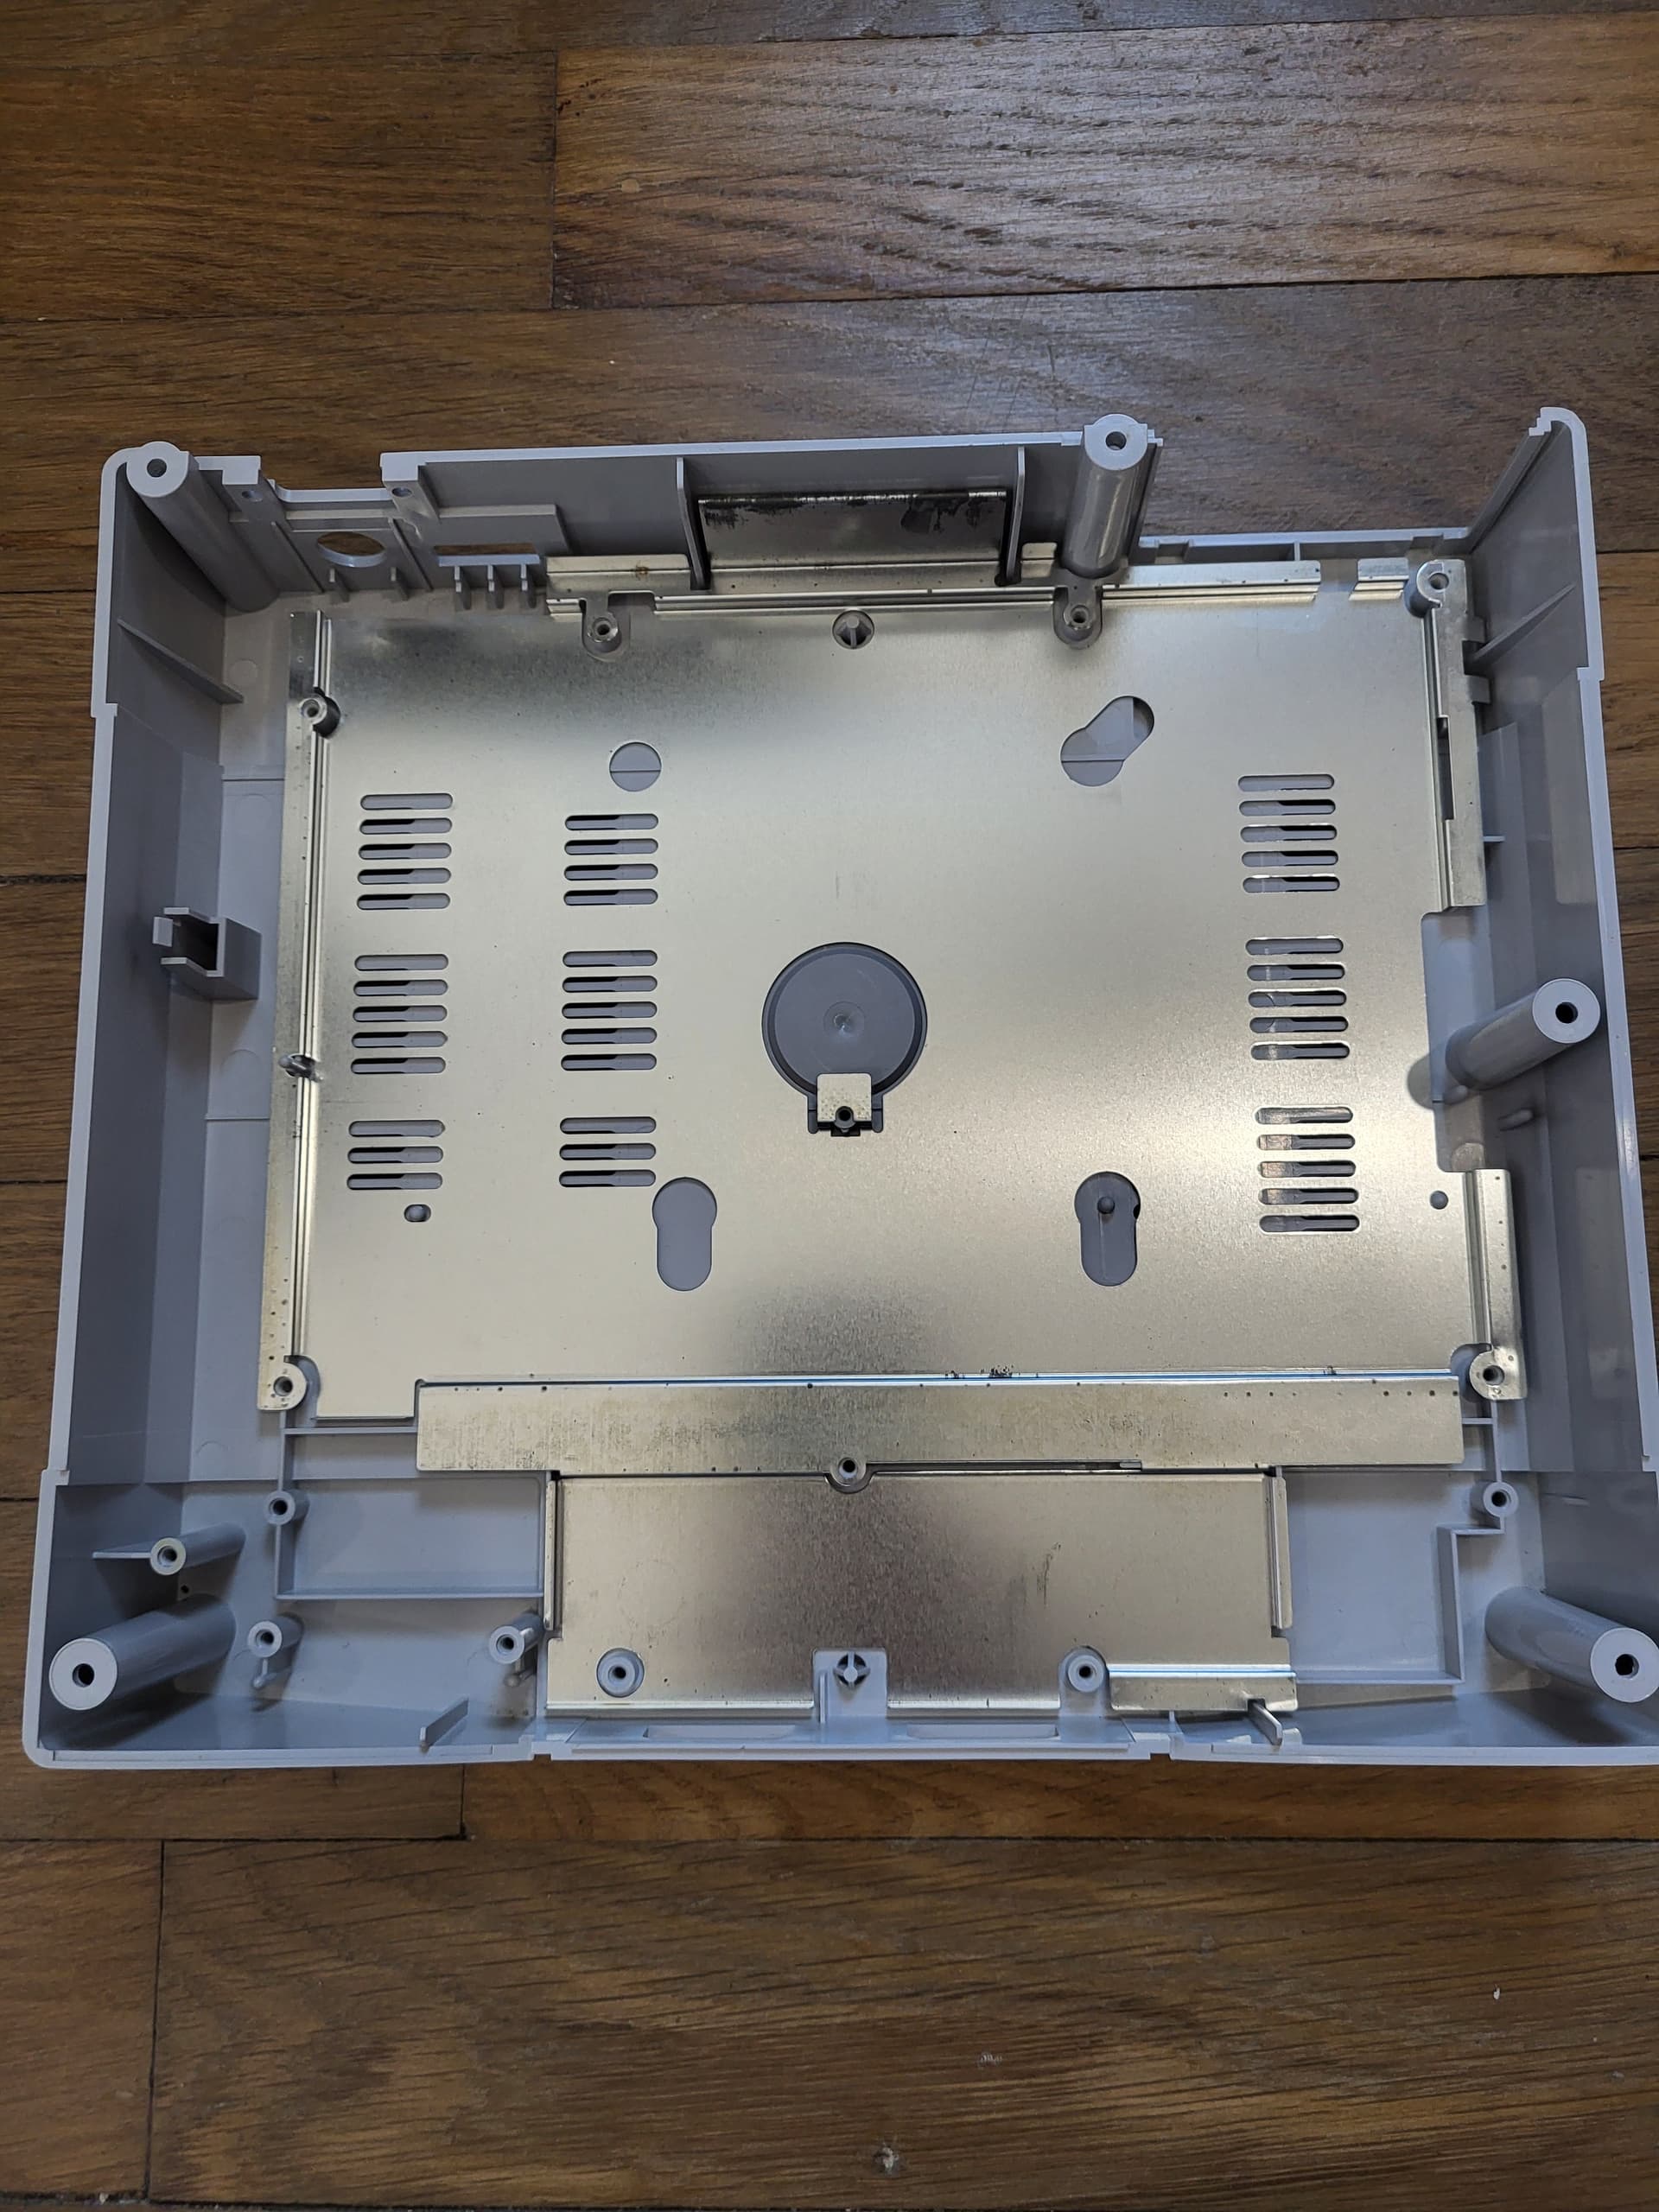
First thing first, how does she look? After taking everything apart I was left with just the shell and no buttons, a perfect chance to see exactly how much needed to be cleaned:
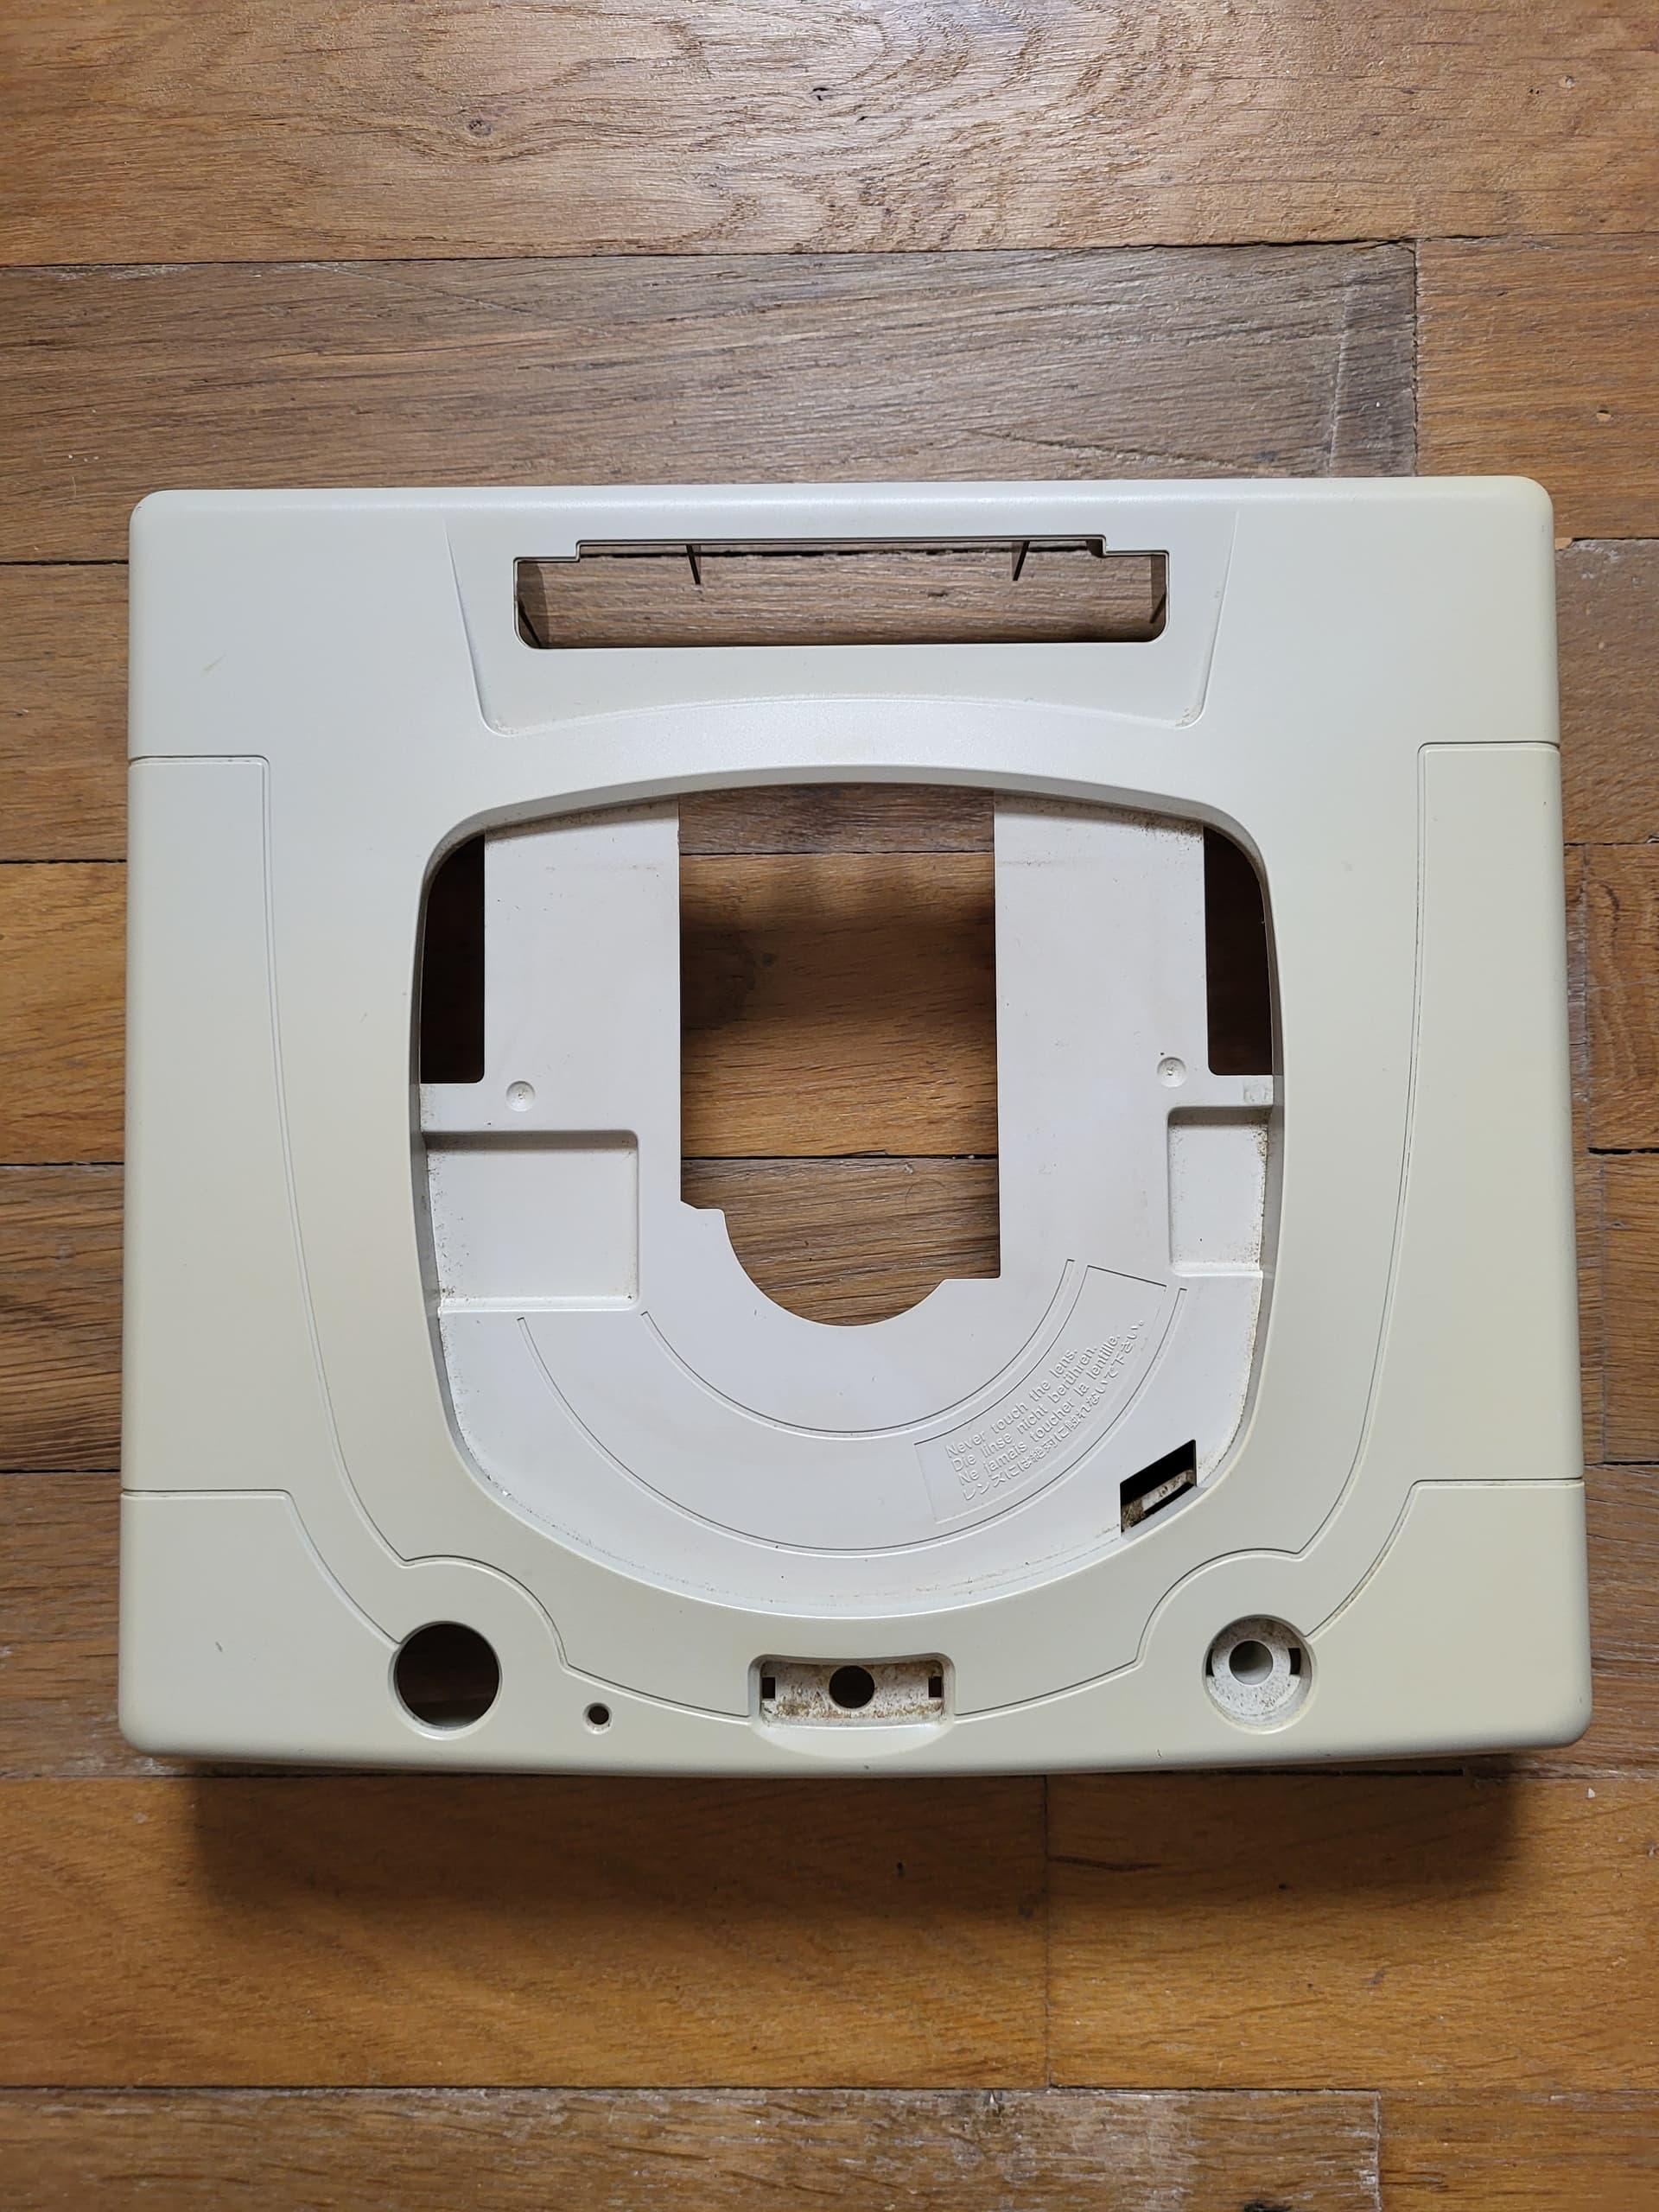
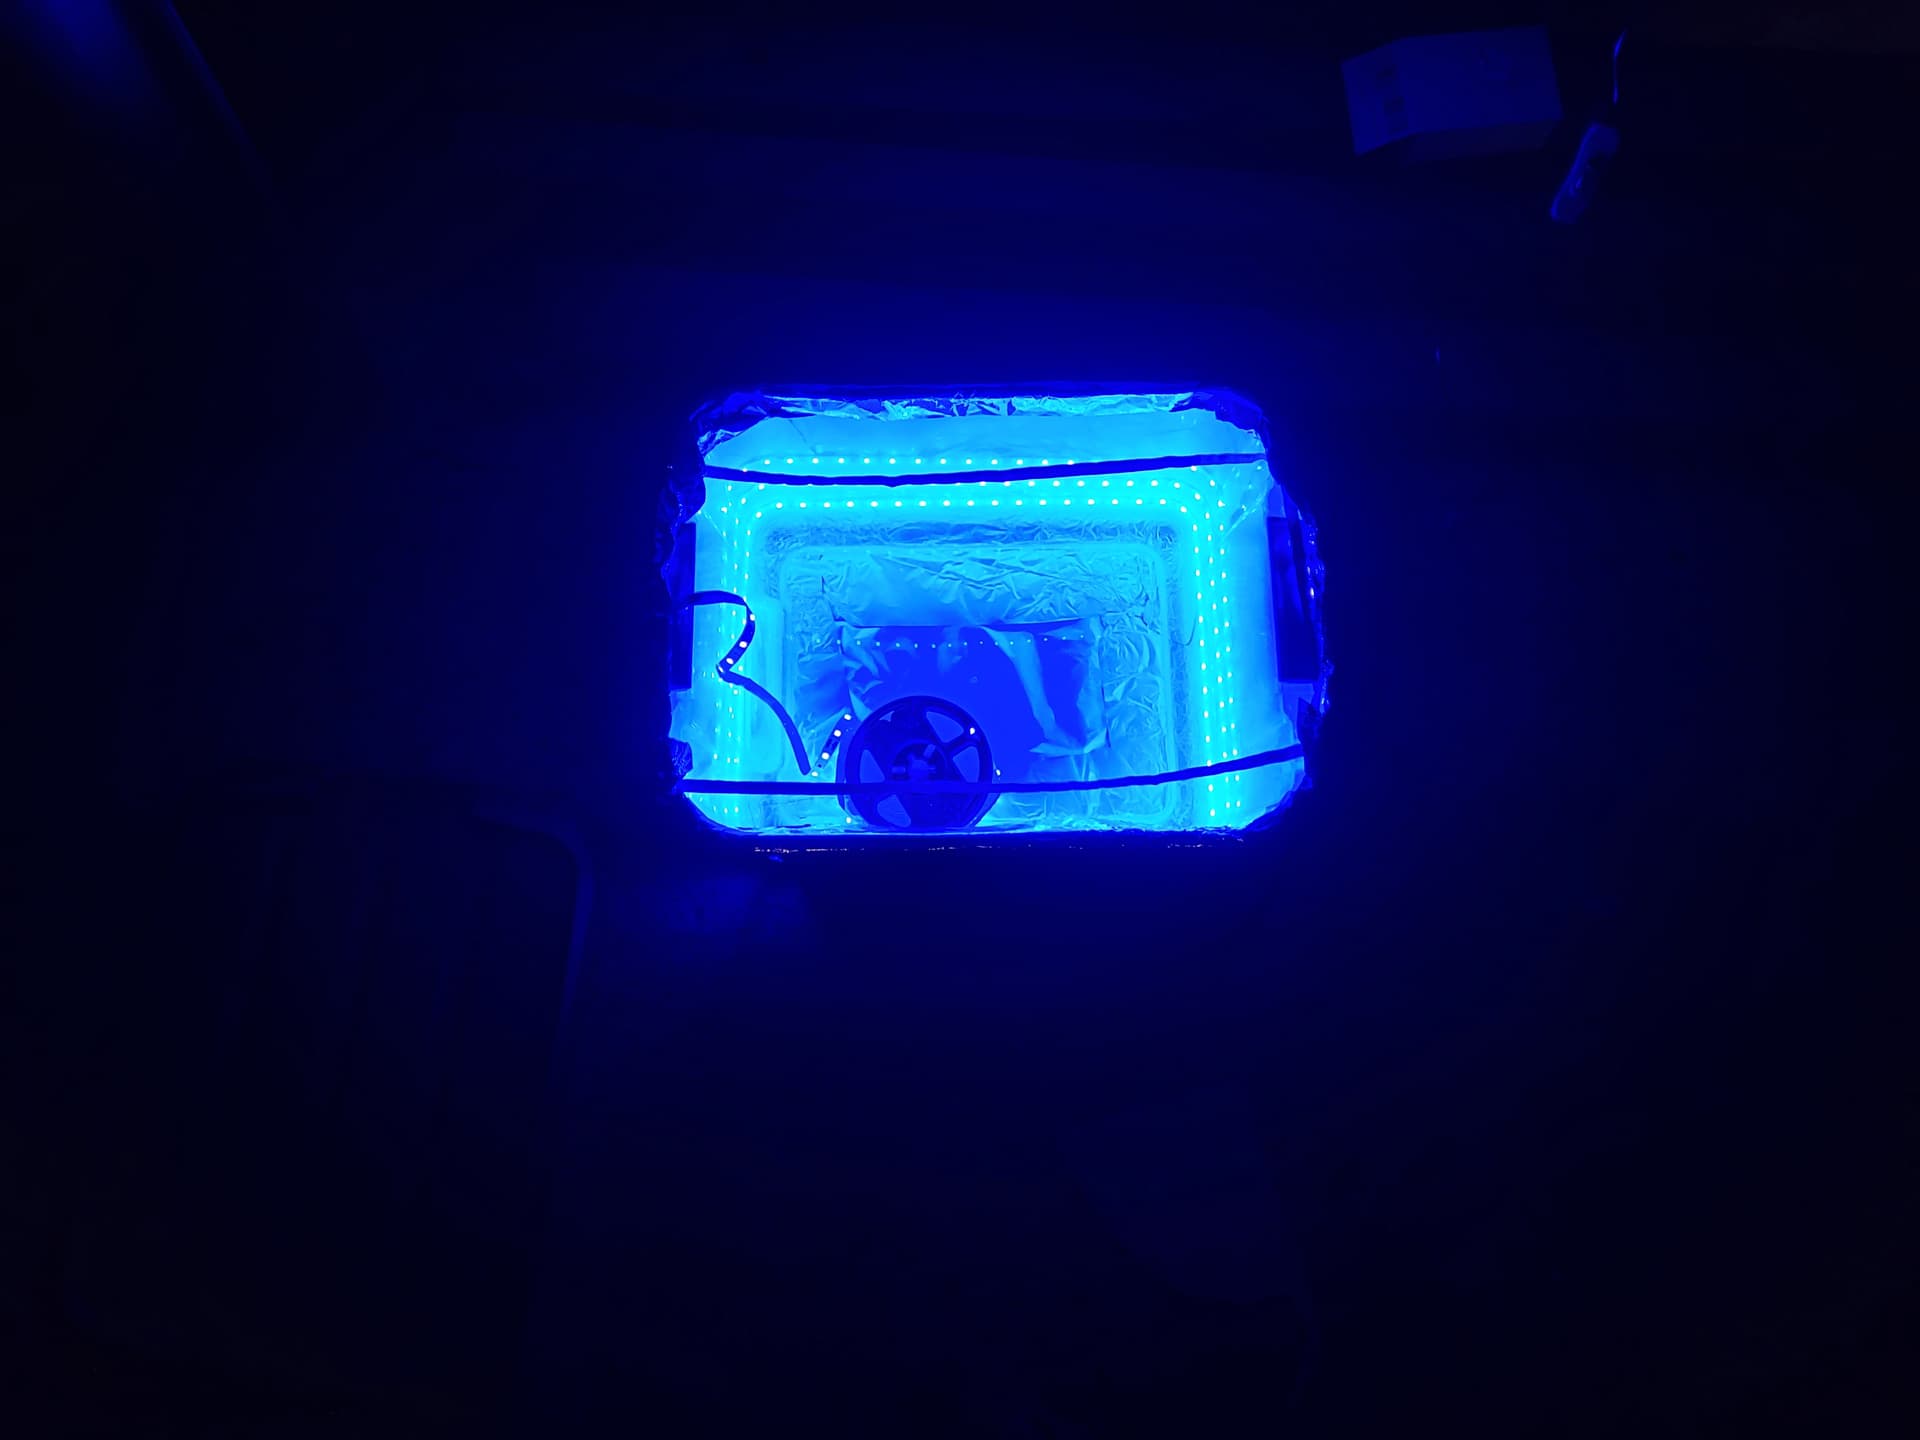
A lot. Aside from the disgusting something in the open and reset button holes, with the tray case off I could see what I was at least aiming to get to close to. So I thought I’d try Retrobrighting! I’ve previously shared a guide I found how to do it, which is here on youtube if anyone’s curious, so the first thing was to get a box, some UV lights, aluminium foil (Yes it’s spelt differently, which is why it’s said differently) and hydrogen peroxide. I put them all together in a ready made box to make it easier to store and have ready and behold, a Saturn discoteque:
Sadly when I bought the peroxide I could only buy three litres, which I found out wasn’t enough to hold everything that needed to be cleaned (the entire shell, cartridge flap, battery backup case, all the buttons and why not the insides because it was there) so it was done a few pieces at a time. After a nice soapy wash all over, I started with the top and all the accessories and left them during the day with the lights on, then at night with the lights off for about 24 hours in total. And when I left them all to dry and checked I was pretty pleased with the resutls:
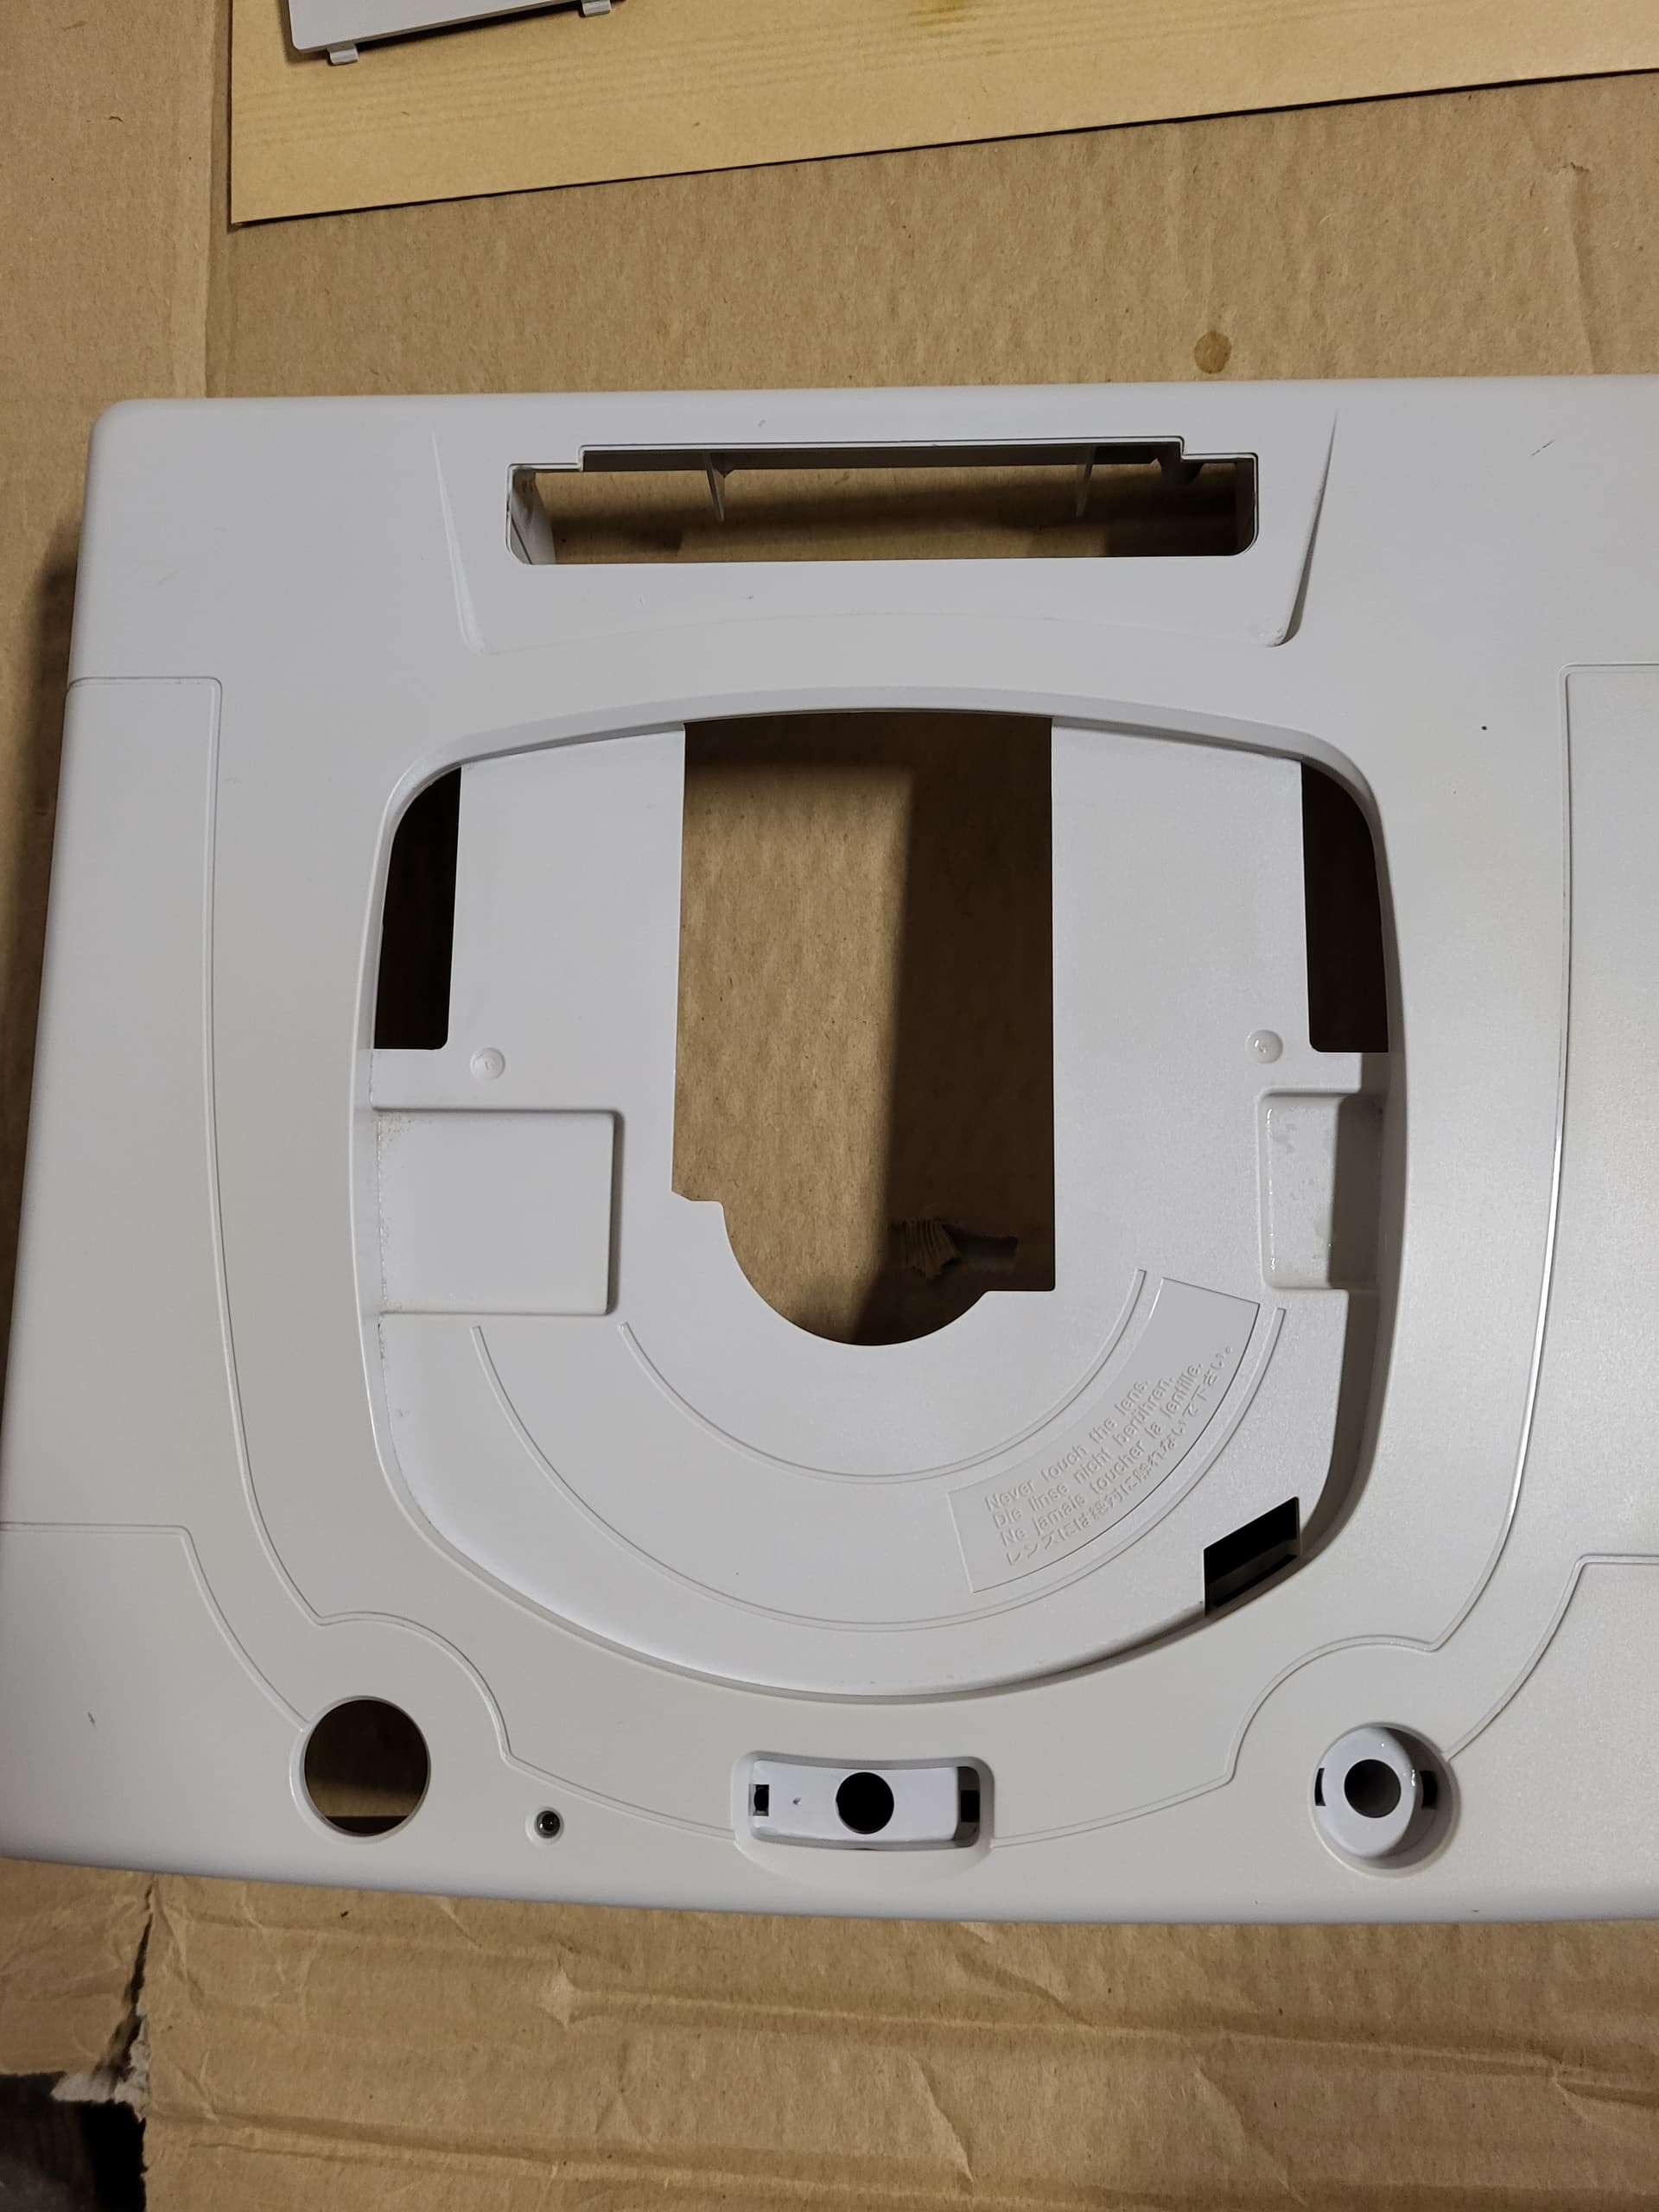
Now I should mention I left it in the garage for safety reasons due to fumes from the peroxide, which was fine but one thing I didn’t have was heat, either an external element or natural heat. I’m not totally sure but I believe with more heat it would help it become even whiter, but as I’m not using any kind of professional (or amature) lighting these are as is and hopefully very close to what I am seeing. Either ways I like it. And as a point of comparison to the bottom of the shell:
BIG difference =)
I then decide it was time to do the bottom, which I did and worked out great as well. One difference was the amount of time, I left it slightly less as it wasn’t as bad as the top, which did cause a VERY slight difference in shades between the top and bottom. However I did it again, the same as before (in the bath at around 9am, lights on. Then lights off at 9pm and left until the next day) and it is I believe about as good as it’s going to get without heating the peroxide.
With the top and bottom matching I was concerned about the buttons, so did them again the same way and pretty pleased with the results. So after a nice airing and super drying, I took all the bits and put them back together and now have this shell:
I am VERY happy with the results so far and it’s more closer to the boxed machine I have, and a lot better than it was without a lot of effort and huge amount of cost. I learned a lot and enjoyed what I did, so that was a bonus, and will probably do it again with another machine I have and no doubt more I get in the future. But I’m not done just yet…
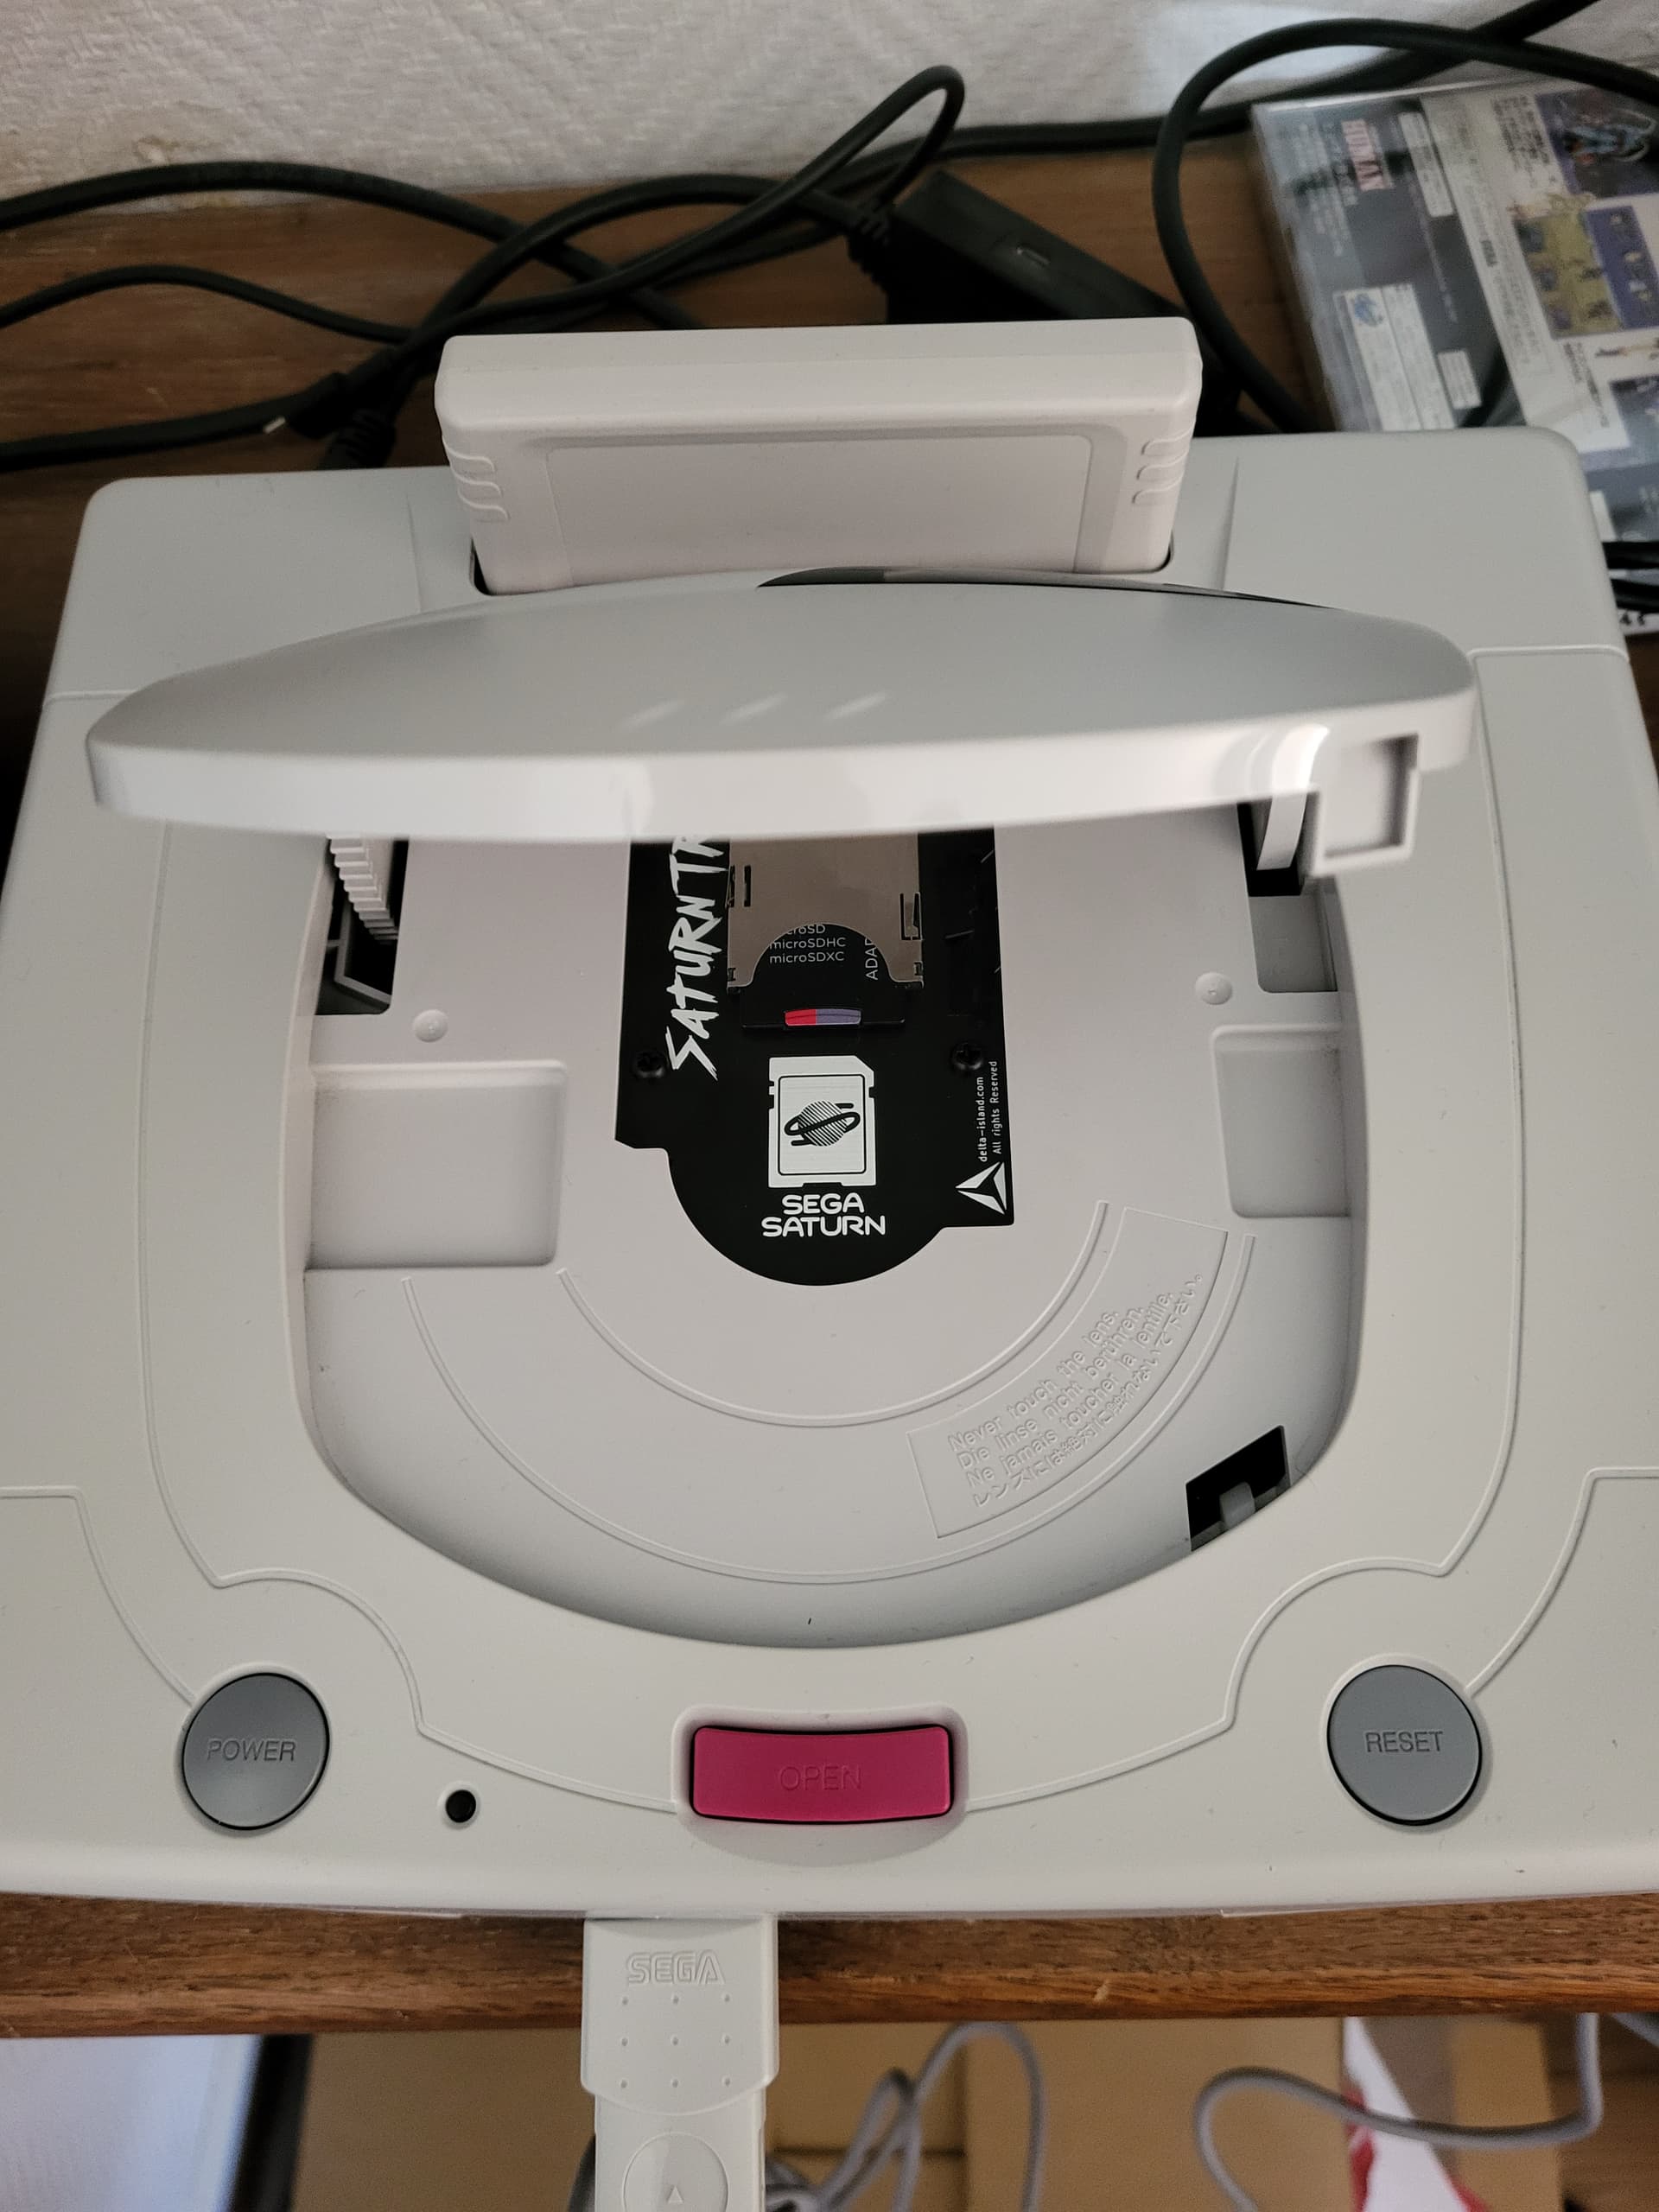
I checked the memory cartridge I had (Which is in fact a 4mb ram cart, as the Fenrir does the back up too) and realised I wasn’t done:
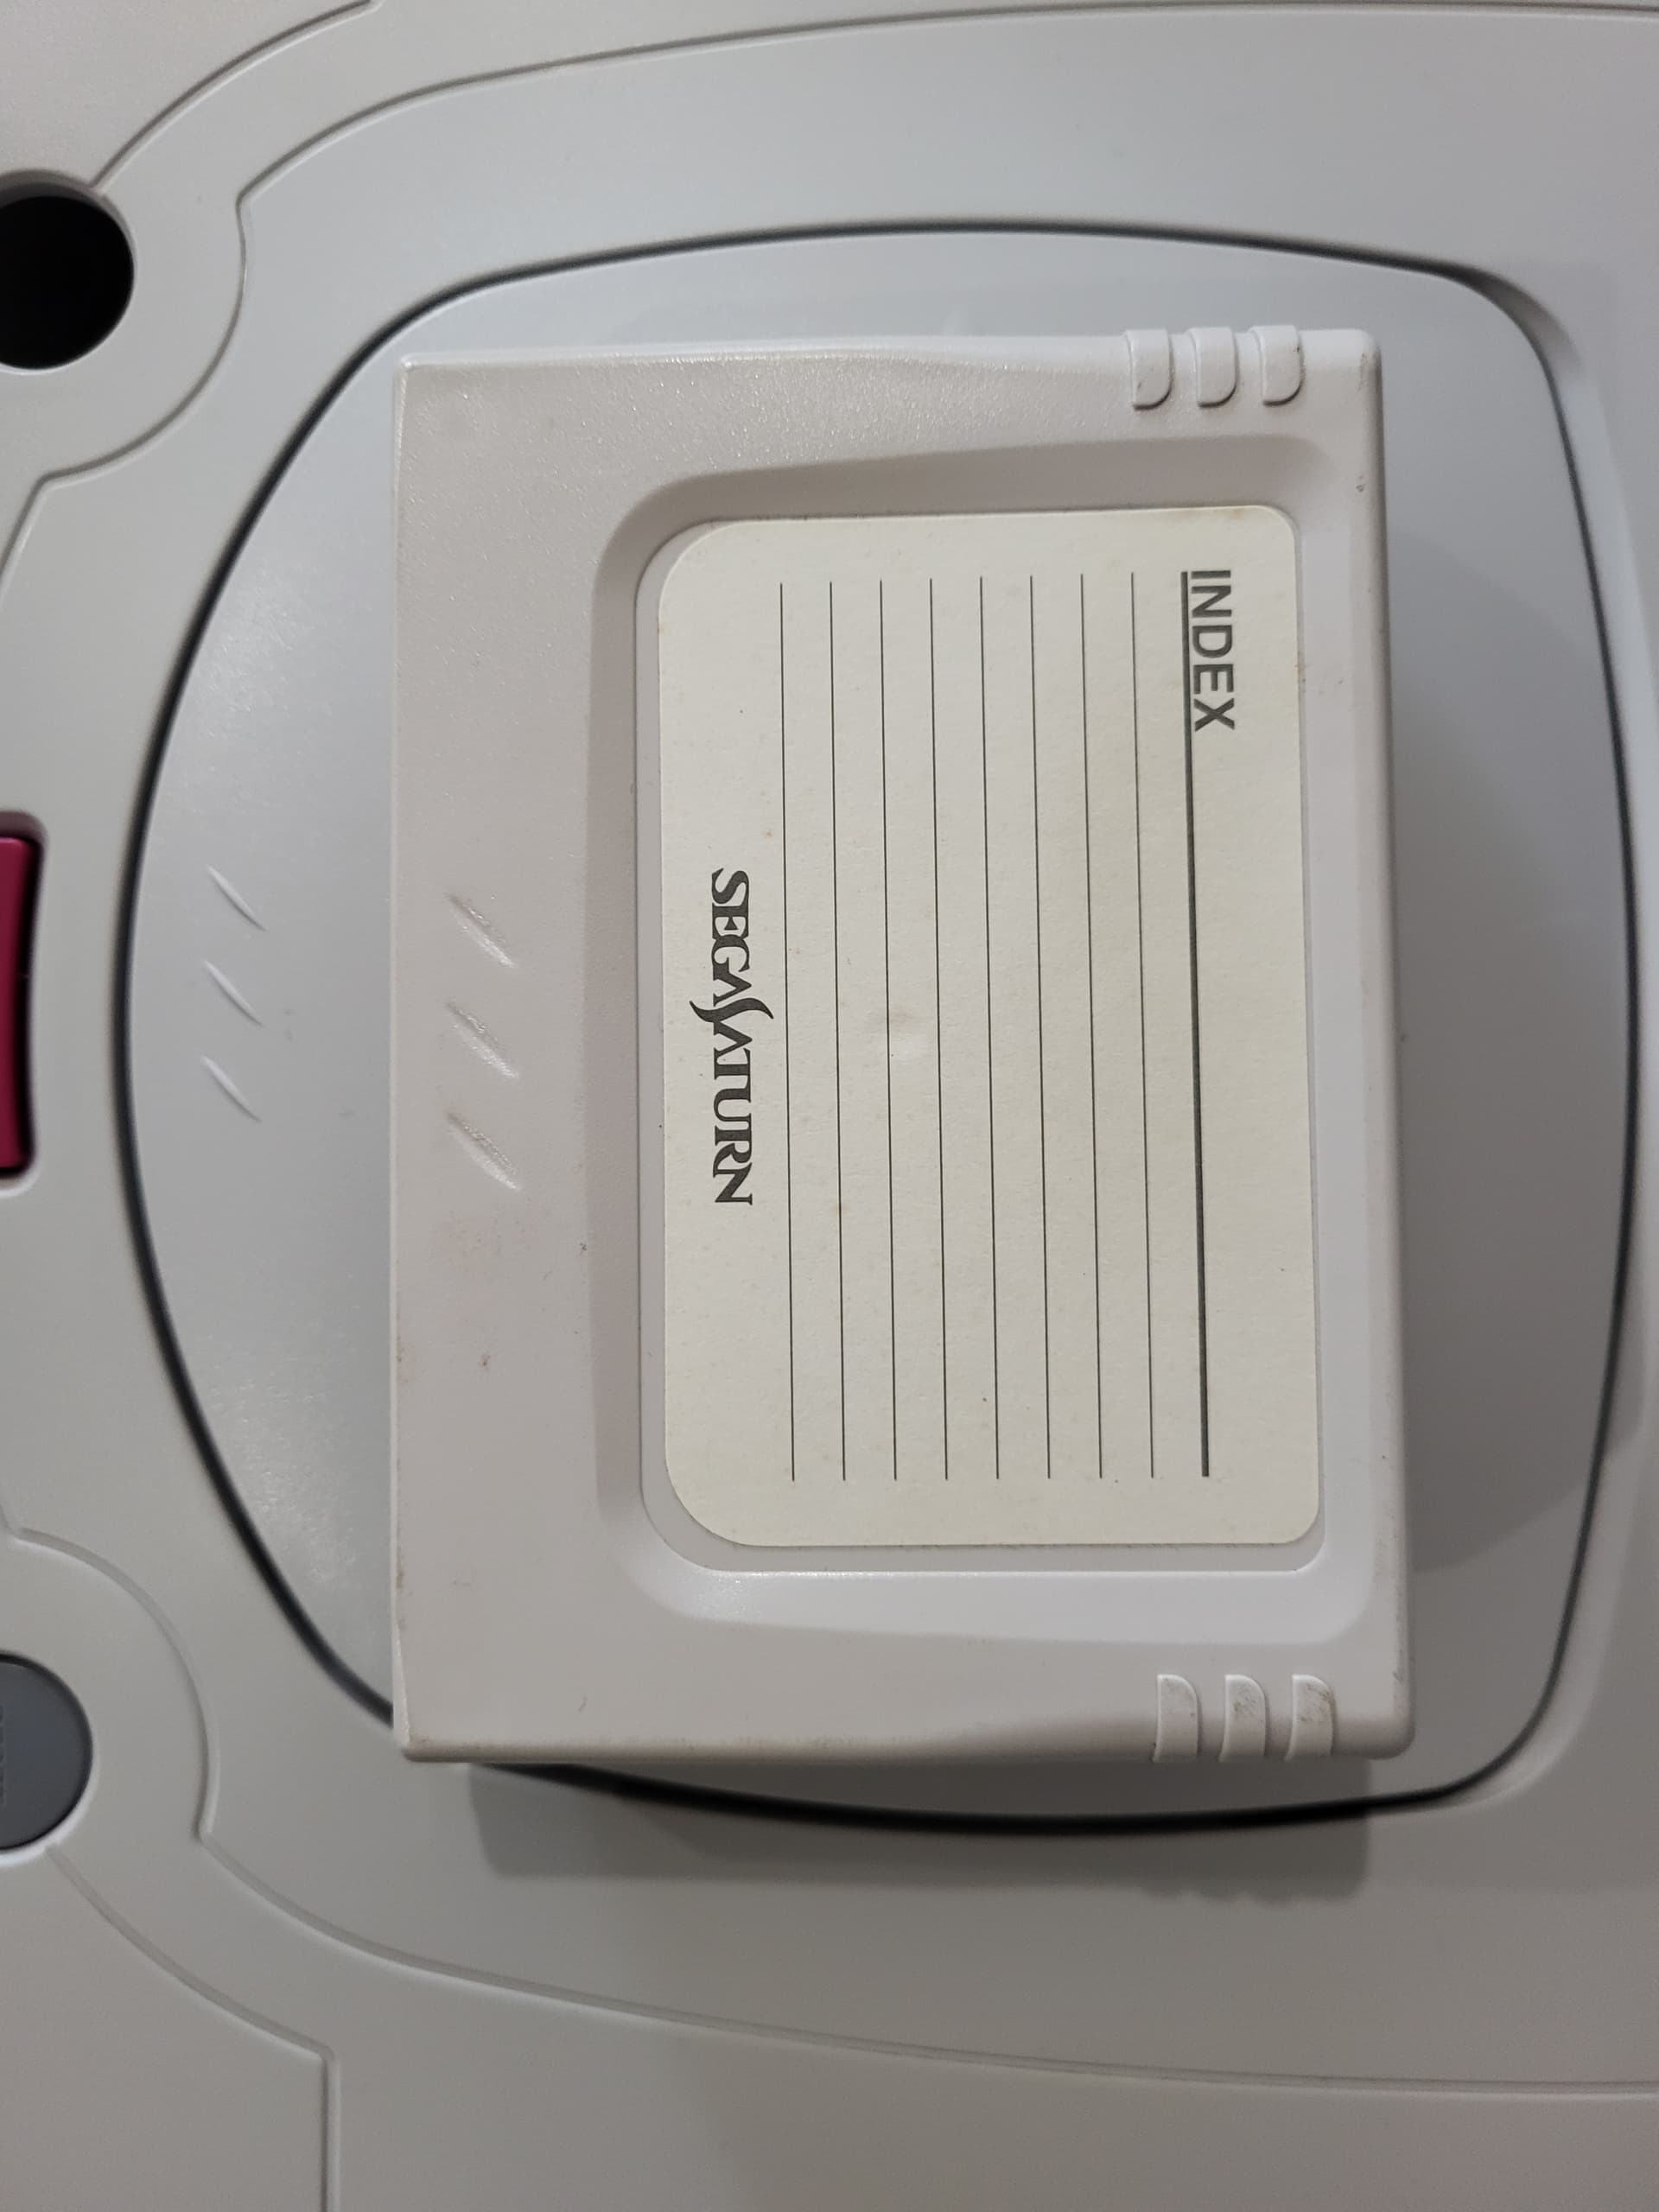
It’s right now sitting in peroxide after removing the lable (before anyone gets upset, I have the original lables from another cart, never used and have a plan for those too) and cleaning it, so tomorrow will see how it is. Which makes the outside pretty tasty. But for each outside there’s an inside and while the motherboard is in very good condition without any corrosion and has been cleaned with isopropyl alcohol, the RF shield leaves a lot to be desired:
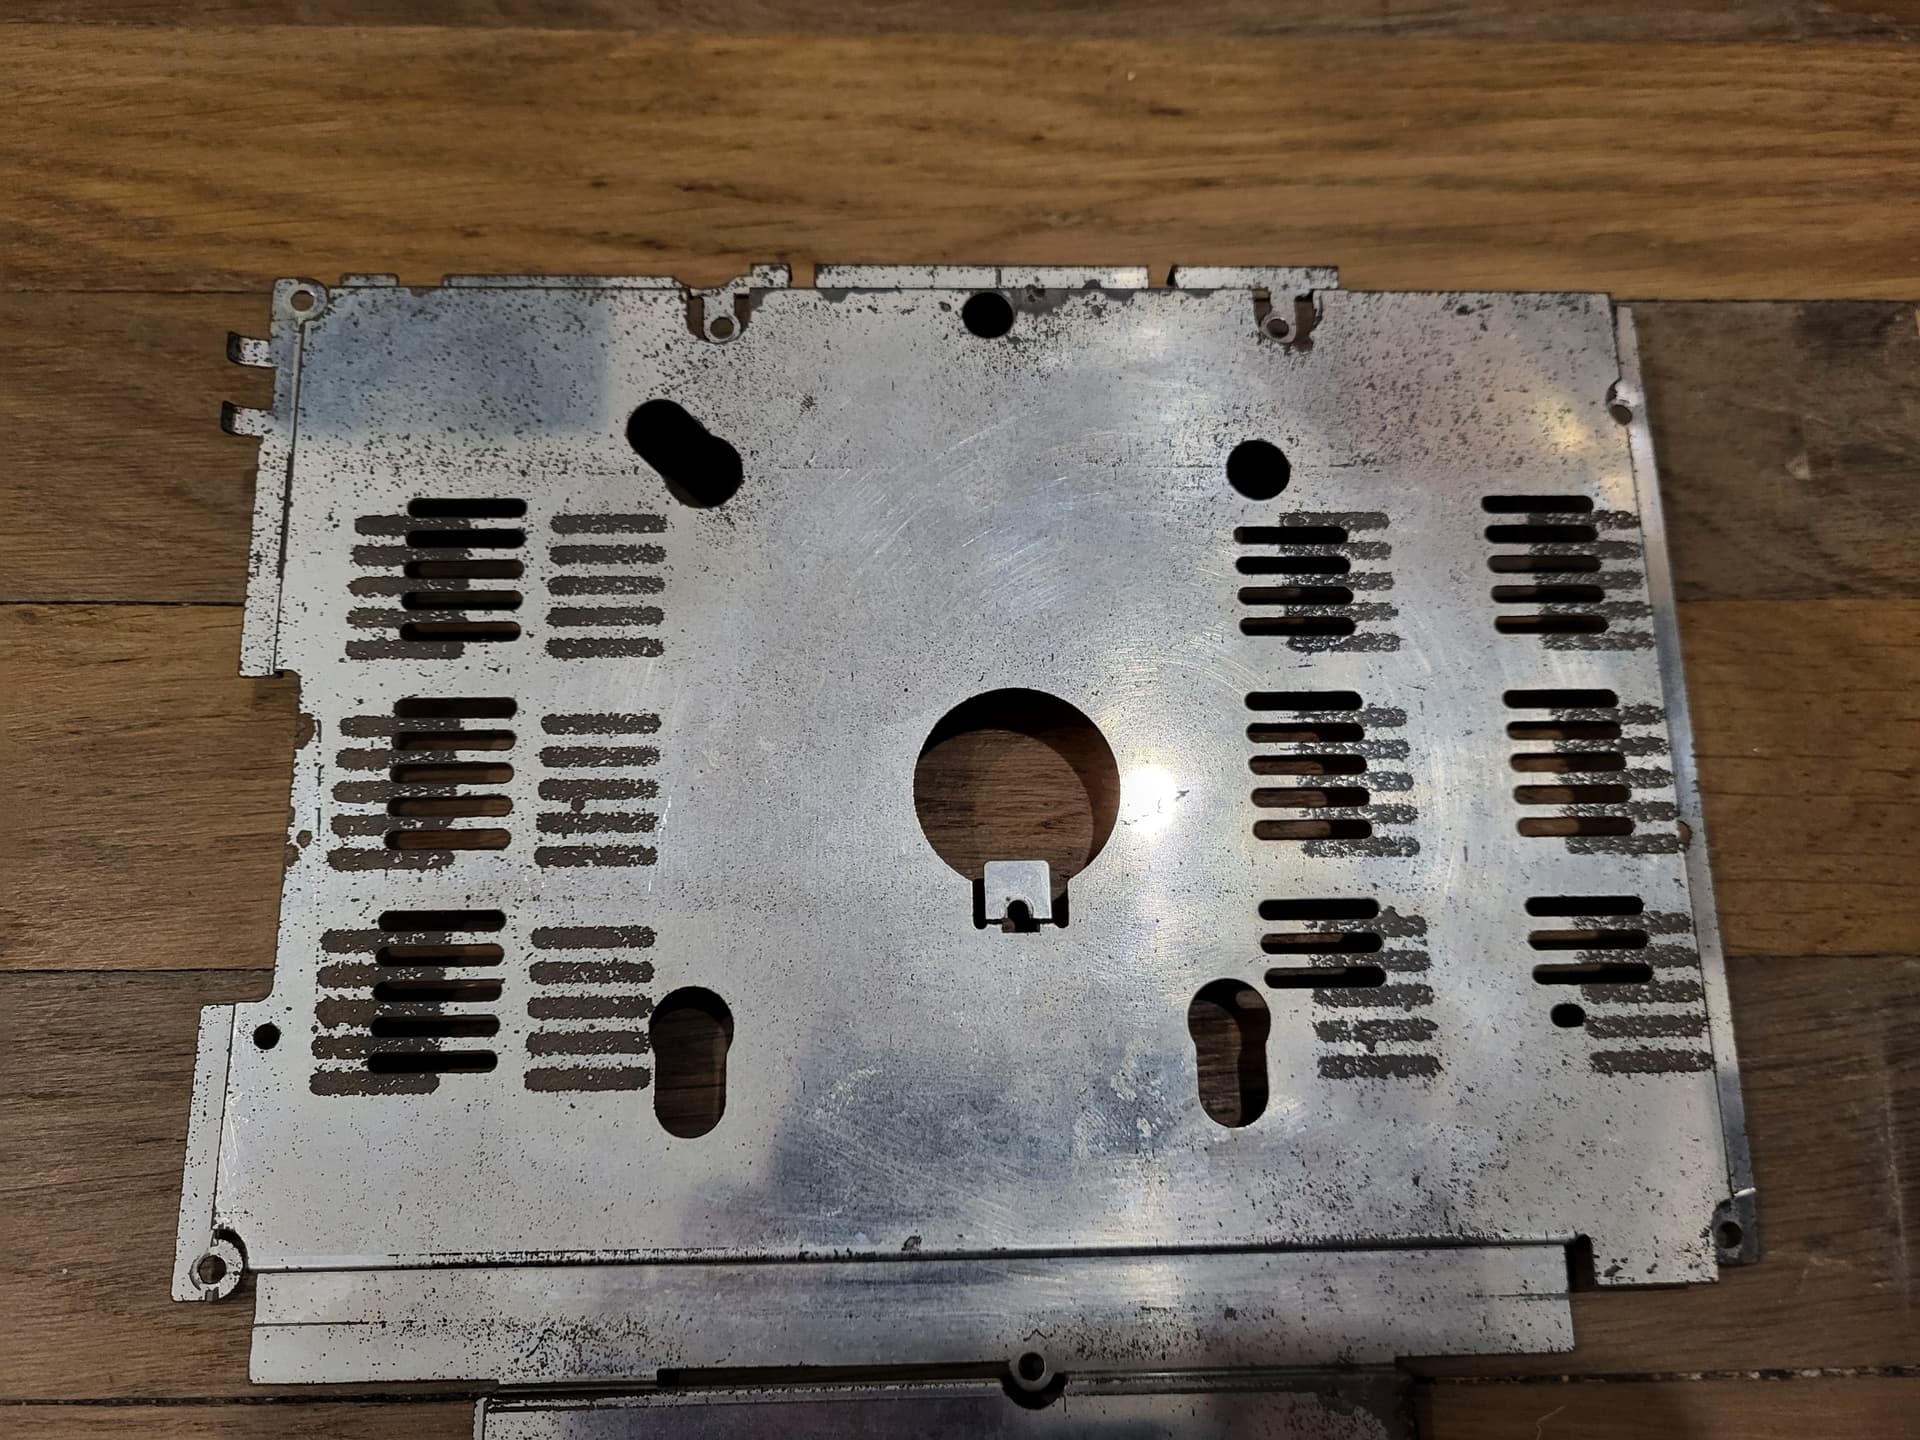
Gross.
I’ve ordered some rust remover to get it cleaned up, as that is the bottom and those horrible rusty marks are actually visible when you turn the console over and I want them gone! That’ll be part of phase two and it won’t be making it shine shine, but it should be nice and clean on the visible parts of the console, both inside and out. Not only will I be working on the rust, but also how to make the memory cart look amazing and just general cleaning up.
A few bits I’ve learned so far:
-
Buy good gloves. Don’t think ones for washing and cleaning normal household items are good enough to protect from peroxide. They’re not and my hands stung like something very stingy for a while. I then bought proper disposable gloves for handling some of the milder chemicals and they’re game changing.
-
Get a good screwdriver or four. Mine were okay but as I am continuing to do more of this sort of thing I treated myself to an ifixit set and it’s great. Nicest upgrade is magnets which helps with some of the fiddly internal screws and the external ones are a real pain. Hopefully others don’t have to fix as many things as me but it does cover everything I need and then some.
-
Ice cube trays make great screw holders
There will be more in part two. If anyone wants to know on anything I haven’t said so far (which I don’t think there is) just let me know.
And happy Saturning =)
9 Likes
Hello Saturn Fans.
Okay a small confession - I thought I’d posted the last bits I’d done here but no I hadn’t. I am sorry for all of you (well three) that have been waiting to see how the machine is coming along and I’m pleased to let you know it’s almost fully done! While a lot of this was done at the start of June the last couple of months haven’t stopped so this is the update that I should have posted at least in the middle of June.
Since the last stage of cleaning the machine I had a chance to clean the RF shield properly and do some other fine tuning to the machine as a whole. The shield was a challenge to clean up - I looked into various ways of doing it, including soaking in vinegar, using a very very fine sandpaper, and if that didn’t work using an ultra fine setting on my dremel.
Which would have probably gone quite well had the setting not decided to change from very slow to fast as possible for no reason. Then the dremel went BANG!!!
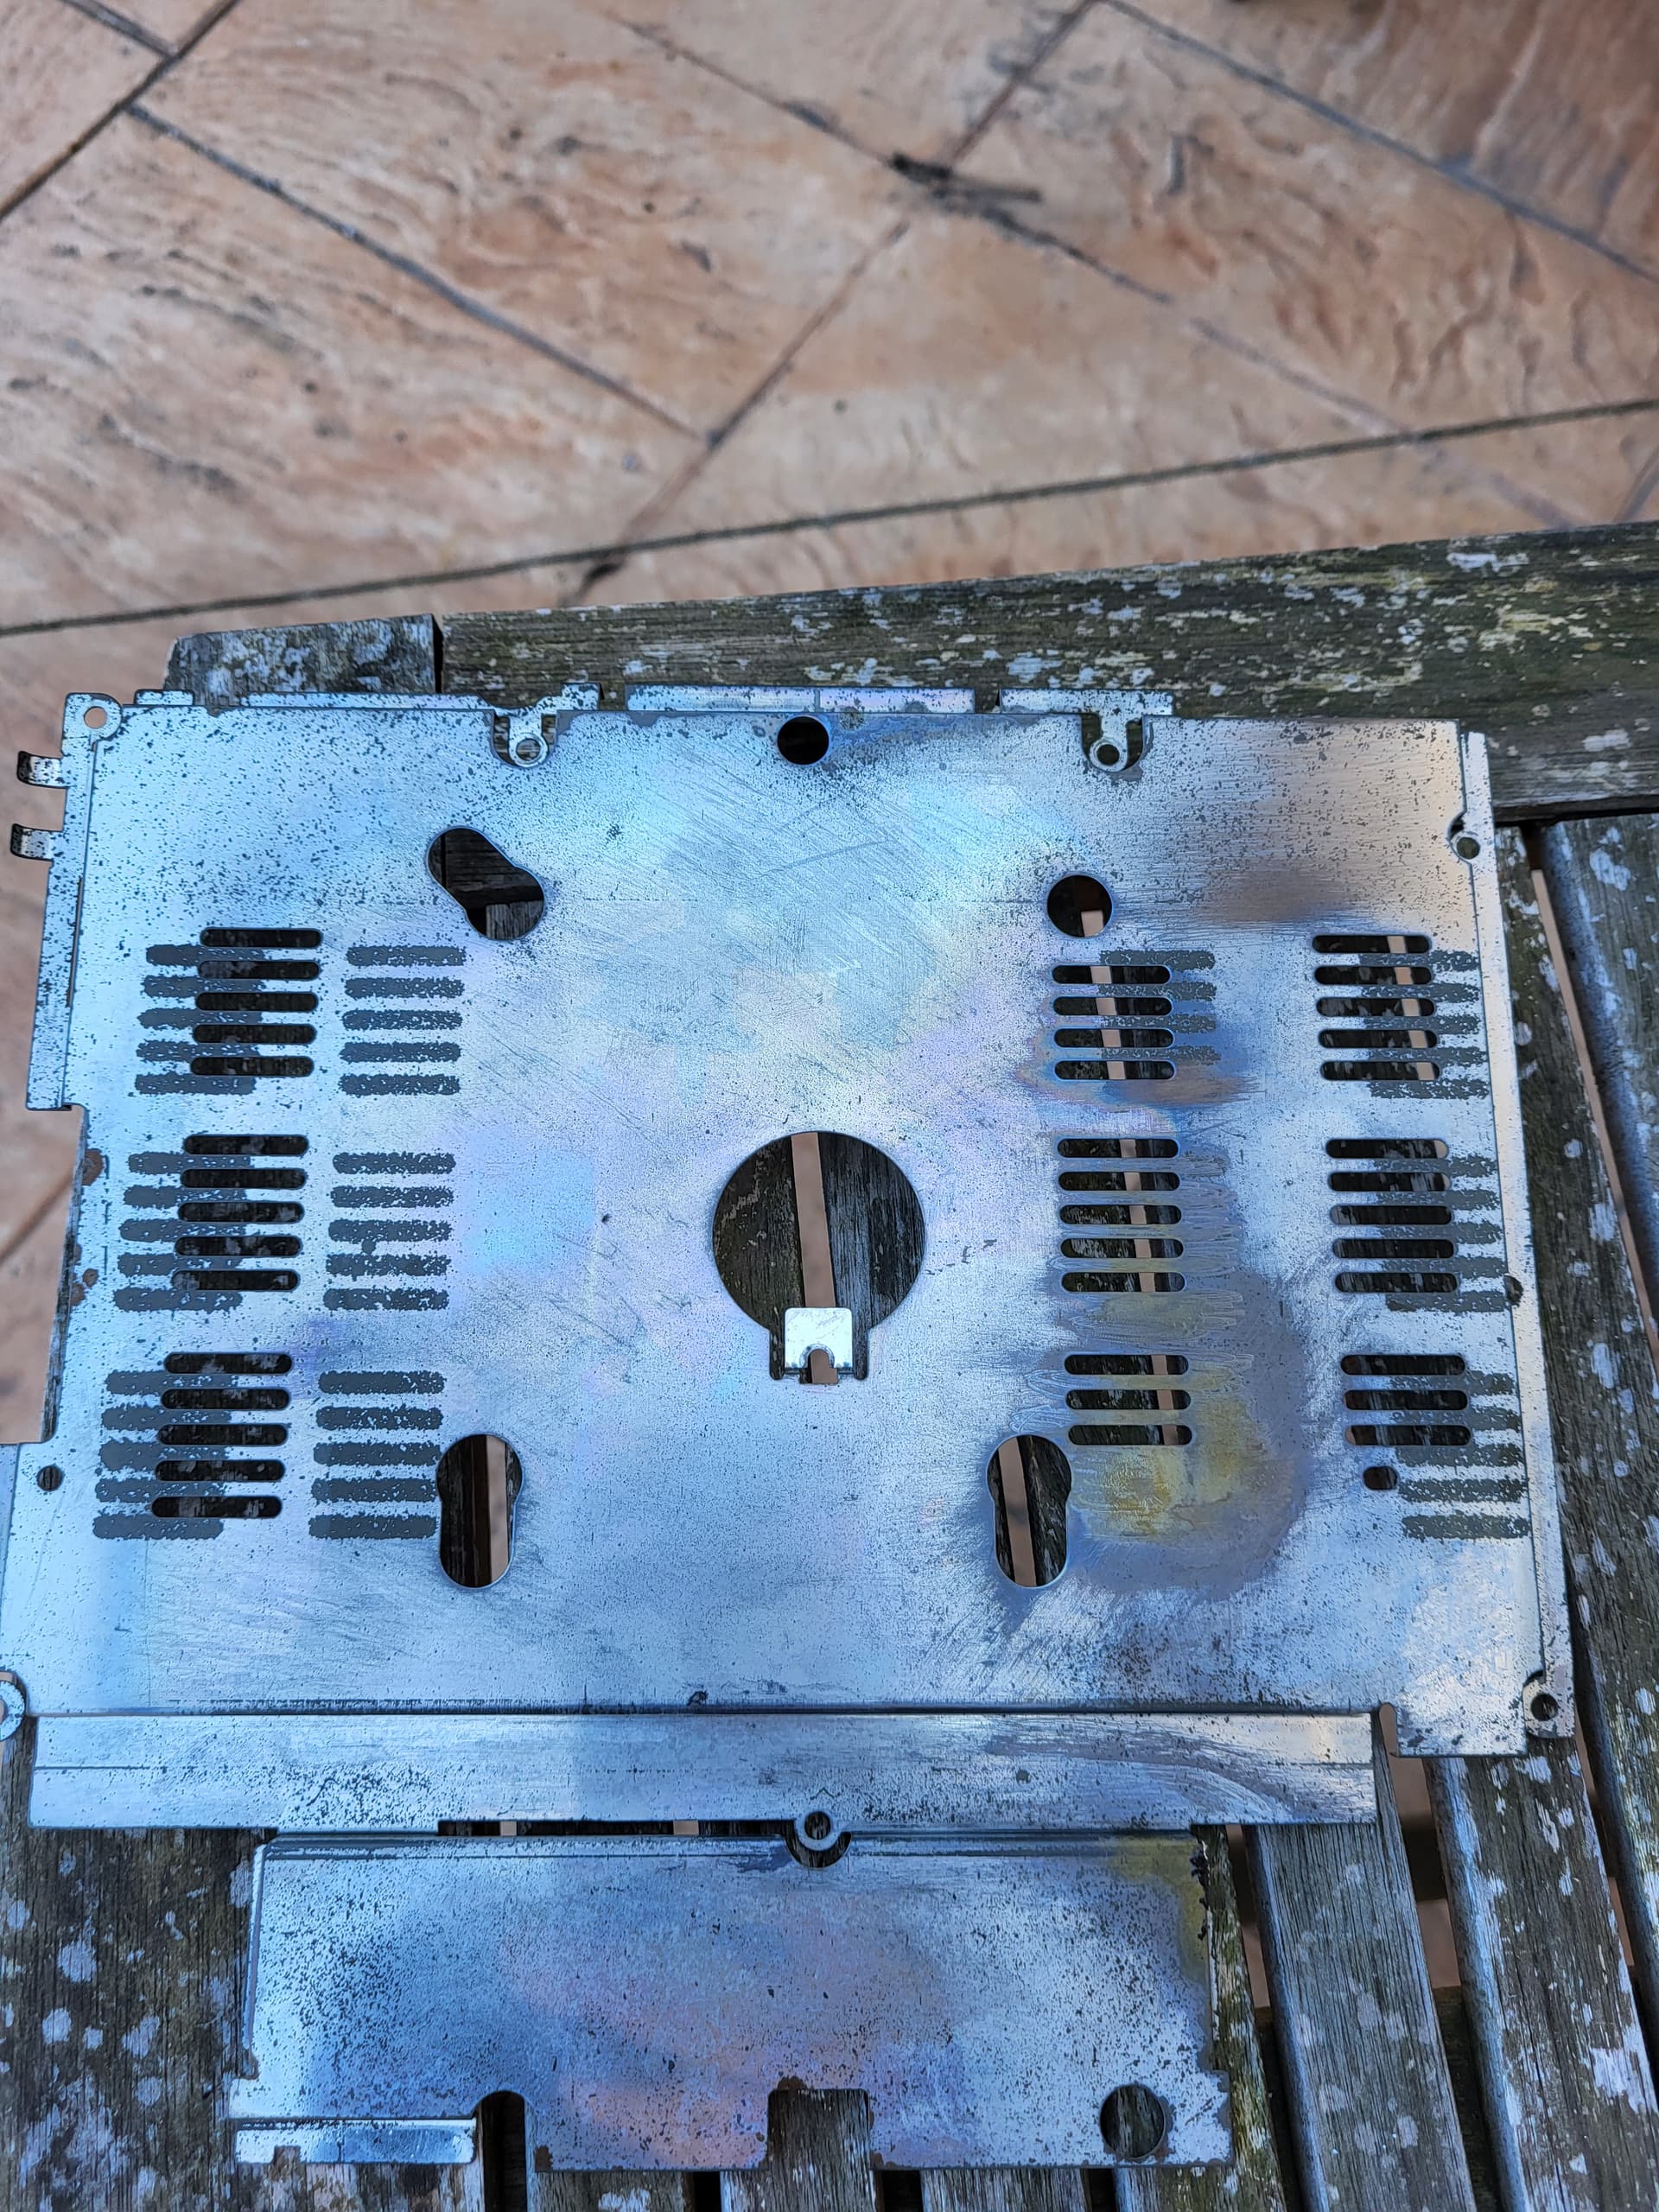
So I had a very badly damaged RF shield which wasn’t fun. As luck would have it, I recently (at time of doing this) purchased a second machine which was in a bad state for the case, but the insides were perfect. Meaning a transplant was needed and in the newly cleaned shell looked fantastic.
Granted it would have been really difficult to make it look worse than the original, unless I set it on fire. Then the putting it all back together process:
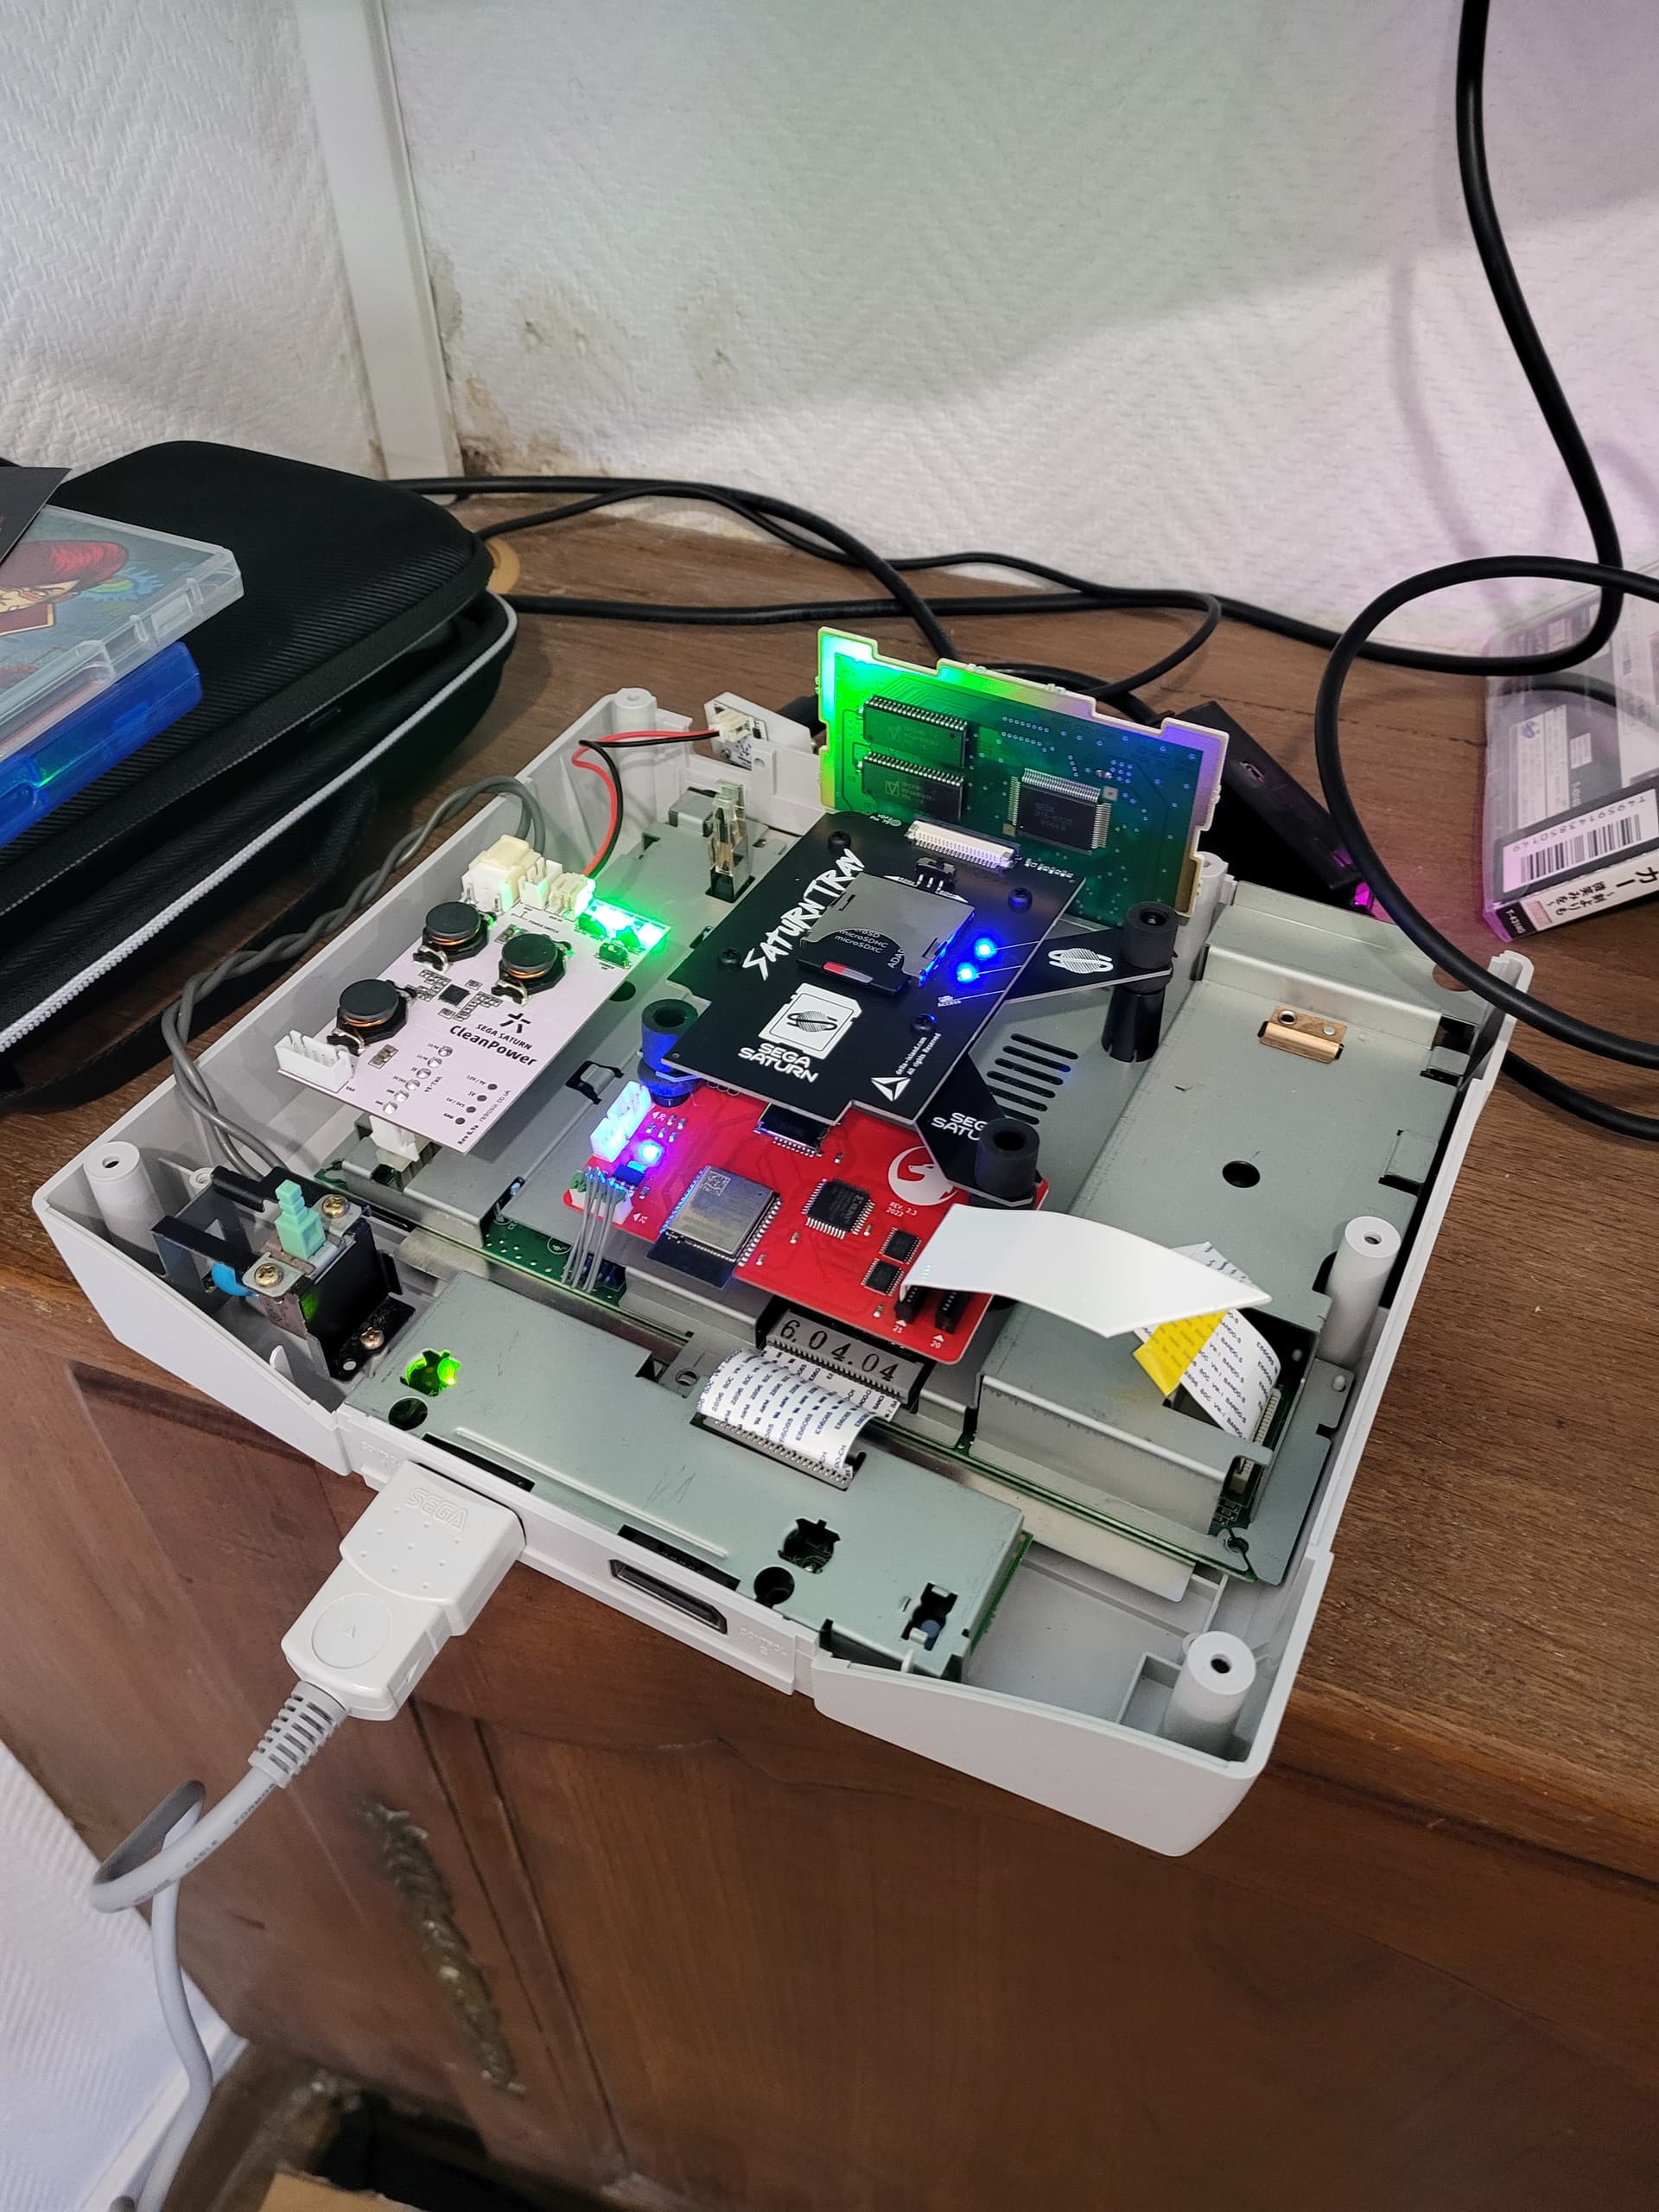
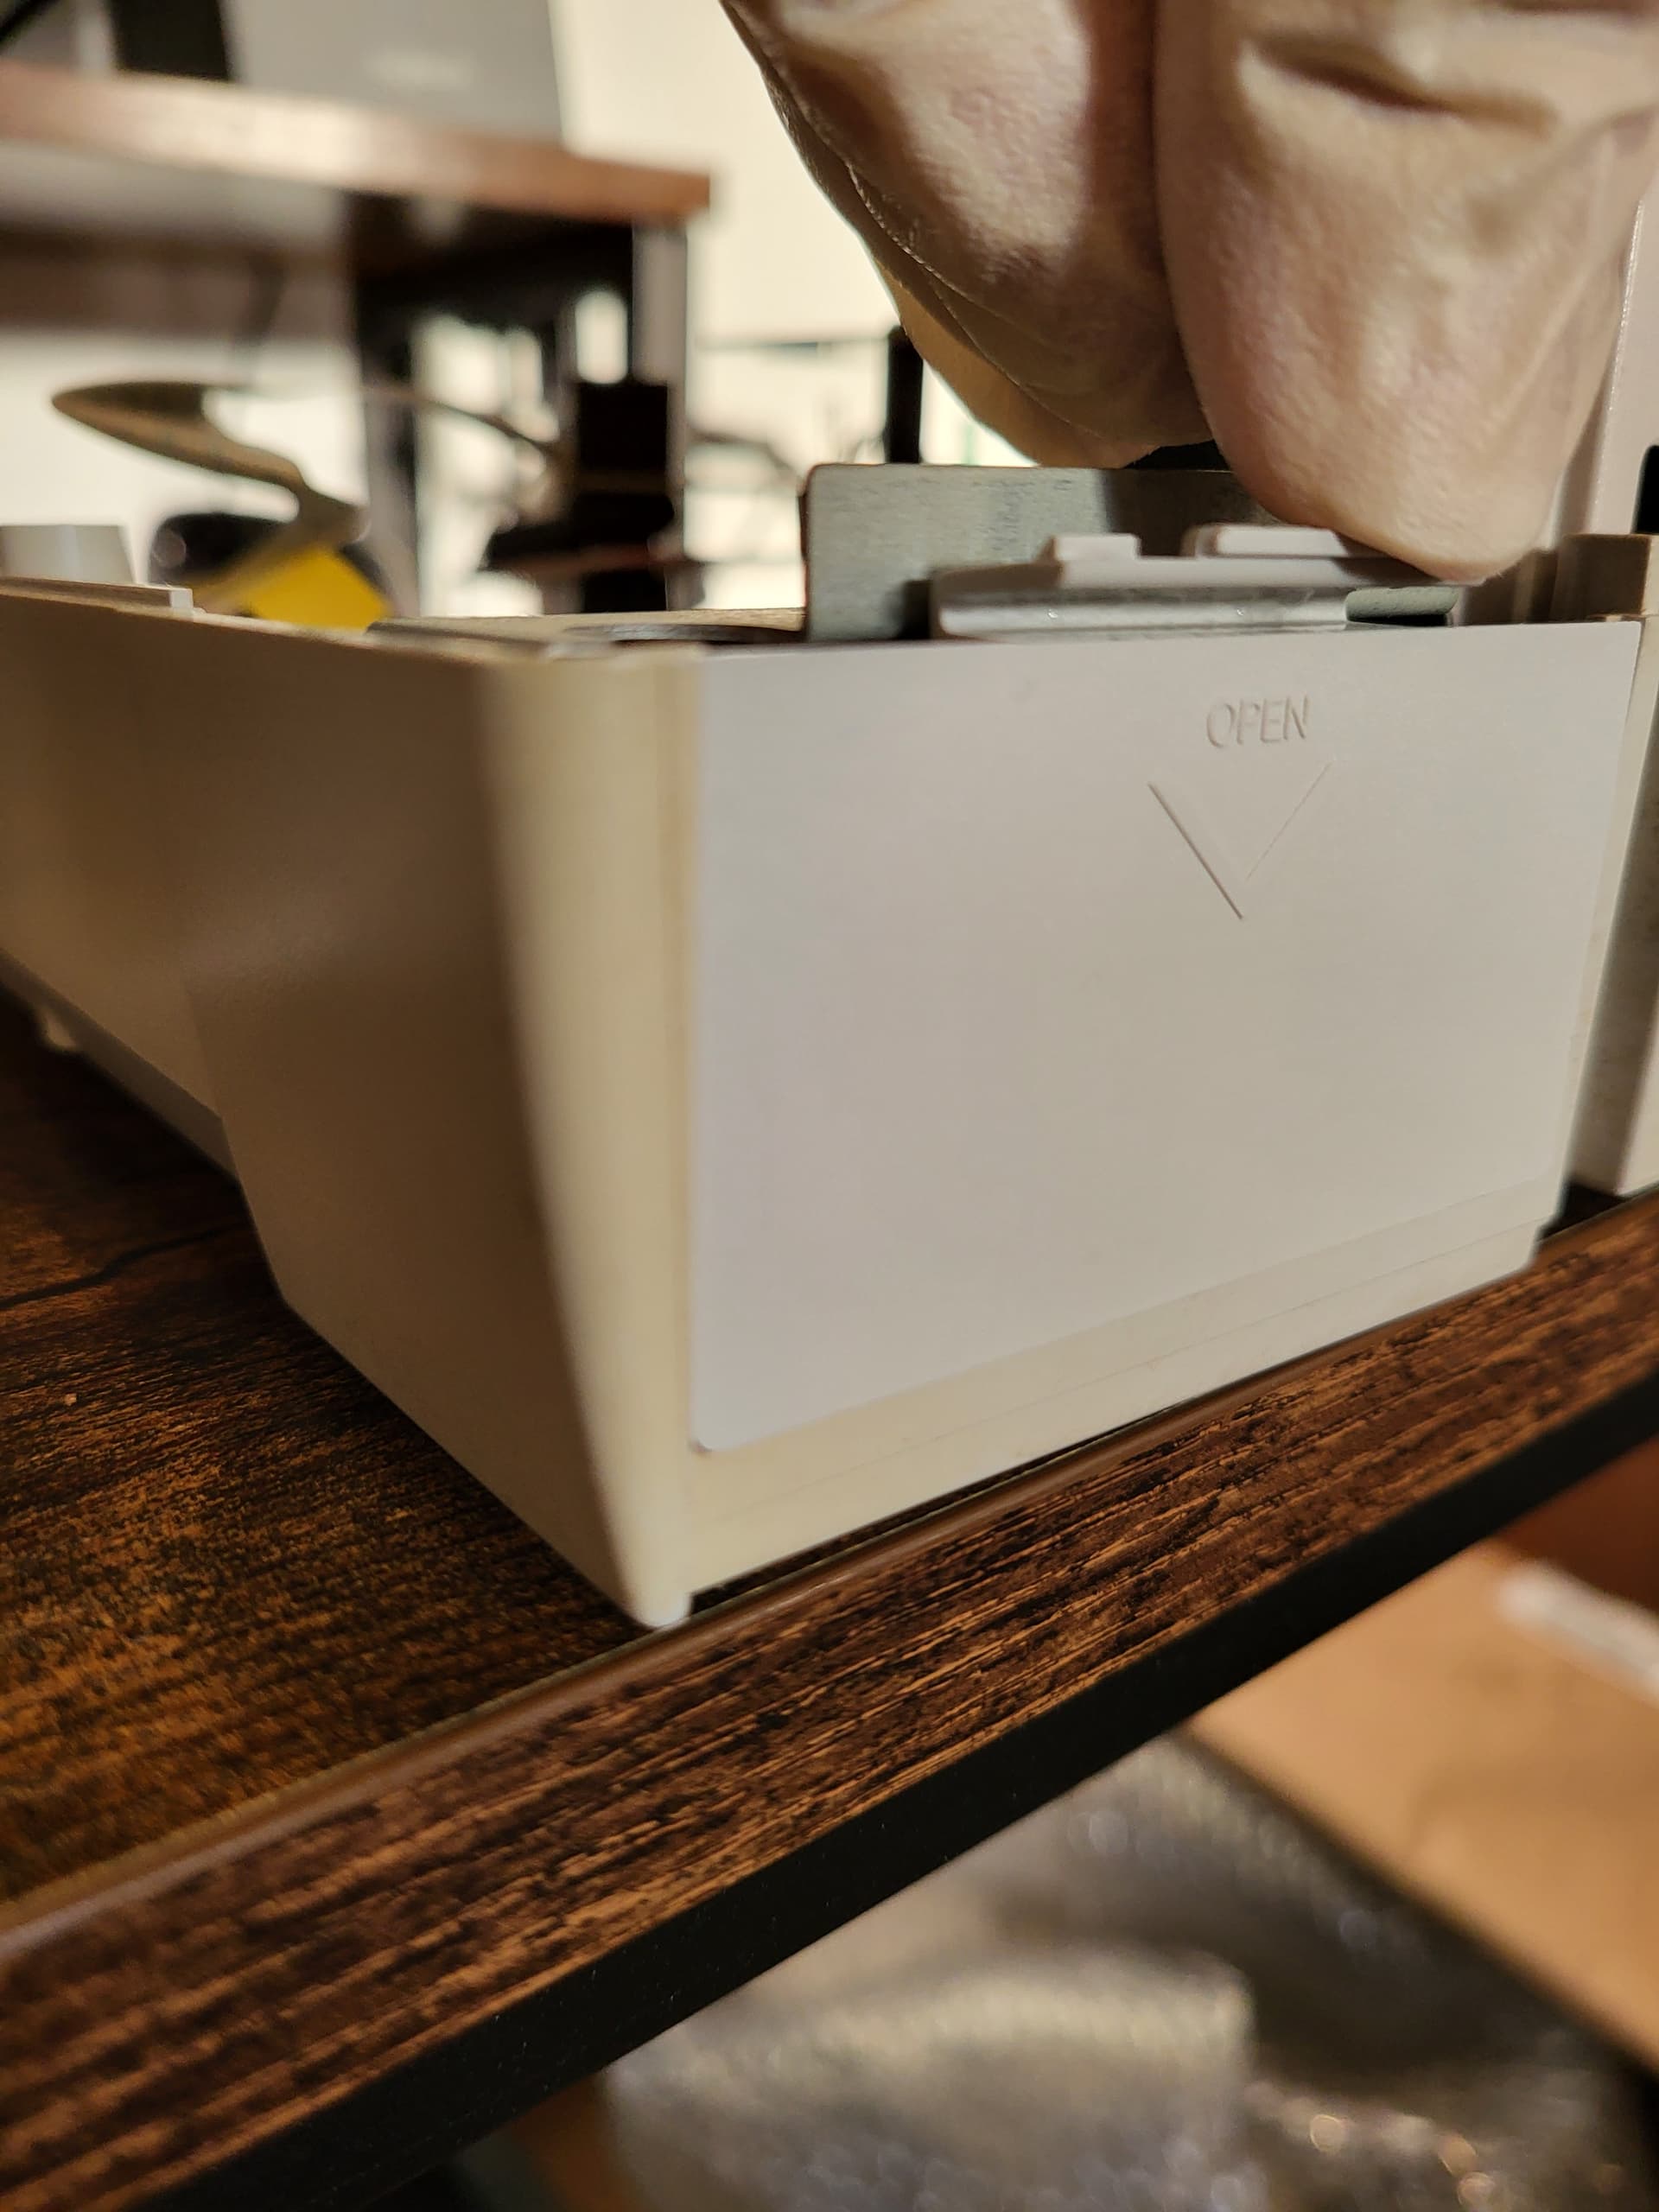
Keen eyed readers may notice the rather naked 4mb ram cart, which was the next part of the process, and ultimately everything worked as intended again which was nice. I didn’t take pictures as it wasn’t that exciting to see, but there was a lot of light bleeding from the USB power supply, fenrir and sd card stand, so my trusty old electrical tape in hand I covered them all up and now when it’s turned on, there’s no light showing except the power one.
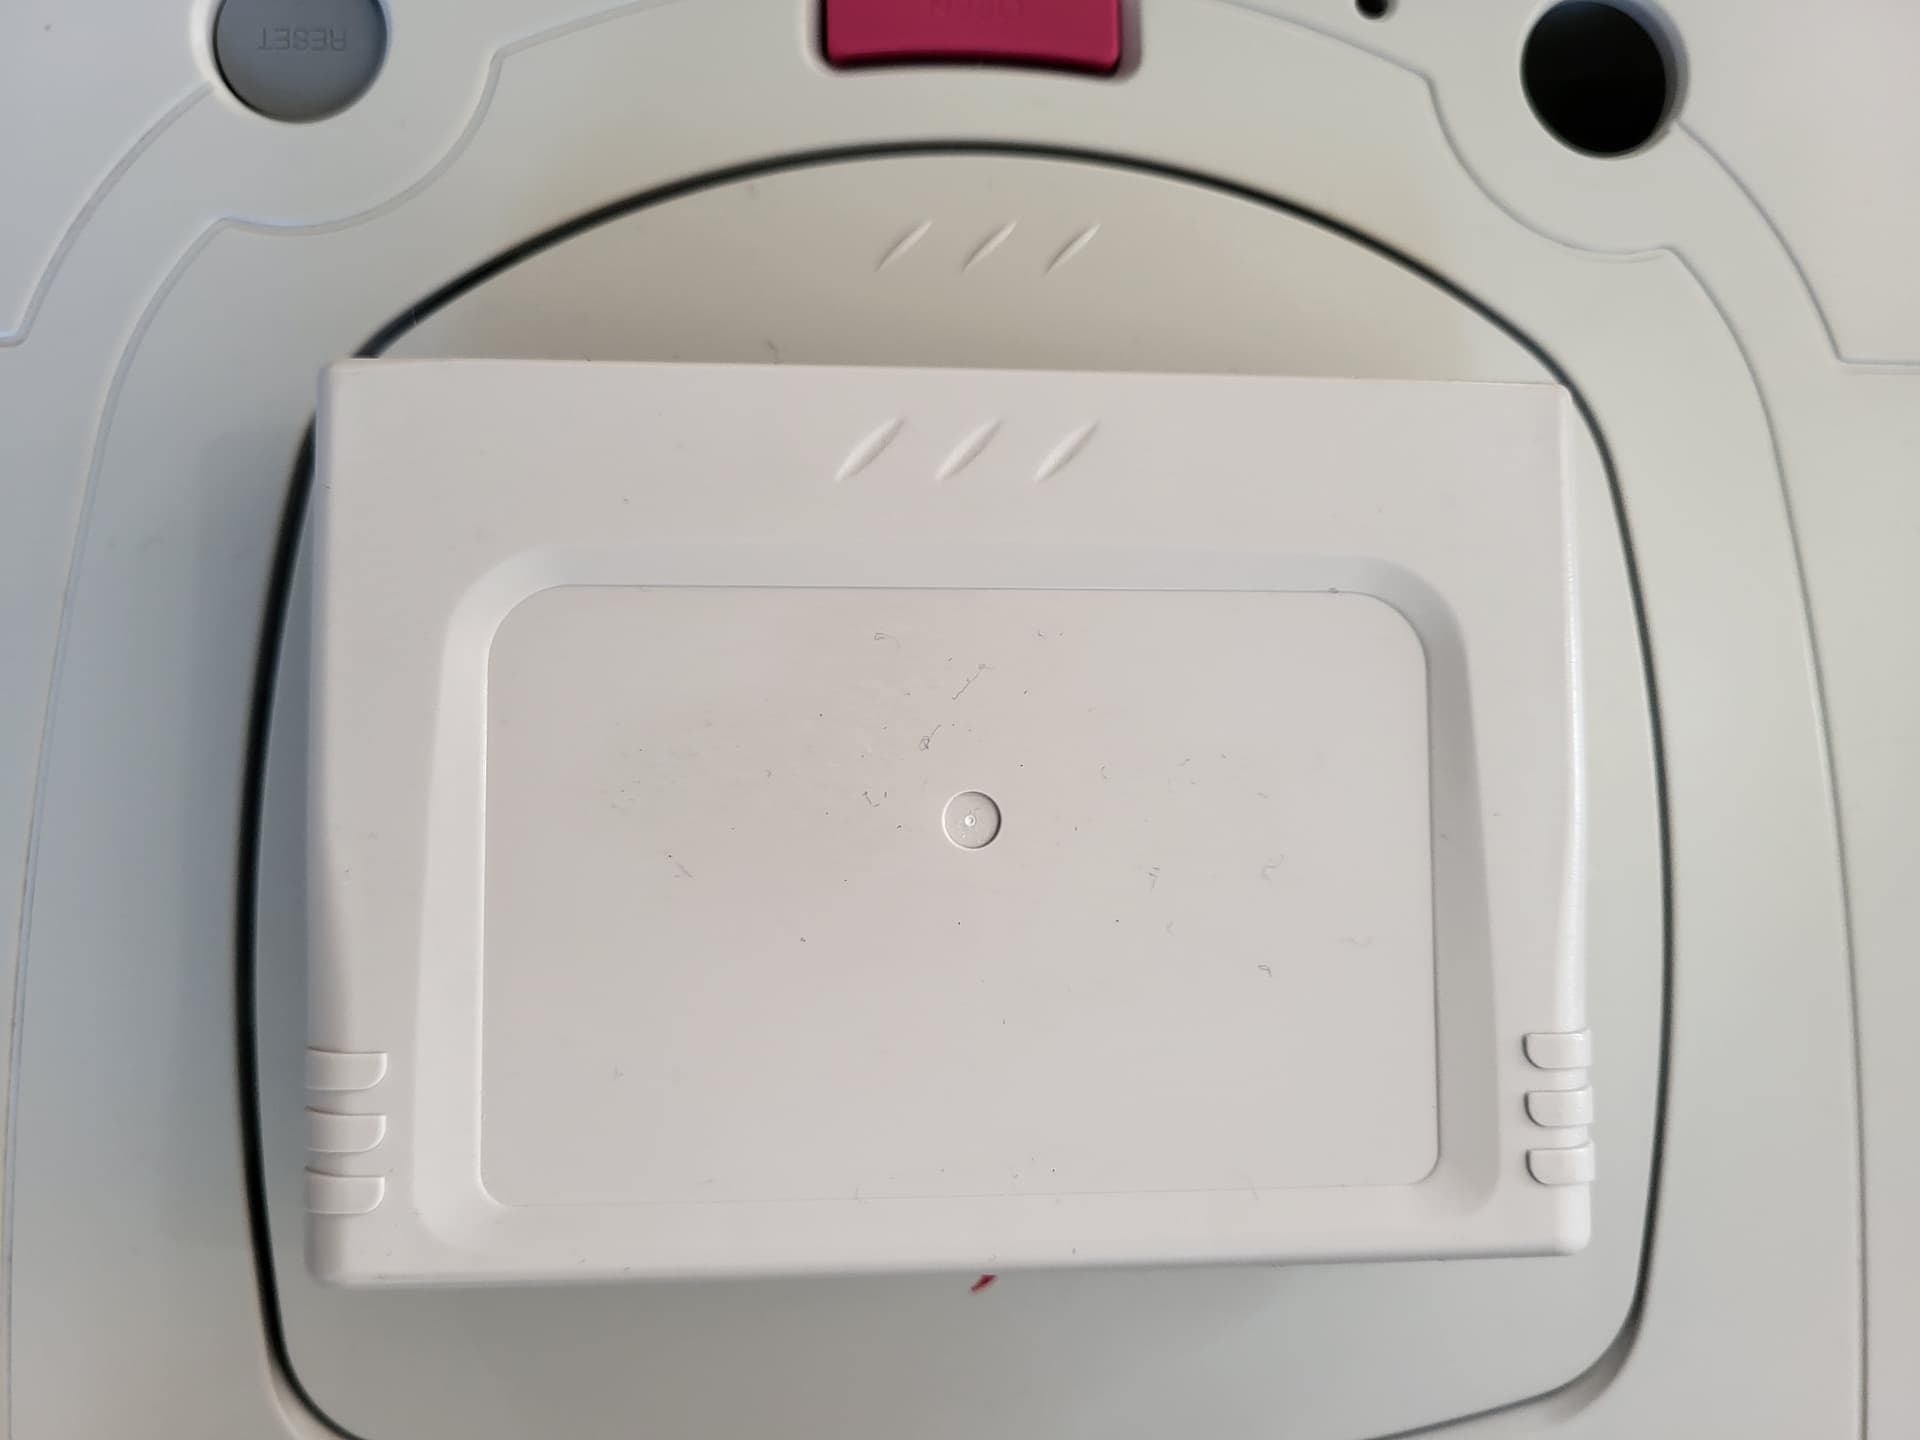
“4mb ram cart, what happened with that?” you ask. Well I decided to do the retrobrighting on it as well to even the colours out between machine and cartridge, so in the bath it went for a day and it came out pretty close indeed.
Of course then I turned it over and learned the label on the back is NOT the same material as the machine itself and doesn’t like having a bath…
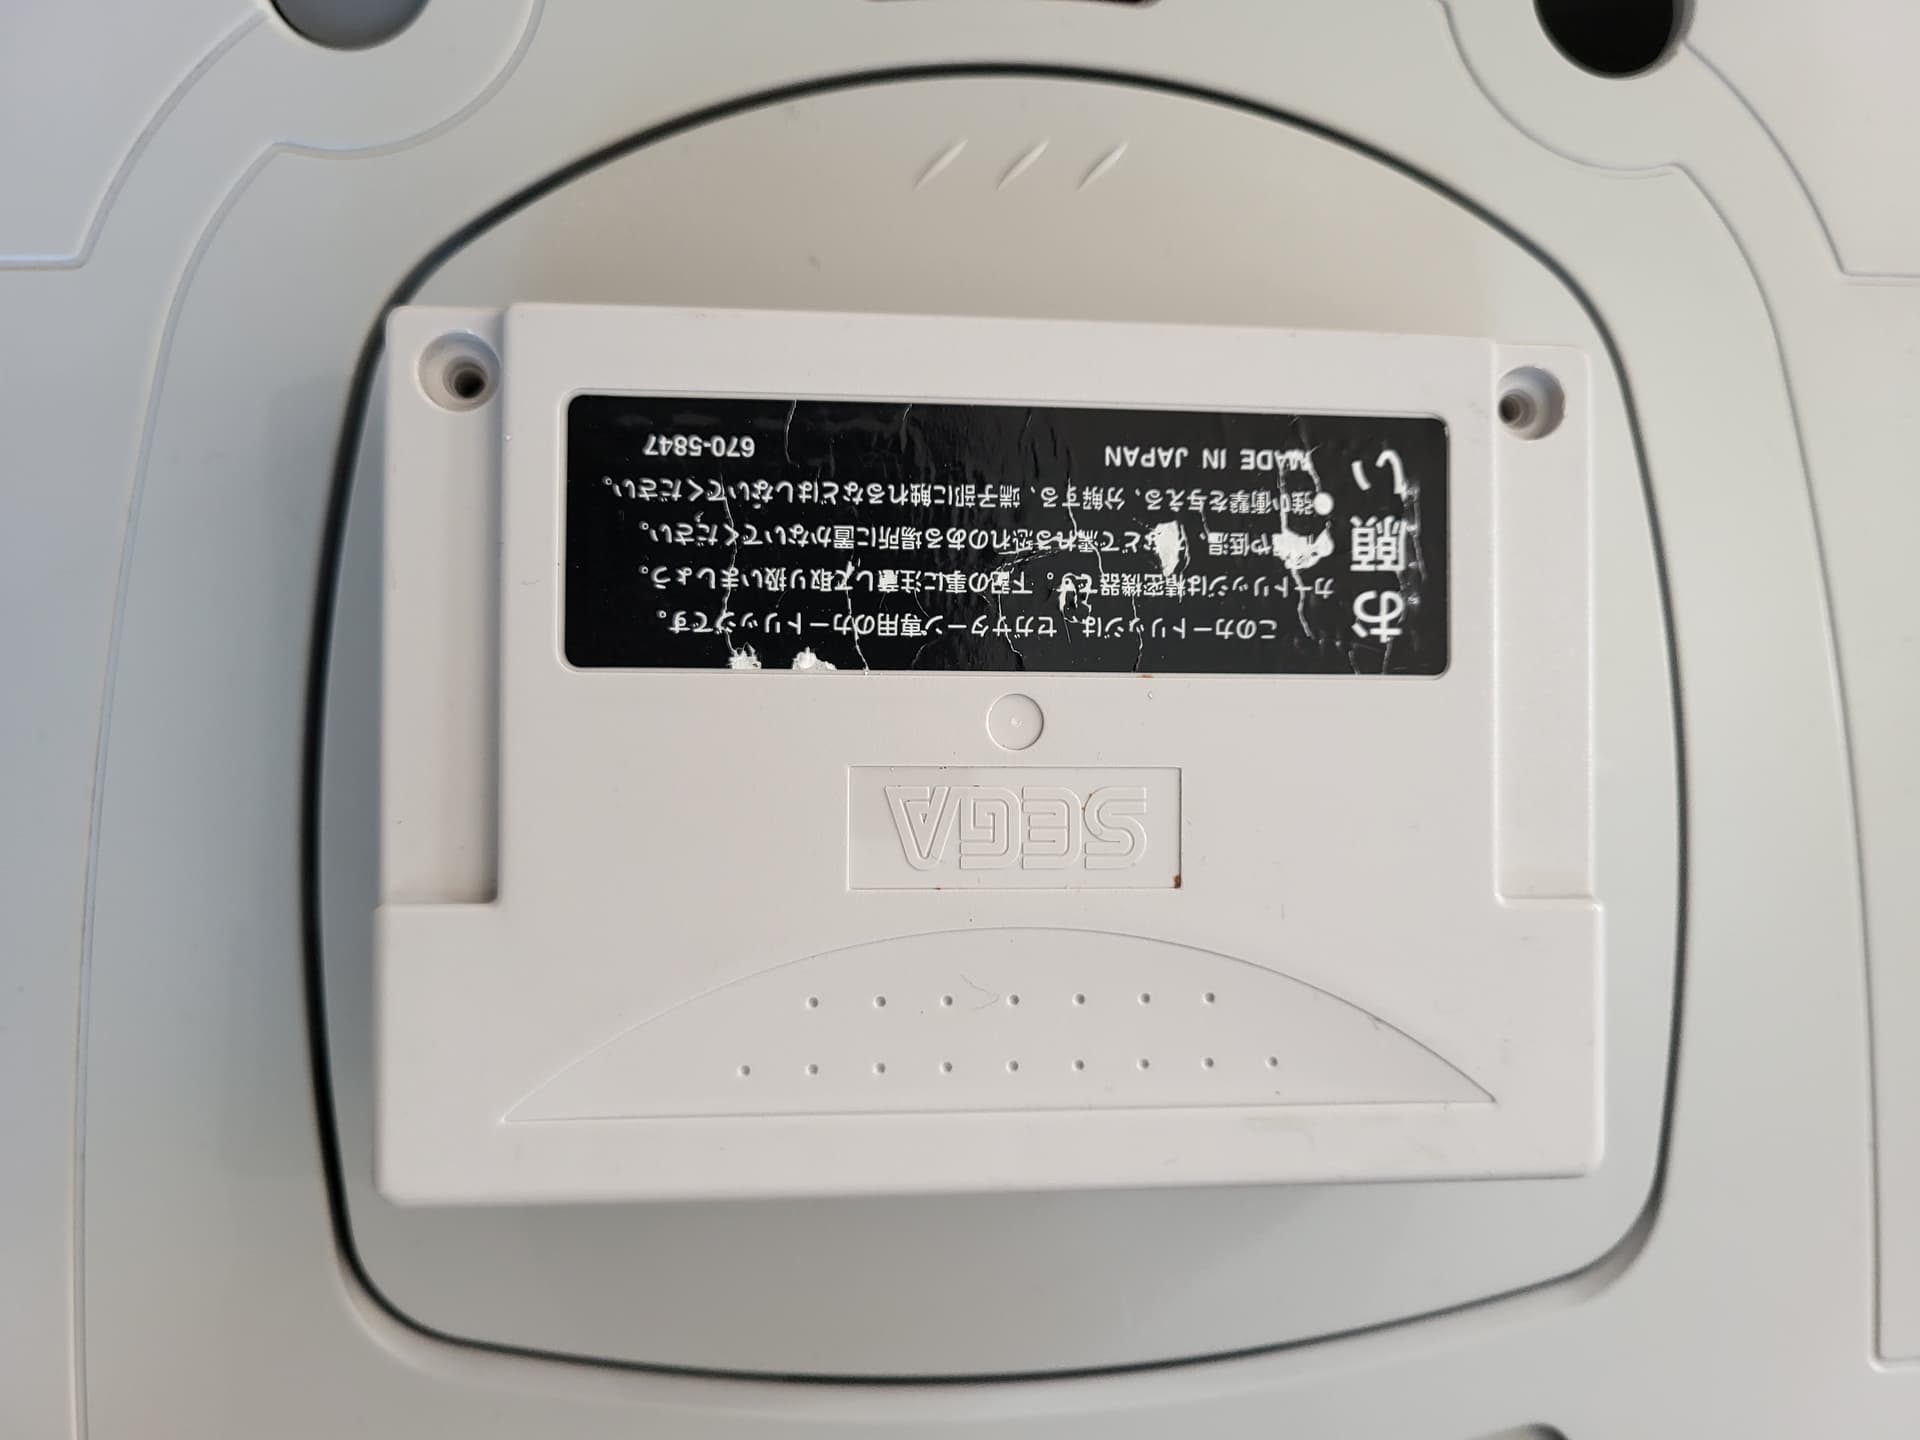
Still this is hidden away when inserted into the machine, so don’t tell anyone okay. Please! If I do one again I will do it without the peroxide and leave it in for longer to make sure the label stays in one perfect piece.
And after all that, we have an almost perfectly finished machine. I’ll admit the camera on my phone doesn’t do the colours justice as when I look at it, it really matches much better than in the photos so you’ll have to trust me on this one.
She works perfectly, doesn’t leak light everywhere and looks almost as good as the mint in box one I have so I’m quite pleased. Yes the label is missing, but I plan on creating a printable image of it, scanning an original label sheet I have from another memory card and finding some time (if anyone has either please let me know) to put on it. Then it’ll be complete for me and lead onto my next project, which is going to be quite a big one indeed and hope to have it done pretty soon. Yes I’ve said that before but you know, it happens!
Happy Saturning =)
6 Likes
@connrrr @treefroggy @exodus As it was fresh in my mind, thought I’d mention this here while I thought about Saroos.
I just spoke with a friend who got his yesterday and called me up for some technical advice - I have to say having seen it running it’s fantastic! It loads very fast, has a very simple but very good menu and one amazing thing it does do is caches saves onto it’s own virtual memory card.
He has a problem with the FRAM so it doesn’t save when you disconnect the power, but the Saroo creates a save file within its own memory. It then acts as a specific memory card for that game and is accessable on the SD card. He tried a few games out and worked perfectly every time. I was impressed.
The model he got specifically was this one: https://es.aliexpress.com/item/1005007268566543.html and stuck a 128gb card in it, worked like a charm.
Not sure if you need it still, but while I haven’t got one, I trust his judgement fully so I say it’s ![]()
7 Likes
A couple of fun updates, not from me as I’m busy working on something, but other great things!
If this does happen I will definitely pick one up and get a board out of my test machine for a test or four.
Professor Abrsaive has completed an update to the Satiator firmware for the first time in a couple of years:
https://wiki.satiator.net/start#software_updates
Happy Saturning =)
5 Likes
They sell things like this on AliExpress now and I can’t say I’m a fan. Makes me wonder where they’re getting the consoles to make them. Hopefully they’re reusing/recycling rather than taking perfectly good Saturns and chopping them up to be less-useful (no CD).
Examples:
https://a.aliexpress.com/_ms5EN9q
https://a.aliexpress.com/_mKoOoUC
https://a.aliexpress.com/_mOAKiJW
3 Likes
I’ve seen those before when Saturn hunting, and while I think they look stylish, like you I hope they’re taking healthy boards and very damaged cases and making something new out of them. I’d rather, in that situation get something more like this:
1 Like
The Sega Saturn is the one Sega console i’ve skipped. FRAM swaps, clock batteries, mod chips. Seems a little more fiddly then readying a Dreamcast or Playstation. Plus, for a long time the price of the games kept me away. But now ODEs exist.
I’m kinda confused on what I need to actually get going on the Saturn since it also uses RAM carts and there’s like various ODE options that everyone has differing opinions on.
Can someone spoonfeed me thru what I exactly need to ready for going to Saturn? I’d like to be able to procure everything in one-go.
Think my biggest hesitation is I don’t know what sellers I can trust out there. Unlike the west coast which has hardware modders in every town, out here in middle america, options are few.
4 Likes
Glad to hear even after skipping it you are still interested in getting one! Having documented a lot of my progress (both good or bad) here, I can vouch it’s a lot tougher now than when I first bought one way back when, but only because there are a lot more options with mods for it.
Rather than write out a huge guide (which I did) and overload you, I’d say answer these questions, as the answers will determine what you would need:
- Do you want to play disc games at all? (this would help answer how you would play games, as some ODEs allow you of sorts to keep your drive usable)
- What model/colour would you like? A simple black US Saturn won’t be expensive, but some of the rarer machines are, so would you want a real special model or just a machine to play around on.
- How comfortable are you at doing any mods to it? If it’s a simple change of drive to an ODE that’s not that hard, but if you are considering soldering inside the machine maybe that’s something to avoid. Also that FRAM mod probably won’t be needed depending on the ODE you get, and also means you may worry less about batteries, but if someone has one with it installed ready it’s not a bad thing.
I’m not familar with US sellers at all, but I’m sure when you know what you’re after a bit of hunting around can get you on the right path to making sure you get the best machine, of the best machine!
Happy Saturning =)
(I love saying that!)
2 Likes
Don’t need to play discs.
Do not have any preference for a Saturn variant.
I don’t even mind if I buy a pre-built one just to avoid having to cobble all the parts together. The DC and PS1 was a little different to mod as I had old hardware laying around.
I think my burning question, with all the ODE and ramcart options the Saturn has, what’s considered the better ones from what’s available? At least looking to narrow my options.
Think all I’ve heard is to buy a Pseudo Saturn Kai online. First, I gotta go read what it actually is :v
Satiator still lets you play discs. If it’s just one, I’d probably go for that. It just plugs right in to the video cd slot. This also lets you enjoy some of the more limited Saturn Hardware without feeling guilty that you’re modding it.
3 Likes
It really depends on the solution you’re after and the budget too.
- Satiator is probably the best non-mod solution but it’s not cheap. It uses the Video card port so frees up the cartridge expansion slot.
- Saroos are cheaper but one issue with Saturn hardware is the cartridge expansion slots do have a tendency to break over time, and if you could get a machine with a bad slot it’s game over (yeah).
- Fenrirs/TerraOnion Mode require removing the drive entirely so you are limited with games, but does free up both cart and video expansion slot if needed.
- Pseudo Saturn Kai will let you run burnt discs.
It also depends if you want to buy the extra carts to run certain games - and for storage as well because of changing batteries, which isn’t a pain just something to add to the calendar. You would have to consider a memory cartridge/1/4MB ram cart (But really the 4MB is fine, there’s only a few games that must have the 1MB cart).
If you wanted a single device, that’ll let you run everything easily and you just plug it in, I’d say the Saroo would be a great place to start. Just check you’re getting one of the better models, with a couple of extra chips inside, as they seem the most stable. They’re a bit more expensive, but it’ll let you run any region game, run images, act as a memory card per game and give you 1/4MB expansion.
Then if you like it, and want to go more into it, then you can could explore bigger mods and discover why the Saturn is such an amazing console!
5 Likes
I’ve been using a Saroo for a couple of months. Occasionally I’ll boot up a game and immediately notice audio or sprite issues, but it’s usually been fixed by trying an alternate ISO or a config edit.
I think if you want something that will run the entire library without hassle, it’s not likely to be there for a while, but as a companion to playing a disc library it’s pretty great.
2 Likes
I use Satiator with Satiator Menu Kai and a blanked all-in-one cart and I like it.
3 Likes
Satiator is on sale right now
5 Likes
normally not into this sort of thing but it’s saturn and it’s sick as fuck and would love to be able to carry around my saturn more easily and worry less about damaged it in transit. It’s bulkier than I expected.
i know times are hard but if y’all got it like thar (or credit card debt is also your fetish) it’s worth every penny
1 Like
Satiator plus a Gamers Cartridge (the guy was wicked sweet to me over email and sent some extra goodies along with it) is basically unbeatable, i wish i could show my Saturn to my younger self—her brain would explode at seeing the combo of these two together
3 Likes
I have Satiator + modded action replay cartridge. What’s Gamers Cartridge?
So it is essentially a super powered specialty cart that has an SD card slot for saves and all sorts of other stuff
2 Likes