PICO-8 Dev Diary

Fleshing Out the Castle

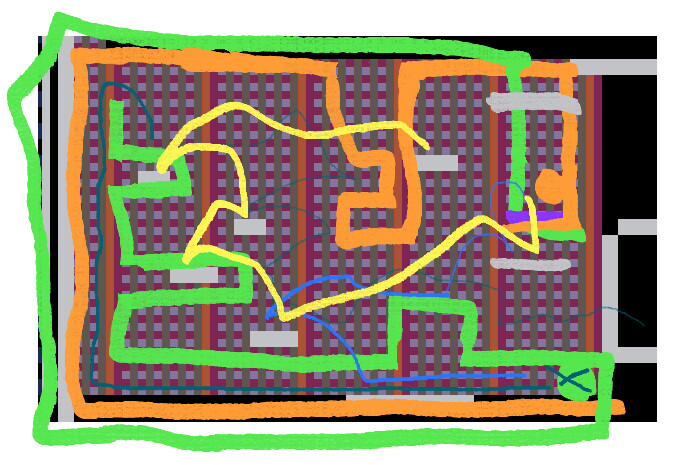
So we have a big ol castle to navigate. Great! One problem, though; there's nothing in it! Sure we have some rooms defined and in those rooms we can put upgrades, furniture, and enemies, but we need something that feels a little different from the garden to make the interior really shine. Plus, areas are more interesting when they change and give you reasons to explore them beyond curiosity. Metroid would be a pretty short game if it didn't lock any doors, after all!

So how do we give the player a little nudge towards exploration, and what can we accomplish with our solutions?

Locks and Keys

The common solution here is just to put a locked door (or some other obstacle) in the way and put the key somewhere else. That's a fine solution for our level design goals, but can we spruce it up a little? Can we tie it into the design of the world in a fun and exciting way? I think we can! Here's the idea:

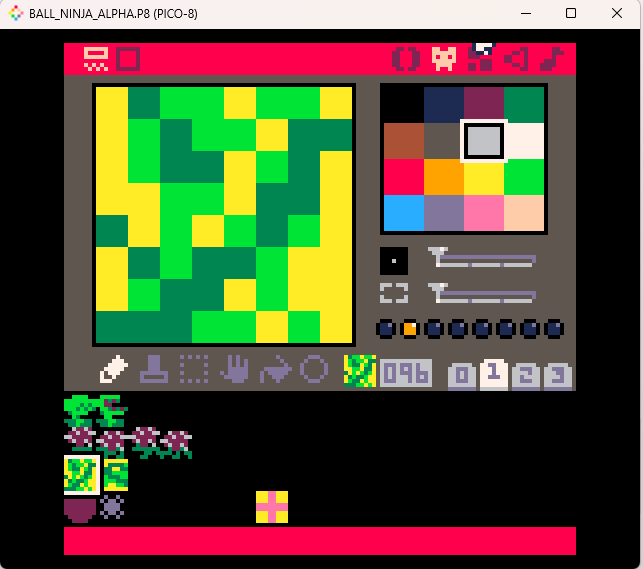
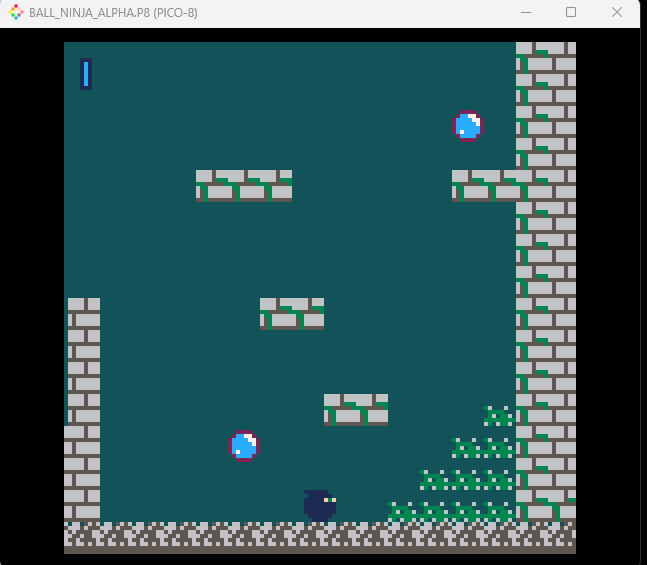
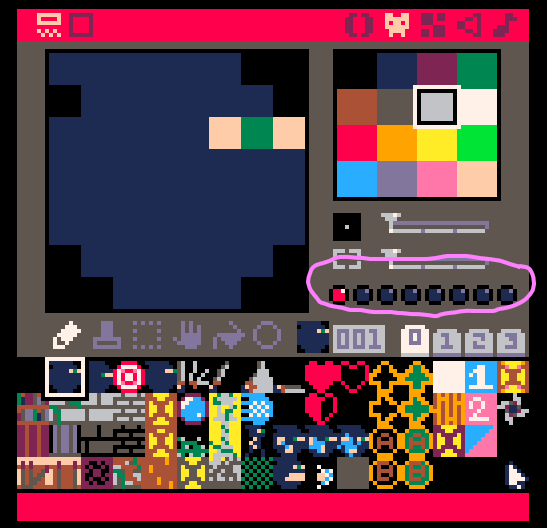
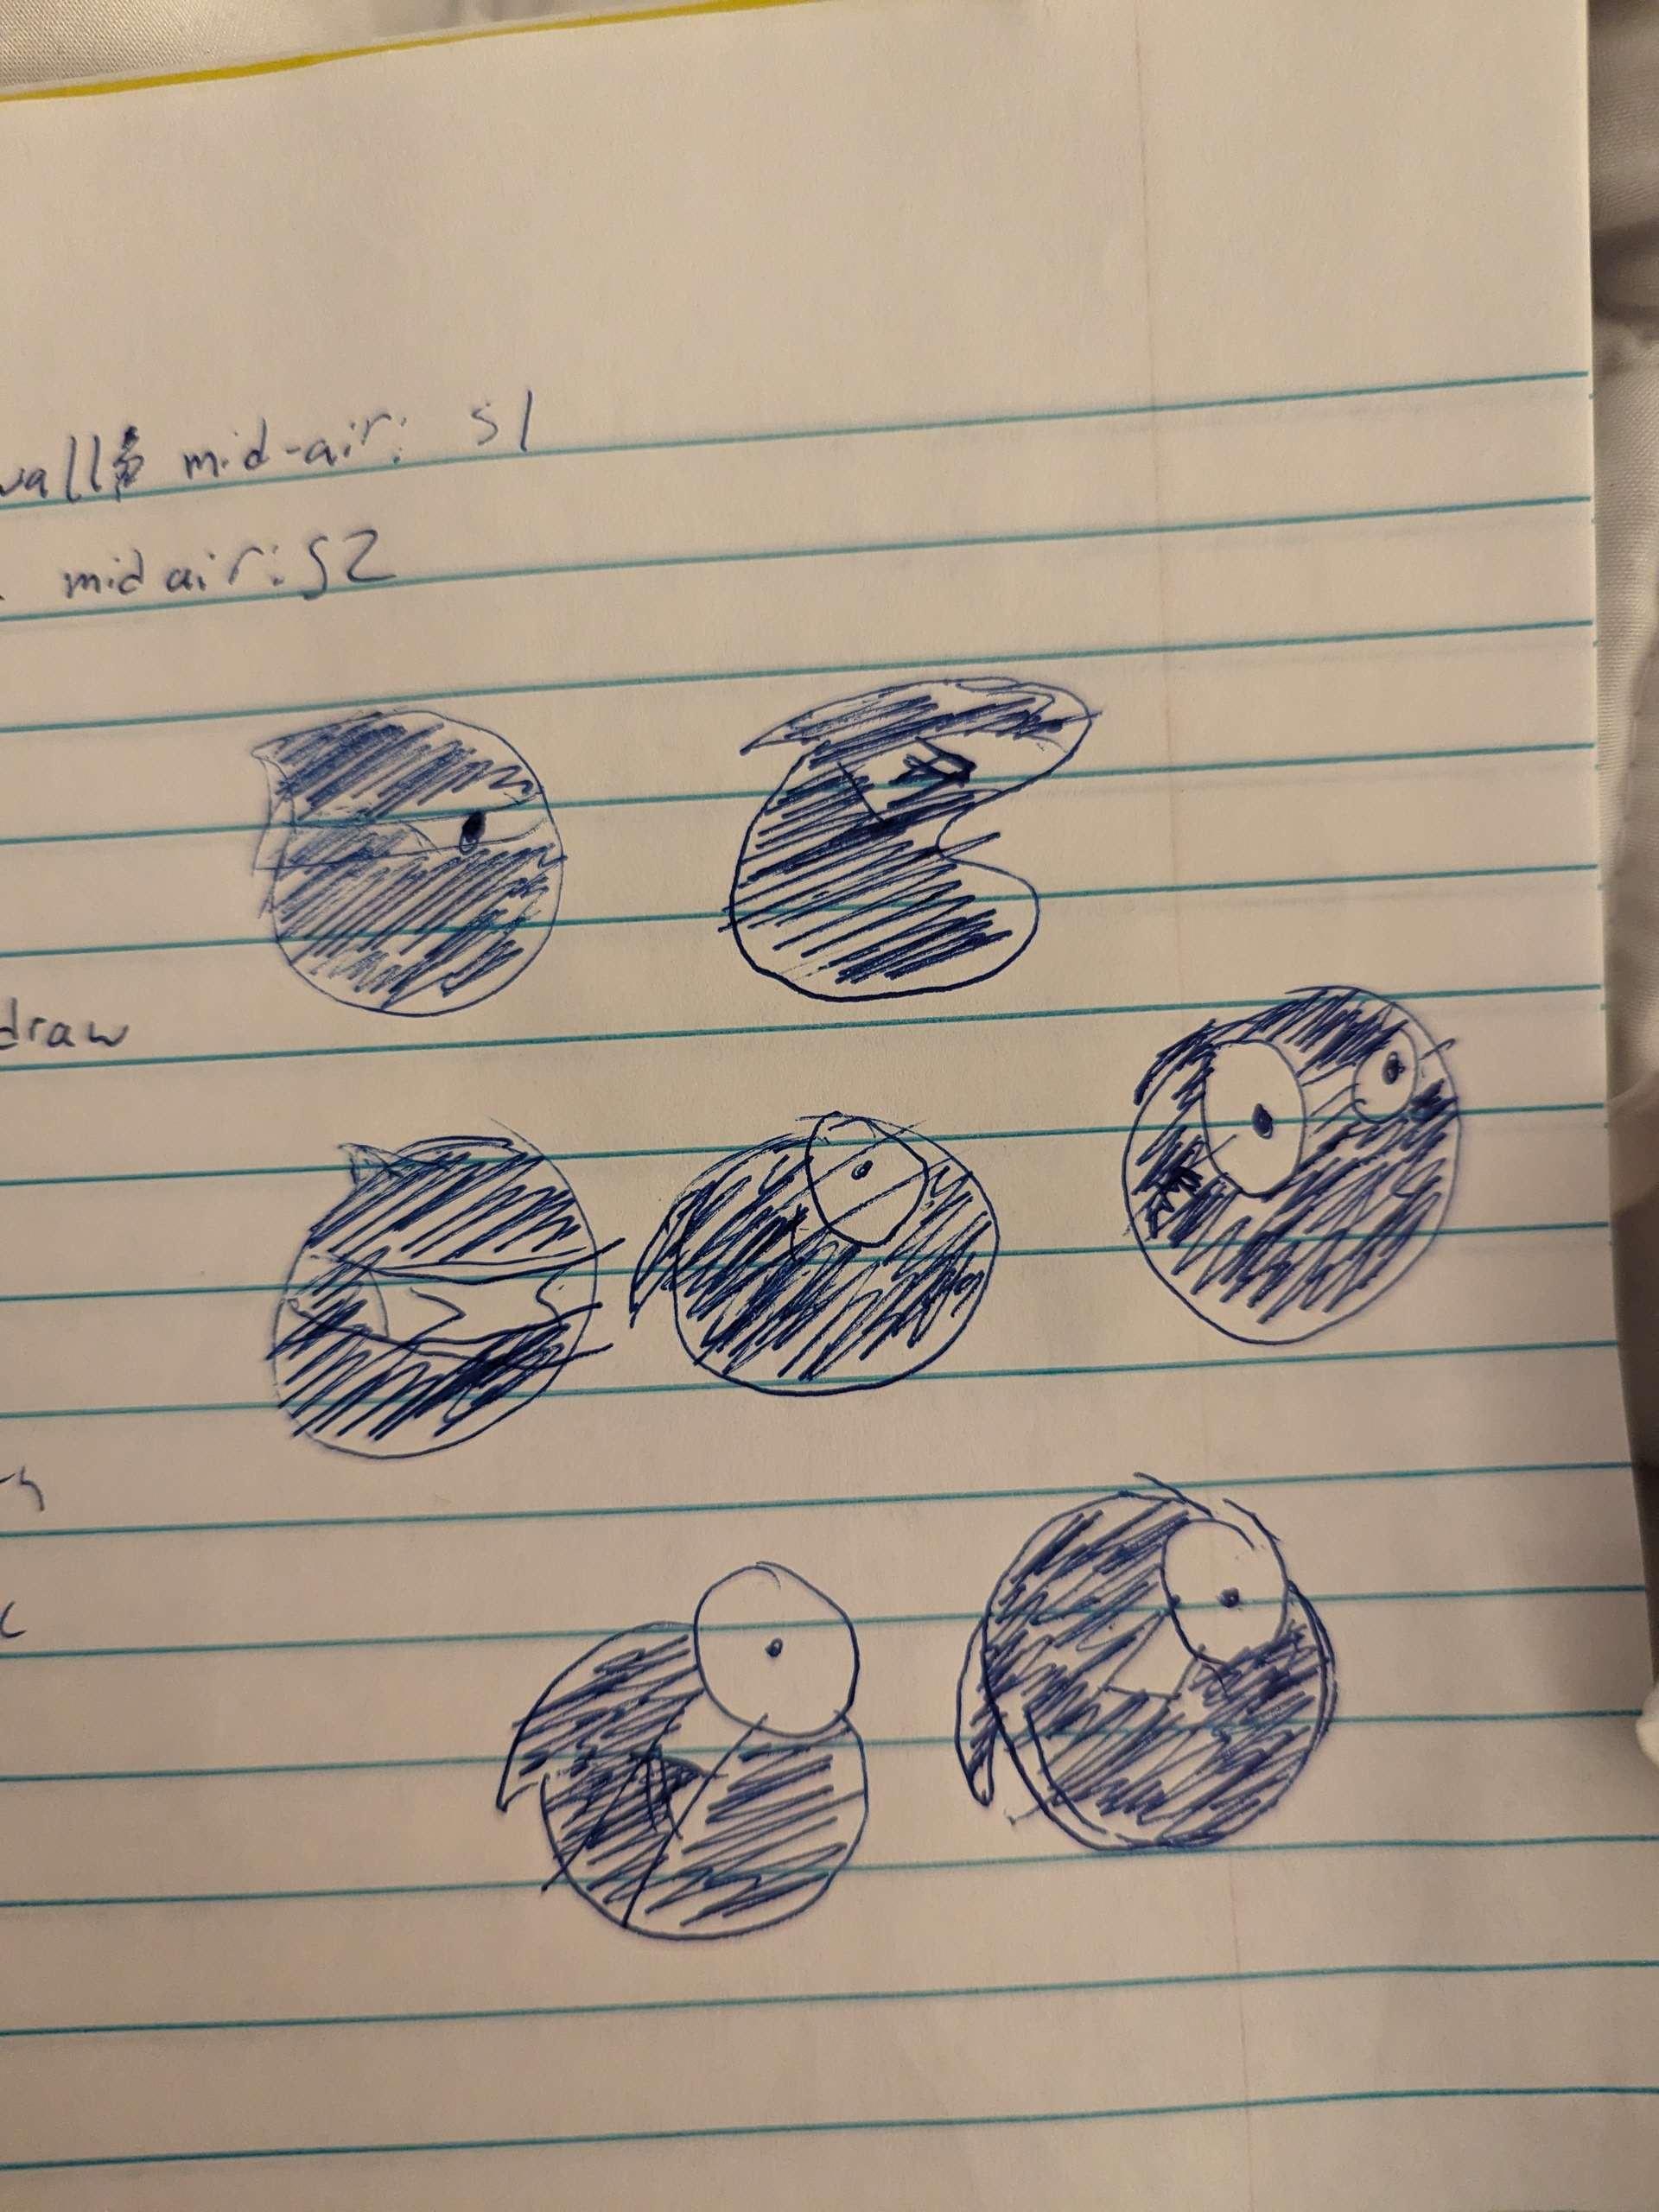
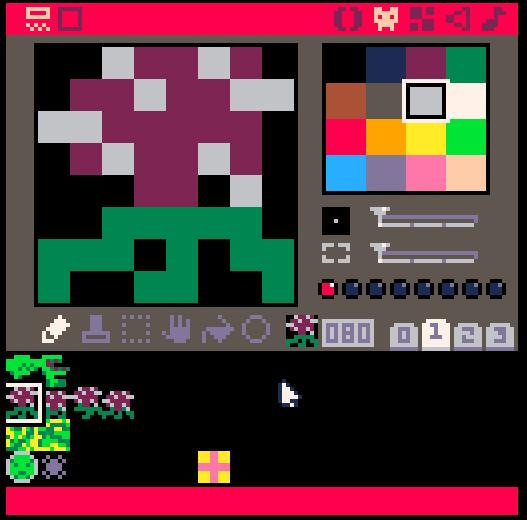
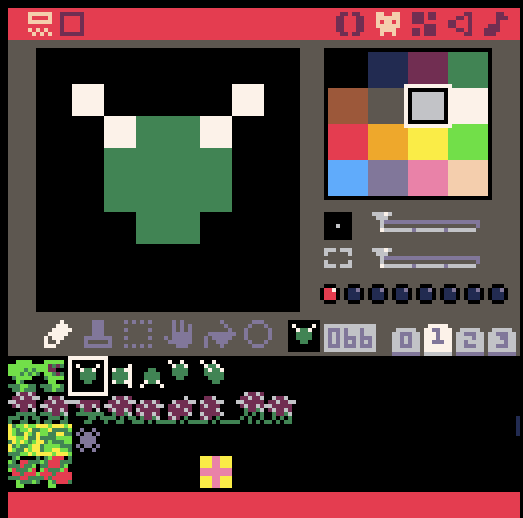
Remember this guy? Up in the corner?

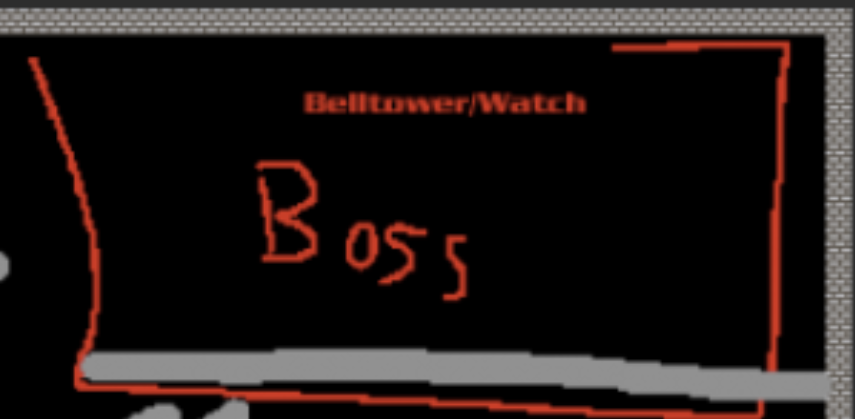
That‘s gonna be a big plant monster. Now, what if our locked door was a large vine? That would cover basically any space we need it to (vines can be easily shaped into whatever wall we want believably) and fits in with our established world (the temple is overrun with plants from years of neglect). How do we get rid of the vine, then? What’s the “key” to this “locked door”?

Well if we have the vine continue off in some other direction and put a big vulnerable spot on it then we can get rid of the vine after the player destroys the lump! Plus, we can have a big scary roar after that happens to hint that what you've really just hit isn't just a vine, it's a monster. That would solve quite a few problems at once! This solution is far from free, though, and brings with it a few other problems. How do we demonstrate the relationship between the wall and the lump? How do we encourage the player to actually attack the lump? How do we draw the vine when that's an object far too large to fit on the sprite sheet?

I have answers for some of these questions, but not all of them.

How do we get the player to actually attack the lump?

Well, it has to look different from the rest of the vine it's on and draw the player's attention to it. So it'll probably need some combination of:

  • Color variation from the main vine
  • Movement
  • Sound which gets louder as you approach it

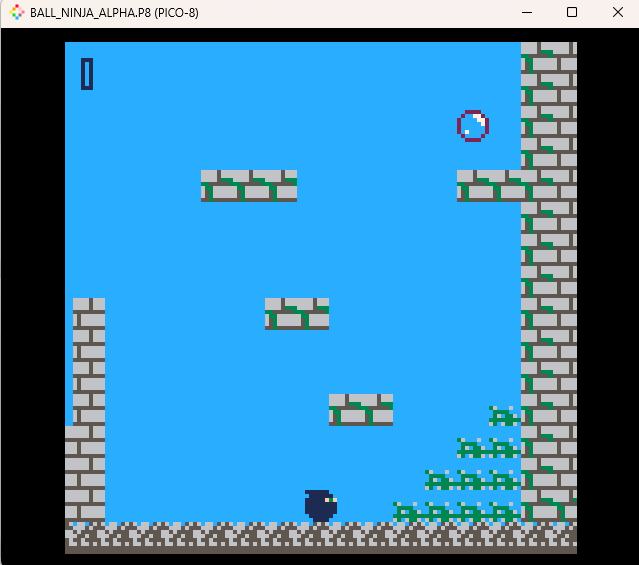
That's how they see the lump, but how do we prompt them to actually attack it? I figure the easiest way is a one-two punch. First we make the lump an enemy. It's probably best to have this enemy shoot projectiles at our player, which will reveal it's position from a further distance and allow us more flexibility as to its exact location. Second, we put a magic pickup right behind it. That way if the player wants the pickup they have to get through the enemy. I think all those things put together will probably do a fine job. Plus, that will give us a useful mechanical language to use when designing the boss fight later on. The second question is less design and more technical:

How do we draw something that big?

This one I'm less sure on. Probably some combination of sprites on the sprite sheet and maybe some raw shapes. We do have access to rectangles or circles, though they're not especially efficient functions. For now I'm just going to use three big rectangles and we'll put "make the vines look/sound better" as a later problem. Oh, and speaking of later problems:

How do we animate the vine going away?

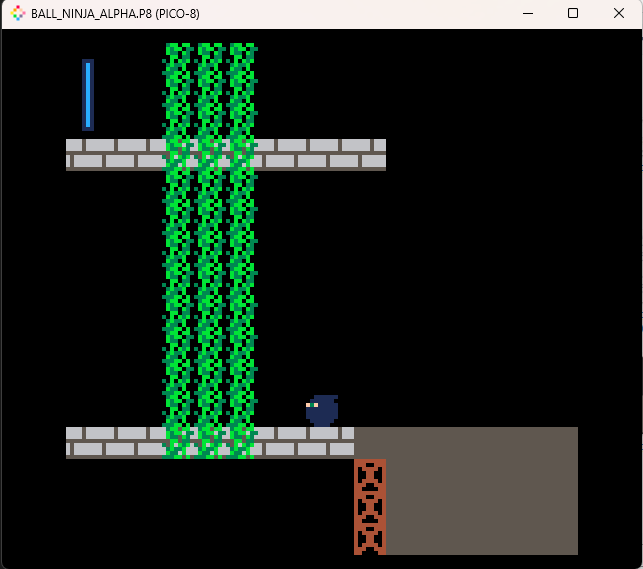
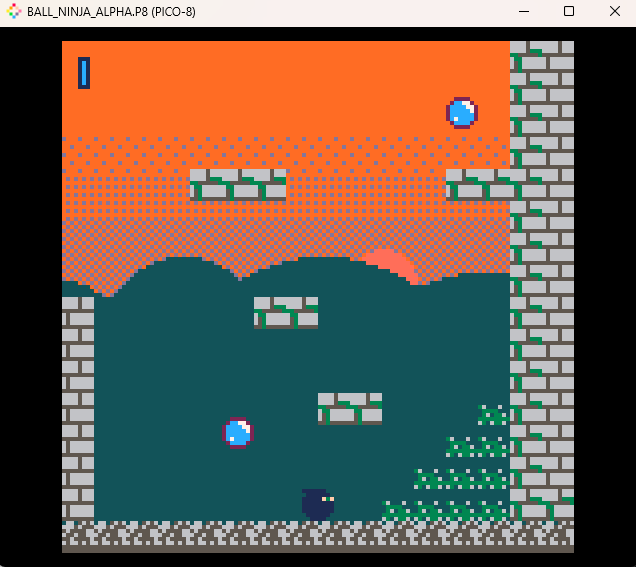
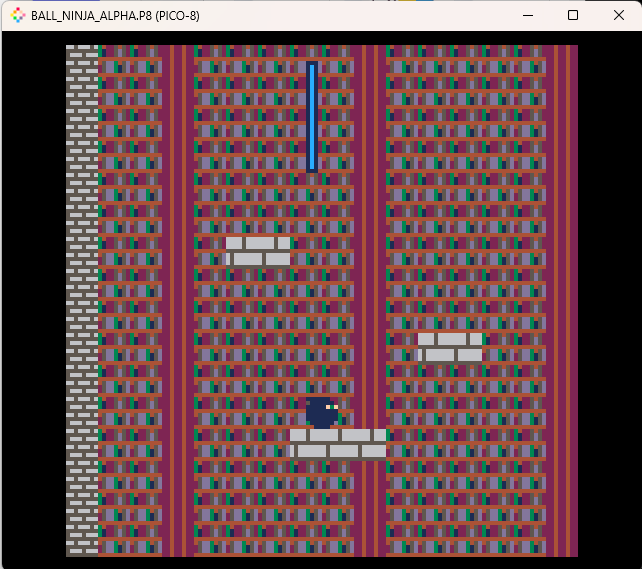
I also don't know! Maybe it just tweens offscreen. Maybe it explodes in old school NES glory. This too is a problem I'm willing to put on the back burner to get ourselves closer to a functional, albeit crude, full playthrough. So how's it look/work?

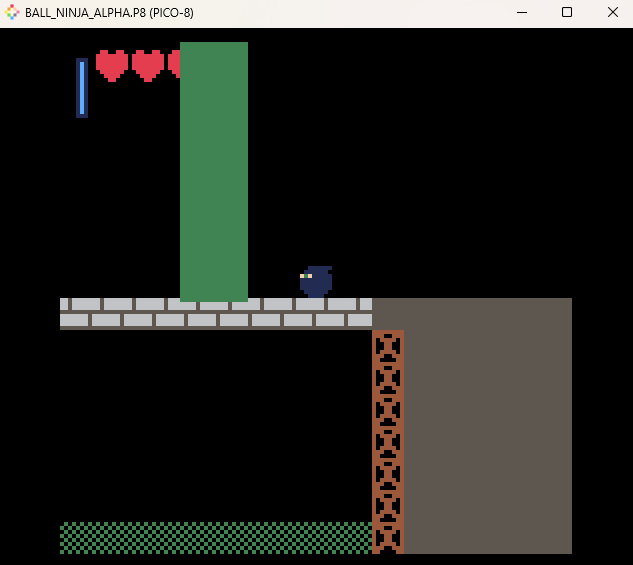
A big rectangle! So big it‘s drawing over the UI (oops). It’s not much but it‘ll do for now. There are also a couple other rectangles and a circle for the lump. How’s it work? Very crudely! Essentially during the initialization after loading the map we run through all the squares of each rectangle and flip flag 1 to be on. That‘s our collision flag (the same as on the our walls and floors), so that will effectively turn our big rectangle into a wall. How exactly do we treat the lump? As a sort of unique enemy with a death trigger to set vine_1.alive to false. It’s all very messy but it will do.

Join us next time for fleshing out our vine locations, our lump behavior, and maybe even the design of the library! Or maybe audio! It'll definitely be something!

Livening up the world

A lot of the updates made since the last post have ended up being visual tweaks. Normally I'd save these for later, but it turns out that some of them mattered more than I thought they would! Turns out the video of a video game is important, too!

Tweaking the camera

Centering our camera directly on our player was functional enough, but seeing what's above you is generally more important than seeing what's below you. A future update will probably also include shifting the camera to bias in the direction the player is facing, but one step at a time.

001

Now we clamp the camera to never show below the map and put the player closer to the bottom of the screen. We still need at least a little bit below the player to show, since sometimes the player explores downwards and we don't want to make that completely blind. I think it works pretty well!

Fixing the vines

Before, our vines were a big green rectangle. That's fine and all, but really what we want is to show what's behind the vines, to better inform the player of the level layout. These vines are removable, and having them draw over the existing background helps ground them in the world and communicate their removable nature. But how do we do that?

Each map tile can only fit one sprite on it after all, and shared tiles also share flags. Do we duplicate our background tiles to flag only ones we want replaced? That could work, but it'd be expensive (we don't have that many tiles to work with!) and inflexible (what if we want to move the vines later?). Plus, we want our vines to behave like solid tiles, and that's much easier to do if we make our vines part of the actual map tiles.

Luckily, there's a way to get the best of both worlds! First, we add a new tile in our sprite map which has the appropriate flag set to be a solid wall (note that we've made yellow our transparency color here):

Then, we use the PICO-8 function mset() to change specific tiles of our map to this new tile. And here's the special sauce, we also store the tile that was _previously_ at this map location. Then we draw all the old tiles _behind_ the new ones!

-- A table to store our previous tiles
vine_1_prev_tiles = {}

function vine_1_init()
       -- Store all the old tiles in the from X pos 66 to 68
       -- and y pos 21 to 37, then set those tiles to the new one
	for i=66,68,1 do
		for j=21,37,1 do
		add(vine_1_prev_tiles, {mget(i,j),i,j})
		mset(i,j,96)
		end
	end
end

-- Called before the map() function to draw the map, draw all of our 
-- previous tiles
function vine_1_draw(self)
	if not vine_1.alive then return end

	foreach(vine_1_prev_tiles, vine_tile)
end

-- Draw a previous map tile at its stored map position in sprite coordinates
function vine_tile(t)
	spr(t[1],t[2]*8,t[3]*8)
end

And now instead of a big green square, it looks like this! Much better!

Adding a background

It occured to me that this was probably a good time to experiment a little with the nature background, and I'm glad I did! Turns out your background is actually very important for contextualizing all your other color choices.

My first instinct was just to make the sky blue. I thought it'd be more interesting for this game about a ninja to not take place in the middle of the night, and after all, this fortress is abandoned. Stealth is unnecessary here, why not explore it during the day? Turns out I don't really look how the blue sky looks.

Light blue is already an important color in our game (it's the ice!), and making everything light blue fights with that. So no light blue. What are our alternatives then if we still want this game to take place during the day?

It occurred to me that it'd be cool if this game took place at sunrise for narrative reasons. This is a game about reclaiming a space, and a sunrise fits in nicely with that narrative. "It's a new day!", says the background. In order to draw our sunrise I figured it'd be good to have our sun rising over some mountains, but here we hit another snag. If our mountains are a dark green, then they're now fighting with our plant sprites! Luckily, we also have an out here too. PICO-8 may only support 16 colors at a time, but you can swap out any of those 16 colors for one of an entire secondary palette, called the secret palette.

005

If we replace a color that we don't intend to use in our game, like bright yellow, with color 131, a sort of dark teal, that would work well. Do we still have contrast? Do the plants stand out?

They do! So let's make our mountains out of this color. Our sunset sky will be orange on top. We can build our mountains out of a big green rectangle with a series of circles on top.

Getting there! Let‘s add in our sun, and a few rectangles for a gradient sky. PICO-8’s fillp() function lets us draw patterns instead of just solid blocks, so we can have some dithering to help sell the scene. Our sun can be a dark pink to help sell that really early morning look and to not be too distracting.

One final touch, let's add a little parallax scrolling. As the player gets closer to the top of the map (and closer to the end of the game), they can slowly approach the horizon line of the mountains. This isn't too hard to achieve, just offset the mountains a little bit based on the player's vertical position. Put it all together and you get this:

009

Looks pretty good to me! Down the line we might fiddle with our dithering a bit, but this is good enough for now. Heck I'd even call it shippable, should we choose not to fiddle with it more.

Building the Library

The last visual touch for today, the library. This is our vertically focused section and we really want to sell that "gigantic, impossibly tall" library vibe. Luckily drawing something that looks like a shelf of books is pretty easy, and adding in a few columns finishes selling the illusion.

Oops, our magic meter is drawing in the wrong place on the left side of the map. Fix for next time.

Next time: Fleshing out the content of the library and the hallway leading up to it.

Fleshing out the library

The core conceit here is that of cutting through some vines to allow for an ascent up to the final layer of the map. Ideally this will mean that this section is fairly dynamic; as you cut through vines, you also alter the level geometry! So our vines then must criss cross across the library in interesting ways while also cutting off access to the top.

Here's a sketch showing the two vines, the first in green and the second in orange. There's also a few somewhat incomprehensible lines in blues and yellow to show some possible paths, though for now just focus on the vines. After going down the shaft on the left between the green and orange vines, the player can destroy the green node. This will destroy the green vine and still leave the orange one, which blocks the path further upwards. Then after destroying the orange node the path opens up and the area is complete.

001

Here we encounter a minor technical challenge; how do we represent the areas for the vines? We could start with a large list of tiles in code represented as a series of x/y coordinates, but that would take up a *lot* of our available code space. While we certainly don't need to worry too much about code optimization at this point there are almost certainly more efficient ways to deal with this. Luckily, there is a way to mark a series of tiles on the map with zero code that we can use; flags!

Remember flags? Each sprite in the game can have flags. These little circles in the image editor

Right now we're only using a couple of them, flag 0 for spawnable objects and flag 1 for solid walls. If we use flags 2 and 3 for our two vines that'll solve our coding problem very simply. We can just look for all the tiles with flag 2 and put a vine there and do the same for flag 3. We do have one other thing to work around here: we need our flagged tiles to be the library background! But that's easy enough; we can just duplicate the book texture and put it here too. This tradeoff of code comes at the cost of three sprites and two flags, but I think it's worth it.

For the moment I'll leave our big blue 1 and big pink 2 (as well as the blue and pink for where the vines overlap) to make it easy to iterate our vines. With that worked out, here's how it all looks put together:

And there we go! Now we can easily tweak our library level design if we want to without too much hassle. We might want to put an enemy or two in here, and we definitely want some in the hallway leading up to it. This seems like a good time in our development process to focus a bit more on combat, since that's really become the level design bottleneck here. See you next time!

Combat part 1: Tightening things up

Somewhat unusually for my process, I began this step with reference. I popped on a couple classic ninja games (Ninja Gaiden and Shinobi 3) with simple combat to see how they did things and figure out what that could teach me. Turns out they have one pretty important lesson: make the player stand still when they swing! Stopping the player's grounded movement for attacks has both useful gameplay implications (standing still is a little dangerous, so the player must be careful when they decide to attack) and game feel implications (walking and swinging makes the swinging feel pretty limp, but stopping to swing makes that swing feel more impactful).

I also figured I'd add a little hit stop, since that's pretty common advice for action games. Hitting an enemy is a big action, we want to linger on it for a frame or two! Only problem, PICO-8 has no sleep() or wait() functions. This is easy enough to work around; just add a timer variable for our frames and then check at the start of _update() to see if we need to wait for anything. Then, if we hit an enemy with our sword, just add a couple frames to the wait timer.

function _update()

	if wait_frames > 0 then
		wait_frames -= 1
               -- Return will exit out of the update function
		return
	end

Note: You can technically make your own wait function if you're a little cheeky about it. PICO-8 has a function named flip() which scoops up all the graphics and then draws them next frame. That might not sound like pausing, but if you call this function somewhere it, effectively, pauses the game for one frame. This is very hacky! I don't think I'd really recommend doing this unless you're doing something a little goofy.

Anyway, let's also set the player's horizontal speed to 0 if they swing their sword while walking and see how it looks.

Before:

001

After:

002

I might fiddle with the pause timing a little more, but I think that definitely has an impact!

Now let's add back in the health and the ability to take damage.

003

Doesn't look like much yet, but hey, we've got a minimum set of features for technically functional combat! Next time we'll add a little polish (flashing when between hits, getting knocked back by damage, better enemy behavior, etc).

Combat Part 2: Add a little kick to it

So our attacks feel alright now but taking damage is still pretty limp. Let's take a step back for a moment and lay out what our goals are for when the player takes damage.

1: It should be extremely obvious.

It should never be a unclear when the player has taken damage. As such, we'll have to use both our visuals and our sound to make sure the moment of damage is obvious.

2: It shouldn't lock you into a damage loop

Ever play a game where you take damage, but then as soon as your invulnerability period ends you just instantly take damage again? That should be avoided.

3: It should be disadvantageous.

The player should never want to take damage. Or if they do decide to tank a hit, that should come at a real cost!

The classic 8 bit way to do this is to do all these things:

  • Play a sound effect
  • Change the player's sprite to a “taking damage” one
  • Throw the player backwards
  • Prevent the player from acting while they're reeling from damage

This is a pretty elegant solution to all three objectives. The sound effect, sprite change, and sudden change in momentum make it really obvious even to a muted or deaf player when they've been hit. Moving the player away from the source of the damage makes it less likely for them to get caught in a death loop. Throwing the player backwards and preventing them from taking actions is disadvantageous. Let's implement all those things and add in a frame of hit stop just to make it _really_ obvious what's actually hurting the player. We'll give them a fraction of a second to assess the situation before they're removed from it. But first, what should that sound be? And what should the sprite be?

The Sounds of Taking Damage

This is another instance where I thought it'd be good to look at some reference materials. I used mostly NES and Game Boy games for this, since they had somewhat similar sound capabilities to PICO-8.

It turns out it's Calvinball over there. There are trends, but there's nothing close to a _standard_. Sometimes the sound effect comes in two parts, sometimes it's just one, sometimes it uses the noise channel going up, sometimes it uses the noise channel going down, sometimes it's a bloop, sometimes it's even incredibly muted!

The only standard seems to be something short and non-melodic (unless you're trying to communicate a state change with your sound effect like Balloon Fight's popping balloons or Mario's shrinking size). So I picked something. Maybe it'll change later, but it'll work for now.
(Ordinarily this is where I'd link the sound but alas, I have nowhere to upload it to)

Second, what should the damage sprite look like? It needs to clearly communicate Ball Ninja being hurt, but what does it look like when a ball gets hurt?

I opted for really pushing the expression to a cartoony degree, since we just don't have that many pixels to work with. We add a big tilt, have a really big eye, and add a tear to make it as obvious as it can be that whatever just happened hurt!

002

Now let's make enemies actually attack you, Remember our angry raspberry?

The raspberry wants to do these things:

  • Patrol an area until the player comes within range
  • Get to a safe distance and then shoot thorns
  • If the player gets too close after shooting a thorn, run away and try to get to a good thorn distance again.

The idea here is to give the player some combat that also involves movement (dodging projectiles and chasing down an enemy). That's effectively just a state machine (the raspberry is always either patrolling, running away, charging a shot, shooting, or recovering from a shot). For patrolling we just pick one point on the left and one point on the right of its spawn location and have it walk between the two. Getting the distance to the player is pretty easy, so that's all we need to check for running away, but already we hit some edge cases! What if the raspberry walks up to a wall? I think that's probably a reasonable point for it to switch to its "charging a shot" state. We want backing them into a corner to be a valid strategy!

In fact, our state machine for an enemy even as simple as our ranged attacker is quite involved! I intend to add a couple more enemy types later (a melee attacker and a flying, swooping attacker to mix things up) and I expect their behavior will be much simpler. Plus with our raspberry done the others can use its state machine as a template for their own.

We also need to define the projectile. That's easy enough, it's just an enemy whose only update is to fly in a direction. Plus if we define it as an enemy it can be hit with the sword! Sounds fun. How the projectile gets shot is pretty simple trig to give it an x and y speed from the enemy's position to the player's:

local shot = create(thorn_shot, self.x, self.y - 8)
local angle = atan2(p_dist_x,p_dist_y)
shot.speed_x = self.shot_speed * cos(angle) 
shot.speed_y = self.shot_speed * sin(angle)

After throwing in a temp sprite for the projectile it shoots, we have this:

004

Our enemy now patrols until the player gets close, charges up a shot, and then shoots it! We're so close to a finished and relatively complicated enemy! Exciting times.

Oh and in unrelated news I gave Ball Ninja a new sprite for skating, and I think it adds a lot of personality for relatively little work:

005

What a productive weekend this has been! Let's see if I can keep this up and get this game done soon. Next up we'll continue fleshing out the explorable space, maybe add a little enemy variety, really just beef up this castle so it feels like a videogame zone!

3 Likes

Been a while! Lots has happened! I’ve got a quick two parter here followed by the next post, which will be into some level design nitty gritty on the final zone of the game.

Part One: A Better Camera

So locking the camera squarely onto the protagonist and keeping that in the middle isn’t really ideal for this kind of exploration focused game. It’s functional, but it has a small problem: most of the screen isn’t things you want to look at!

Generally speaking, the player wants to see the things they’re currently moving towards. I tried a couple different versions of this until I realized I was ignoring the easy answer:

Part One and a Half: Just steal Super Metroid’s Camera

It should be noted before we dig in here that Super Metroid and Ball Ninja aren’t terribly similar games. Super Metroid has a completely different series of considerations for combat, after all. All of Samus’s attacks have a range that extends at least the length of the screen, so showing things in front of her is especially important. That said, the other consequence of this kind of camera, panning towards the environment the player is actively trying to explore, is still very useful in this case.

Basically, we want this:
Super Metroid Camera

The outcome seems pretty sophisticated! It only moves the camera when you’re running, and always in the direction you’re facing. The player never feels like the camera is taken from them or not looking where they want to go. It also moves at a natural speed without drawing attention to itself while still accomplishing all that. Though really, it’s only doing two things:

  1. Moving at a slightly faster rate than the player whenever they do, and
  2. Clamping itself to keep the player from falling off the screen.

That’s it! The code is this simple!

-- move the camera in the direction
-- the player is moving
cam_x = cam_x + (p.speed_x * 1.7)

-- make sure the player stays on screen
cam_x = max(cam_x, p.x-100)
cam_x = min(cam_x, p.x-28)

-- make sure the camera can't go past the level walls
cam_x = max(cam_x, 0)
cam_x = min(cam_x, 896)

-- put the player in the middle-ish of the screen
local cam_y = min(p.y - 96, 384)
-- don't let the camera go outside the level veritcally, either
cam_y = max(cam_y, 0)

Works just like Super Metroid!
ball_ninja_alpha_7

Who’s that flying guy though?

Part Two: A Flying Guy

Right now both of our enemies (the fly trap and the raspberry) are completely grounded, so for a little more enemy variety I added one that flies. Unlike the other two I don’t really have an idea for what it should actually be though. The flytrap is pretty obvious, and the raspberry is essentially an animated thorny bush, so both of those came together pretty quickly. There aren’t that many plants that fly, though! Wisps of a dandelion tuft? Maybe others???

That’s less important for the moment though. I mostly just needed them in there to make sure they complimented the level design and combat well. So for now, it’s just a green circle with wings. Maybe the very low resolution of this game can do us some favors and keep it abstract enough that we never have to spell out what it is.

The flying enemy should, ideally, be kind of a nuisance. It should generally float outside of standing melee range and swoop down to attack. The player should have to think about their approach a little, since in general the purpose of the enemies is to change the texture of the space they occupy. I want flying enemy encounters to temporarily turn the screen into a field of opportunities for how to approach, hide, etc. Plus, having an enemy like this could be fun for the ice blast! Can’t swoop if you froze it in place after all.

The behavior then is simple:

  • Patrol a horizontal zone somewhere above the ground
  • Move in a sinusoidal pattern to convey flying
  • When the player approaches, take a moment to prepare to divebomb (including a visual cue)
  • Swoop down at the player, reposition if necessary, and swoop down again.

Here’s the code for that, if you’re curious

Summary
function enemy_3.update(self)
	if self.freeze then 
		if self.freeze_timer <= 0 then
			-- TODO: spawn some particles
			self.freeze_timer = 60
			self.freeze = false
		end
		return
	end

	local p_dist_x = player_ref.x - self.x - 4
	local p_dist_y = player_ref.y - self.y
	local p_dist = sqrt( (p_dist_x * p_dist_x) + (p_dist_y * p_dist_y) )
	 
	-- if player in range, stop moving,
	-- loop charge/shoot/retreat behavior
	-- patrolling
	if self.state == 0 then
		self.spr = 66 + self.spr_offset
		self.bob_count += 1
		self.speed_y = sin(self.bob_count / 8) * 2
		self.anim_counter += 1
		if self.anim_counter >= 3 then
			self.anim_counter = 0
			self.spr_offset += 1
			if self.spr_offset >= 3 then self.spr_offset = 0
			end
		end
		if self.cur_target == self.l_target then
			self.flip_x = true
		else
			self.flip_x = false
		end
		if abs(self.x - self.cur_target) < 2 then
			self:turn()
		-- see if next step would be off an edge
		-- or into a wall
		elseif self:check_solid(self.speed_x,0) then
			self:turn()
		end
		-- if so, swap targets
		--self.x += self.speed_x
		if abs(p_dist_x) <= 20 then 
			self.charge_timer = 15
			self.state = 1
		end
	--charging swoop
	elseif self.state == 1 then
		self.speed_y = 0
		self.speed_x = 0
		self.spr = 69
		self.flip_x = player_ref.x > self.x
		self.spr_offset = 0
		self.anim_counter = 0
		self.charge_timer -= 1
		if self.charge_timer <= 0 then
			self.state = 2
			self.sw_time = 0
		end
	-- swooping
	elseif self.state == 2 then
		self.spr = 70
		if p_dist_x < 0 then
			self.flp = 1
		else
			self.flp = -1
		end
		self.speed_x = -2.5 * self.flp 
		self.speed_y = cos(self.sw_time/45) * 2
		self.sw_time += 1
		d = abs(self.start_y - self.y)
		if d<2 and self.sw_time>5 then
			self.state = 0
			self.recov_timer = 30
			self.flp *= -1
		end
	-- recovering from shot
	elseif self.state == 3 then
		self.recov_timer -= 1
		if self.recov_timer <= 0 then
			if p_dist > 40 then self.state = 0
			else self.state = 4
			end
		end
	-- fleeing
	elseif self.state == 4 then
		if player_ref.x < self.x then 
			self.cur_target = r_target
		else
			self.cur_target = l_target
		end
		self.charge_timer = 30
		self.state = 0
	end

	self:move_x(self.speed_x)
	self:move_y(self.speed_y)
end

It could definitely use some visual polish on all these animations, but it functions!
ball_ninja_alpha_8

Next time: fleshing out the final exploration zone before the big climax.

2 Likes

An Explorable End Game Zone

Let’s take a look at the high level map document again:

The sections labeled “Attic” and “Grand Hall” have shifted since this original pitch. They felt a little too boxed in and didn’t leave much room for the central mechanic, ice skating, to really shine. So now it looks more like this:

The final area of the game, the overgrown rooftop, has to serve many purposes:

  • This must be the most difficult area to explore, to increase the tension and friction before a final escalation at the boss fight
  • This area must make the most advantage of the skating mechanic, since this is when the player has the most magic
  • The feeling that the plants have completely taken the space over must peak here before fighting the big plant at the end.
  • An area with few to no background tiles, to show off the rising sunset after the dark castle interior.
  • A more open feeling to contrast with the previous library, as well as a more horizontal feeling.

Recall that one of the goals of the level design was to have a series of contrasts. The intro is closed, the next section is open. The castle is closed, the rooftop is open. Each section also alternates in being more horizontally or vertically focused. In order for each section to be memorable, it must also be distinct!

I started out by sketching a few possible things to do in this zone:

Then I implemented the bottom sketch into the actual map, which was pretty quick. PICO-8 handling the map tiles for me makes it simple to just lay out tiles and immediately see results:
Exploration Zone Demo

This kind of works, though I think it has a few issues. Even if we put aside the few technical issues this reveals (actors not properly having transparent backgrounds, the framerate taking a hit when too many actors have been added, the UI not properly clamping to the top of the screen), the gameplay is a little rough. The first wall jump basically requires a careful wall slide, which isn’t necessarily bad but hasn’t been required up to this point. If we want to keep it that way it may behoove us to use that at least once earlier in the level.

The first ice skate is meant to cause a visual cascade of flytraps ineffectually snapping at you as you skate above them. Right now the skating is too fast and the chomp range is too small to pull that off! It’s also the only skating portion of the whole zone, which otherwise doesn’t use much skating at all. Some further tweaks would probably be beneficial.

We are now approaching the point where playtesting this would be useful. Is this zone fun? I’m too close to the source material to tell! I certainly think it could be fun if I fix those technical issues, but I couldn’t say without some feedback! I’ll tweak this a bit further until I’m more or less satisfied with it as first draft, but I’ll not overwork it. Speculation can only get me so far after all.

Next time, we’ll finish fleshing out the exploration zone with some more little challenges and do a little tech polish.

1 Like