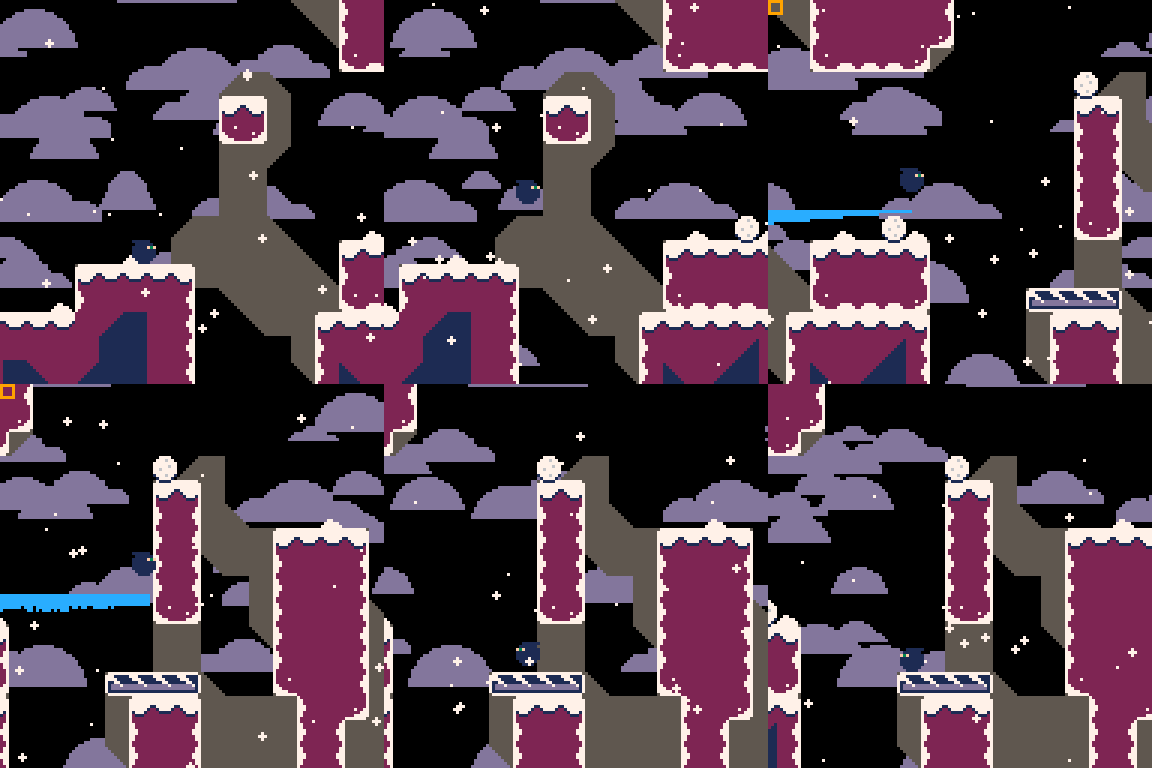
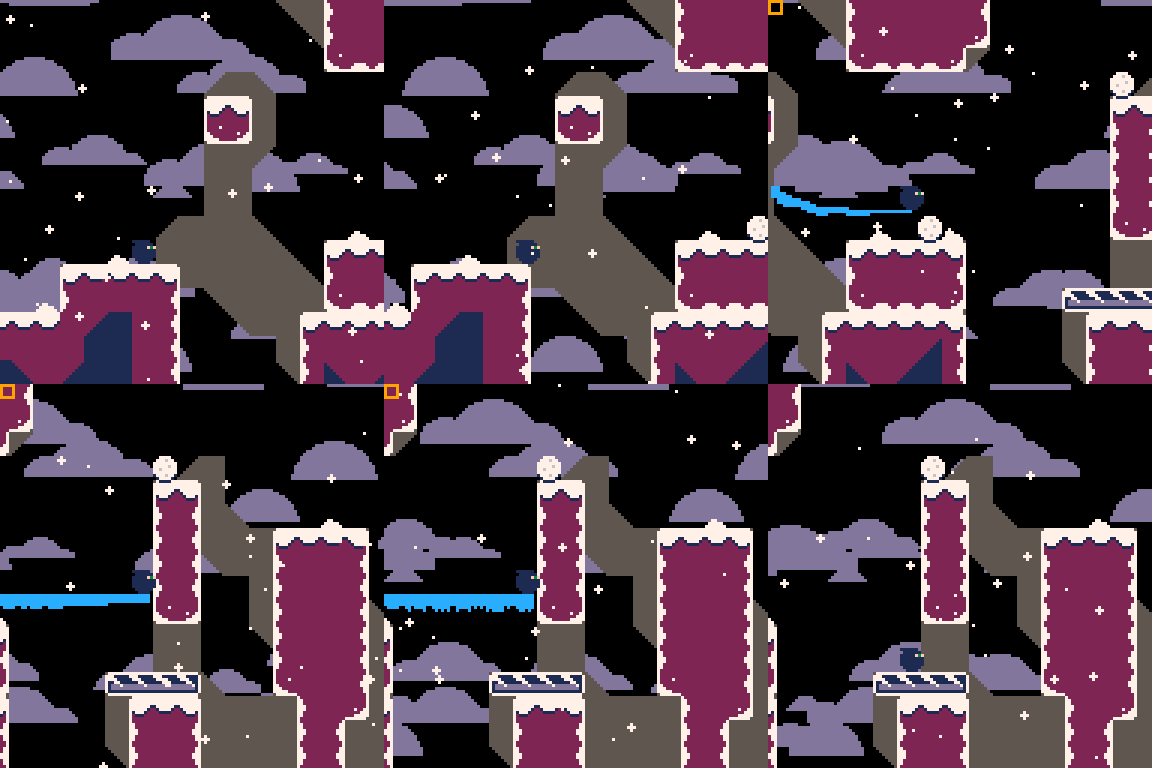
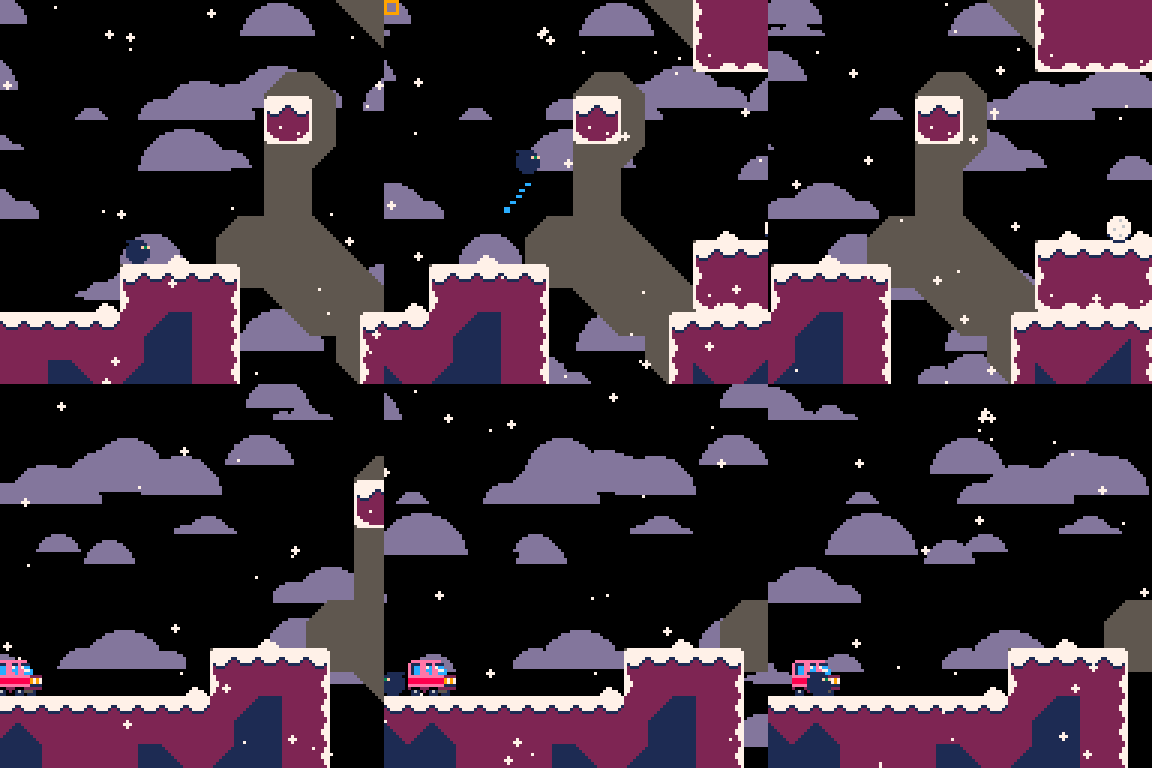
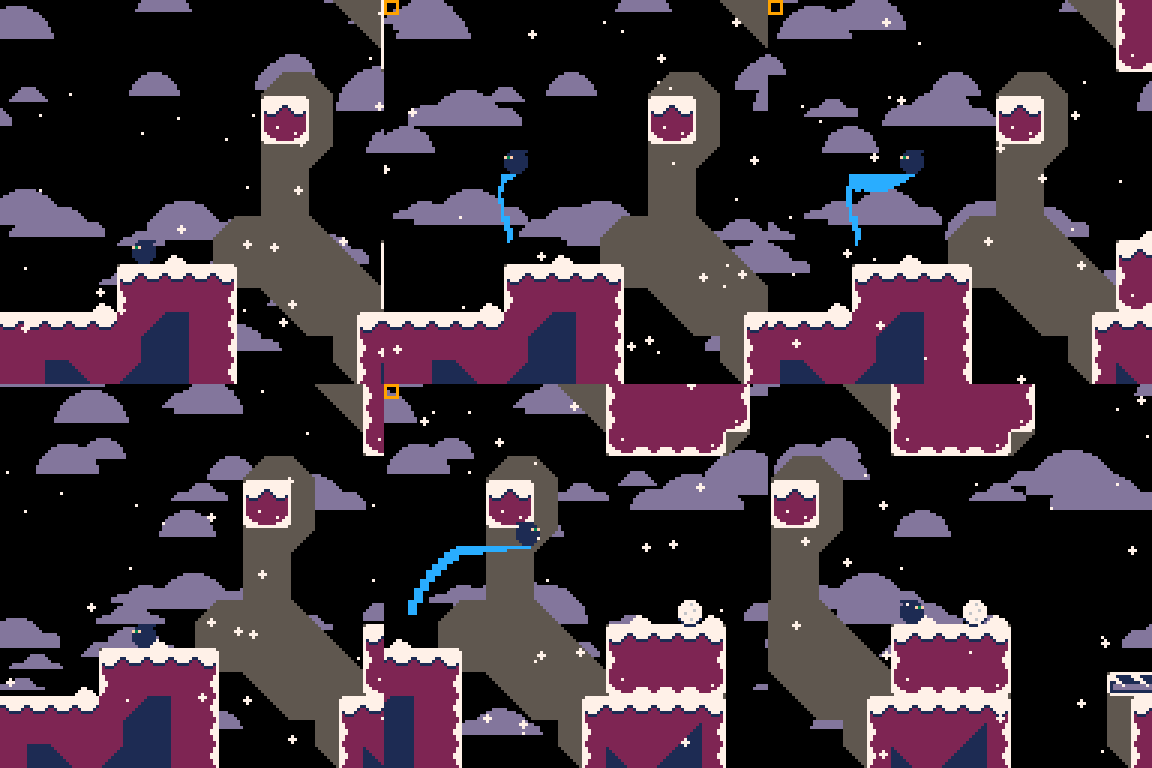
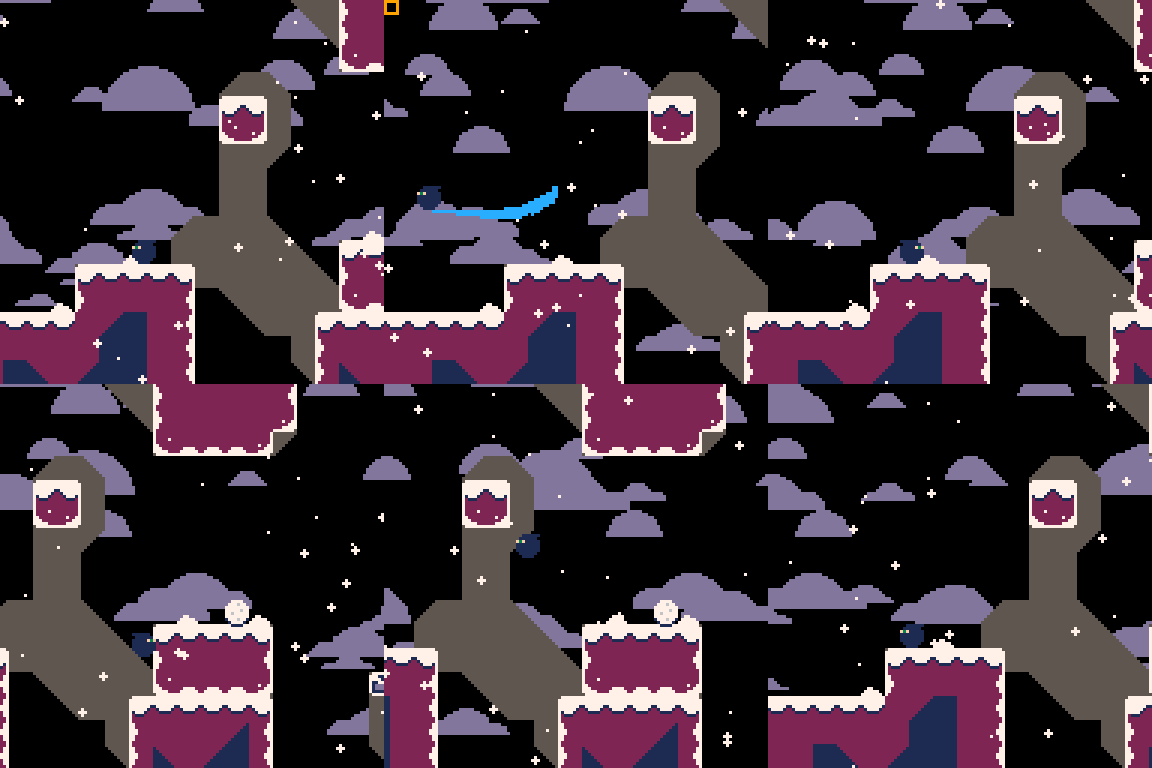
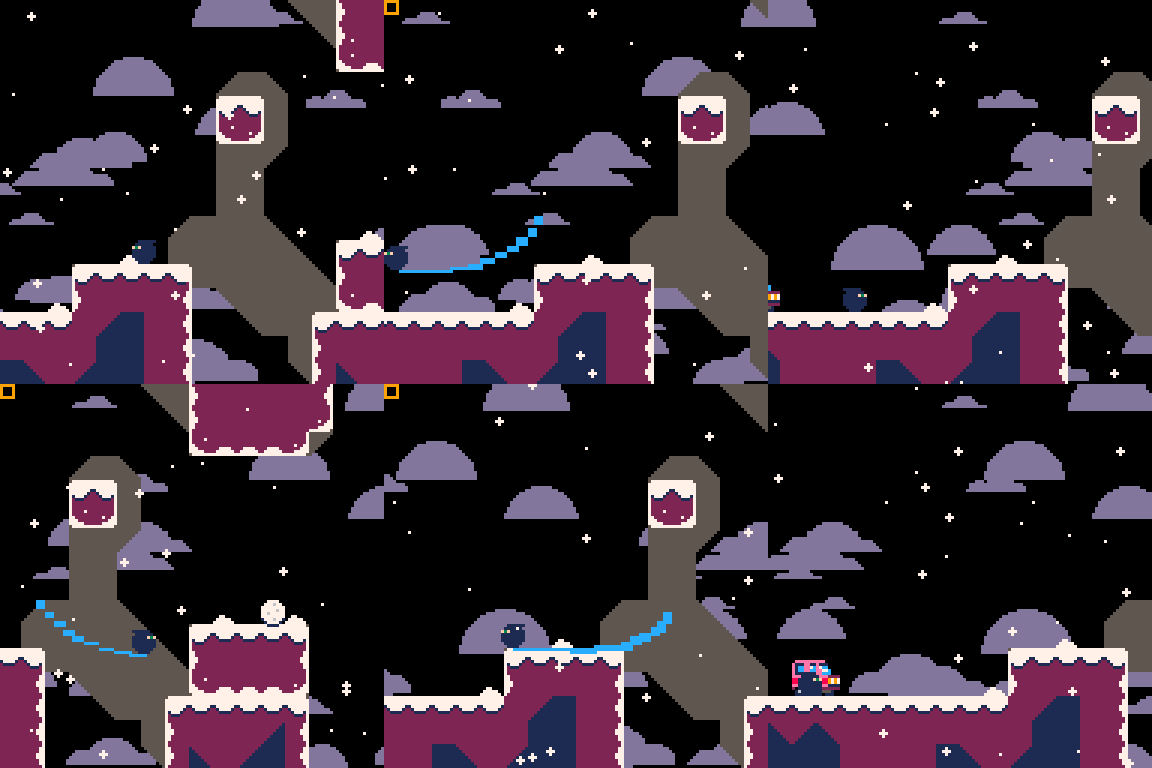
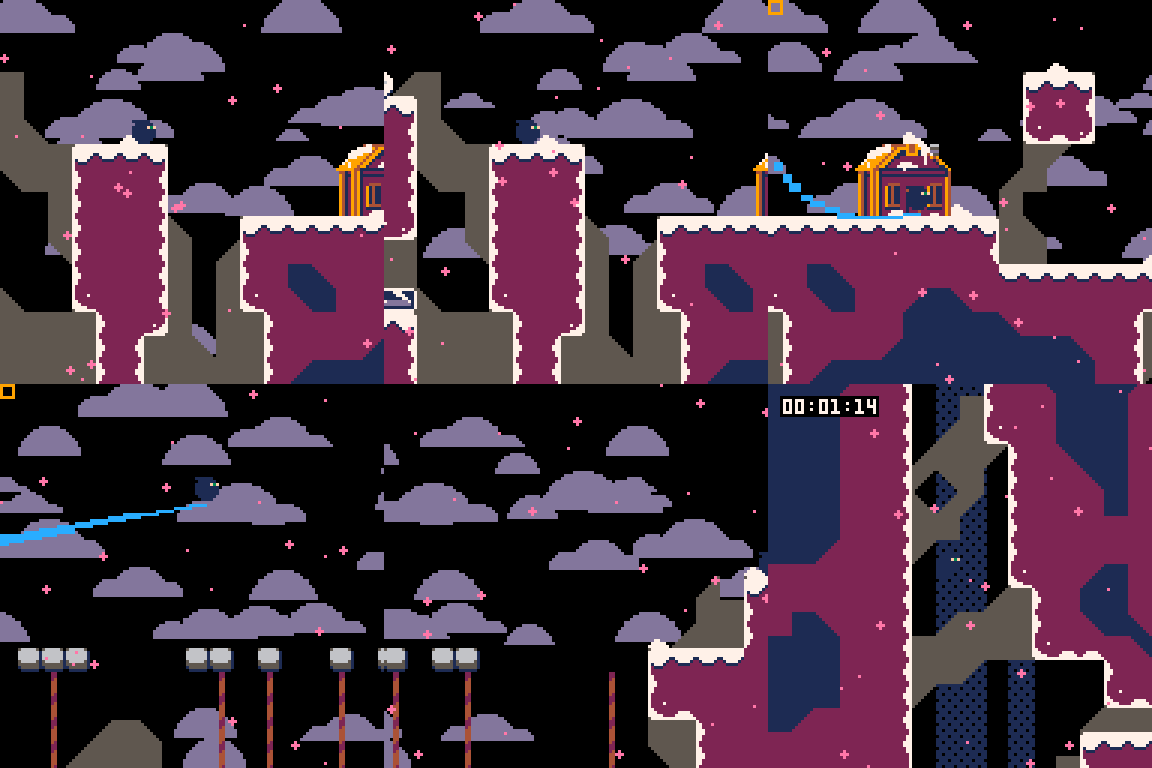
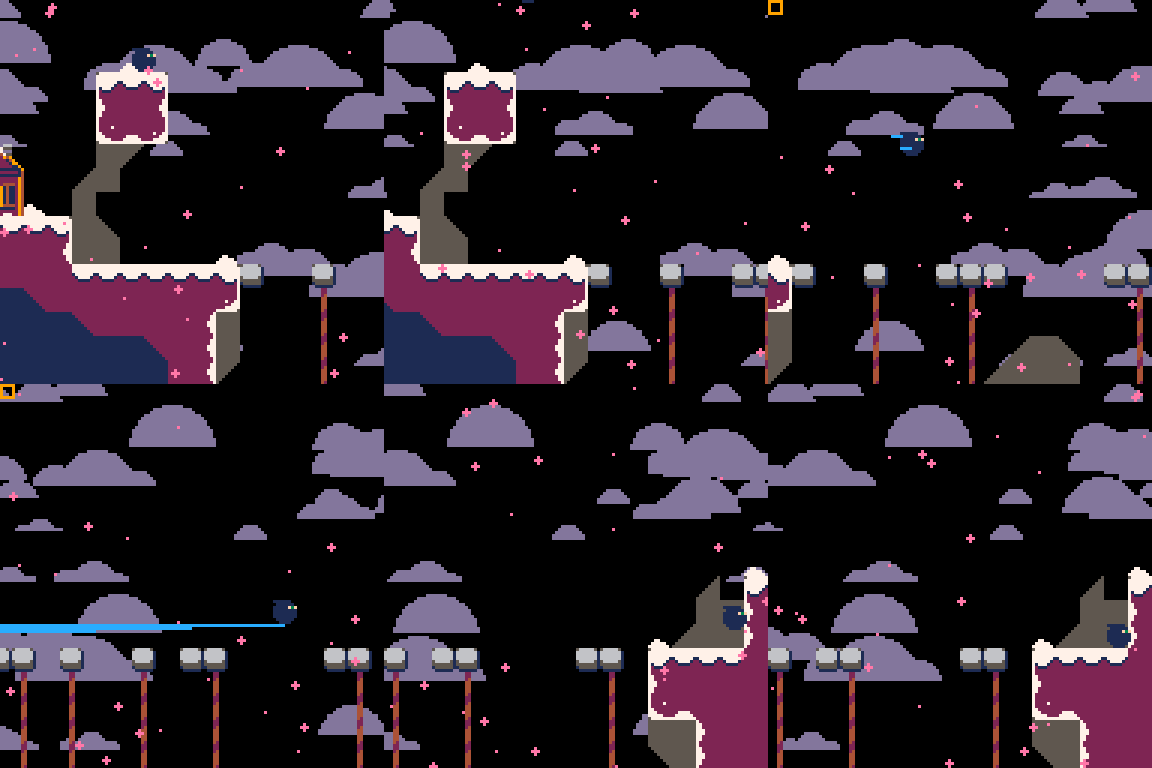
PICO-8 Dev Diary

(You can now get to this thread via url ball.ninja for easy referencing)

If you're here from my GDC Talk, here are the two cart outputs mentioned in that talk:

001 Cart 1

[Temporarily moved; will be edited back in shortly]

Introduction

I'm making a game in PICO-8, and I thought it would be interesting and instructive to detail my dev process as I went. This could also serve as a great place to ask questions to your fellow devs trying to work in PICO-8!

This thread is going to get fairly technical at times, but if you're not super into reading all the technical bits they'll all be tagged with a big ---TECH TALK---- and ---END OF TECH TALK---, so you can just read all the art and design bits. I've already made a little bit of headway, so the beginning of this thread will be a little front heavy. Later updates will be shorter, but first, the groundwork!

The Premise And Placeholder Art

I wanted to make a little ninja action platformer about a character I used to doodle often in the margins of notebooks, Ball Ninja. Ball Ninja is, as you have perhaps inferred, a Ninja who is shaped like a Ball. He has little floaty Rayman hands. He has a sword. This makes him very easy to draw.

As far as the actual content goes, I was thinking a very very small Metroidvania. One, maybe two upgrades and a handful of rooms. These upgrades might come in the form of ice magic, because "What else could someone do with the premise of Sub-Zero: Mythologies?" is a question that's a lot of fun to think about.

To get us started though, we need some sprites. The particular sprite of Ball Ninja began life looking like this:

This certainly looks like a ball, but it only kind of looks like a ninja. This was iterated upon not too much later to look like this:

Hey, now that's both a ball and a ninja! He now stands a mighty 8 pixels tall instead of six, allowing for enough room to give a little definition to his hood. His skin tone was also changed to be a little more natural instead of Simpsons yellow. Will he stay 8 pixels tall? Who knows! He needs some tiles to walk around on though.

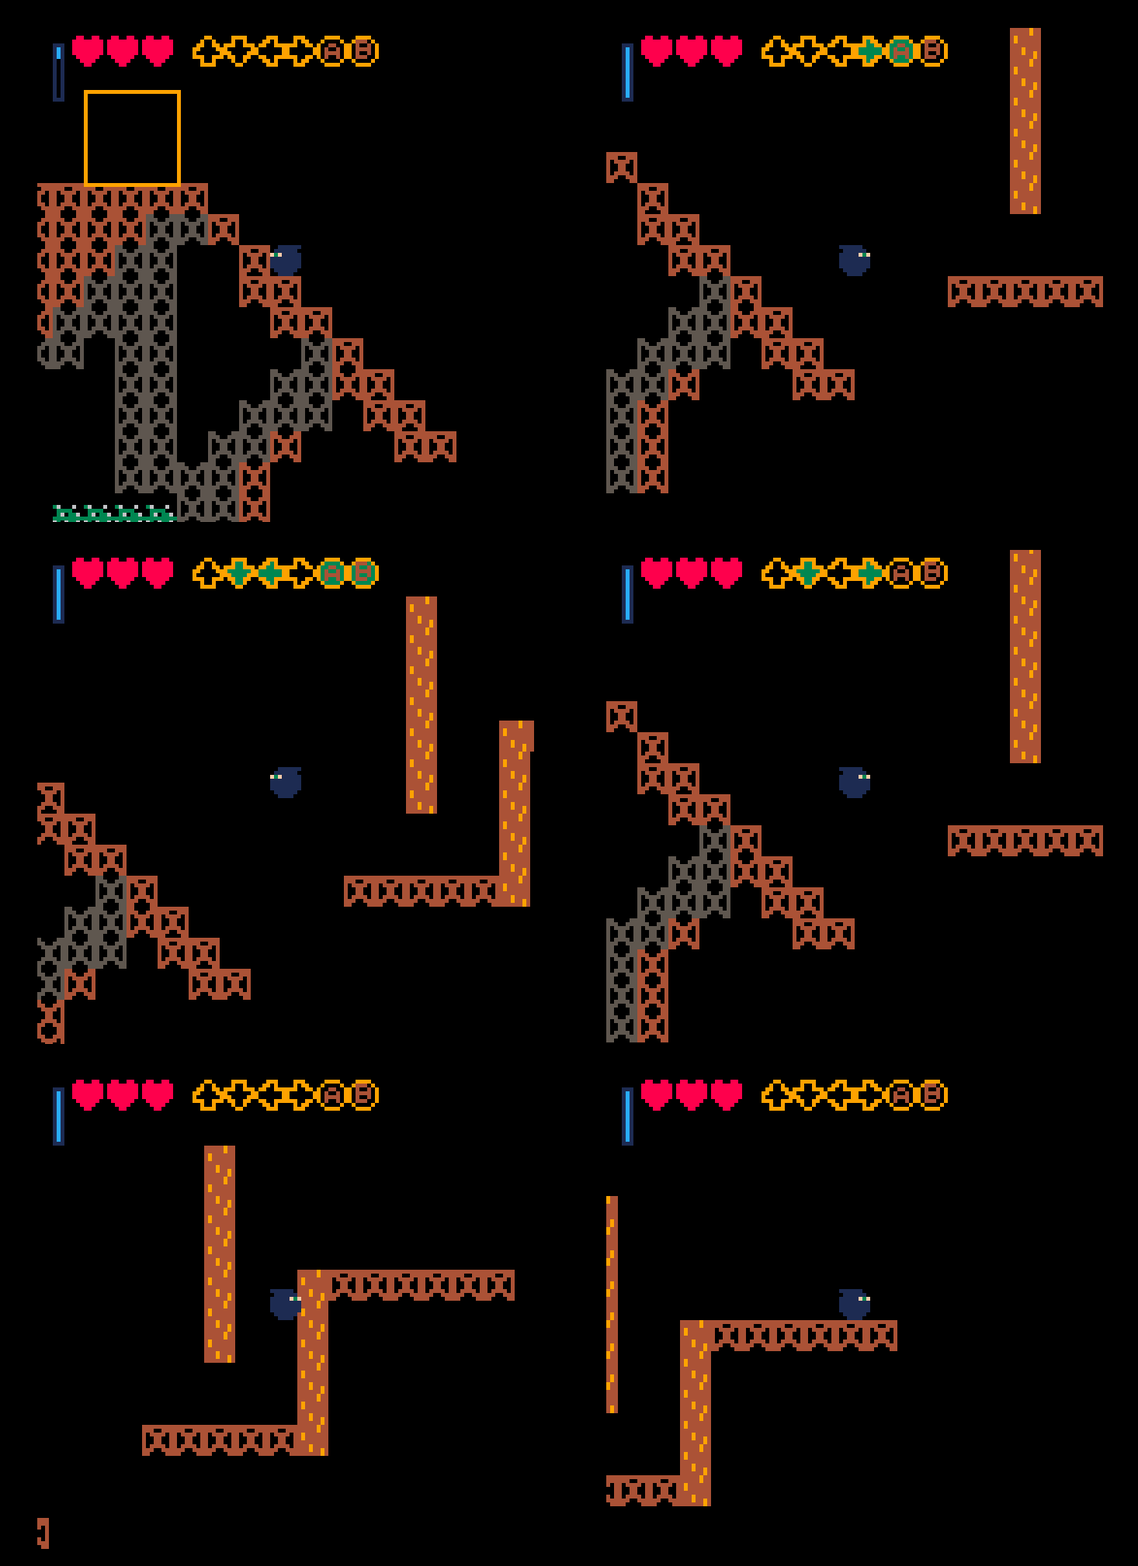
Here's a simple, kinda interesting looking shape. Really I just wanted something which was clearly a tile and drew a simple little 8x8 pattern. Now for a simple level to test out on

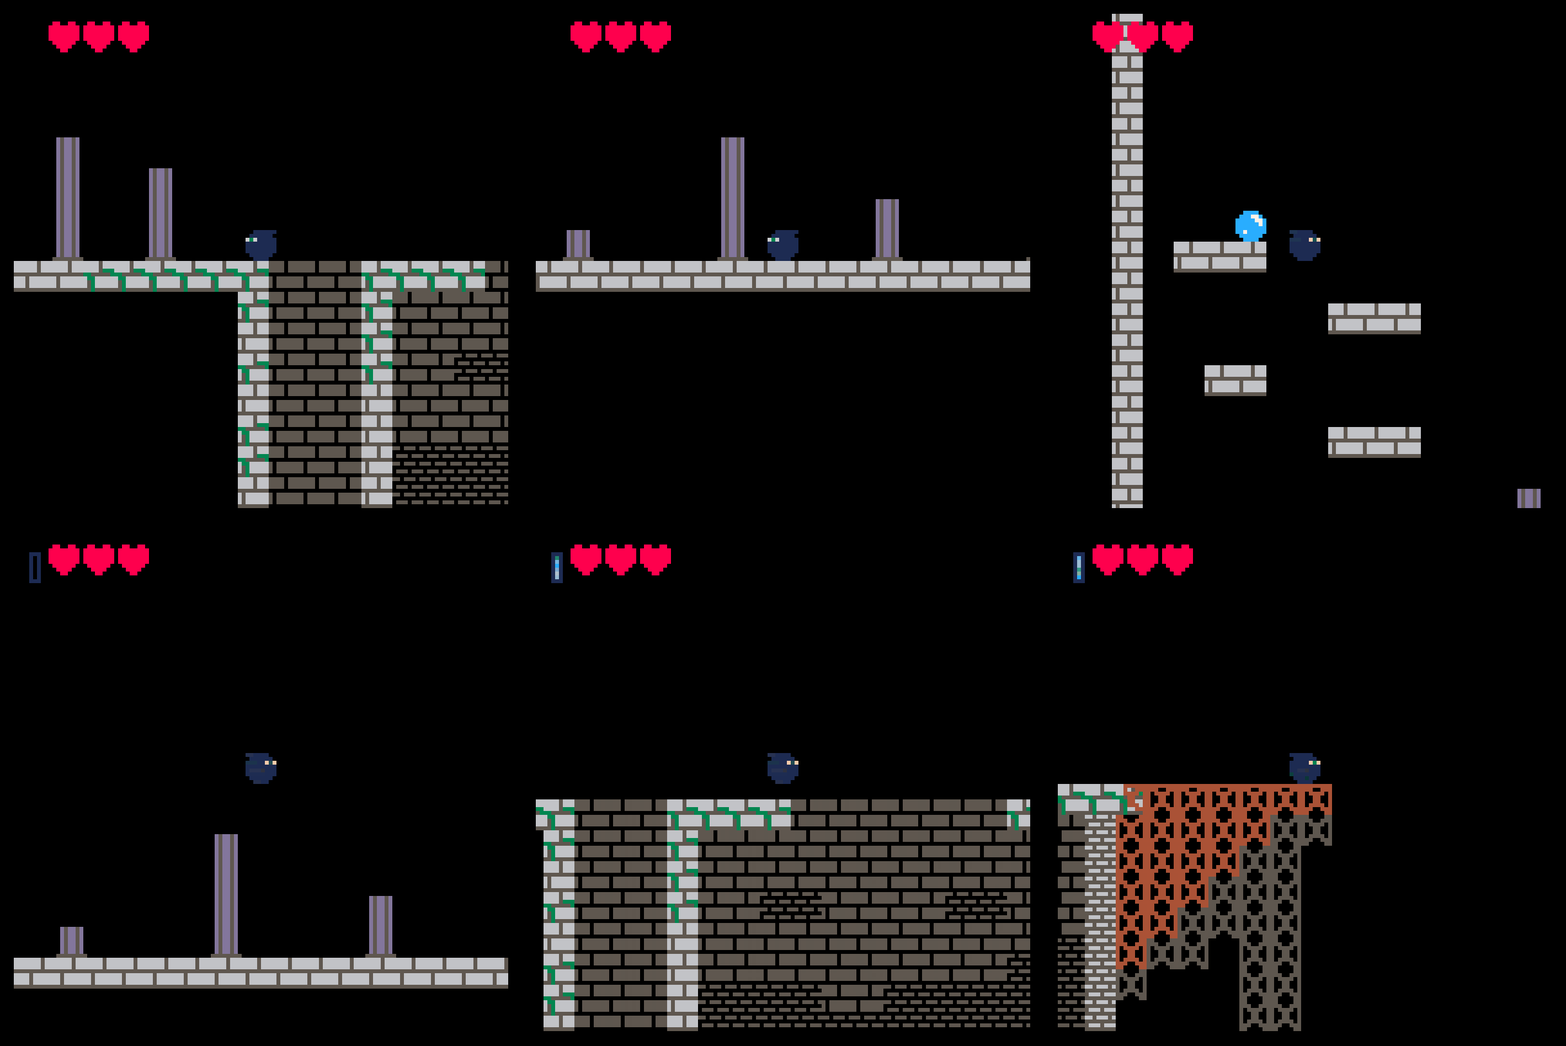
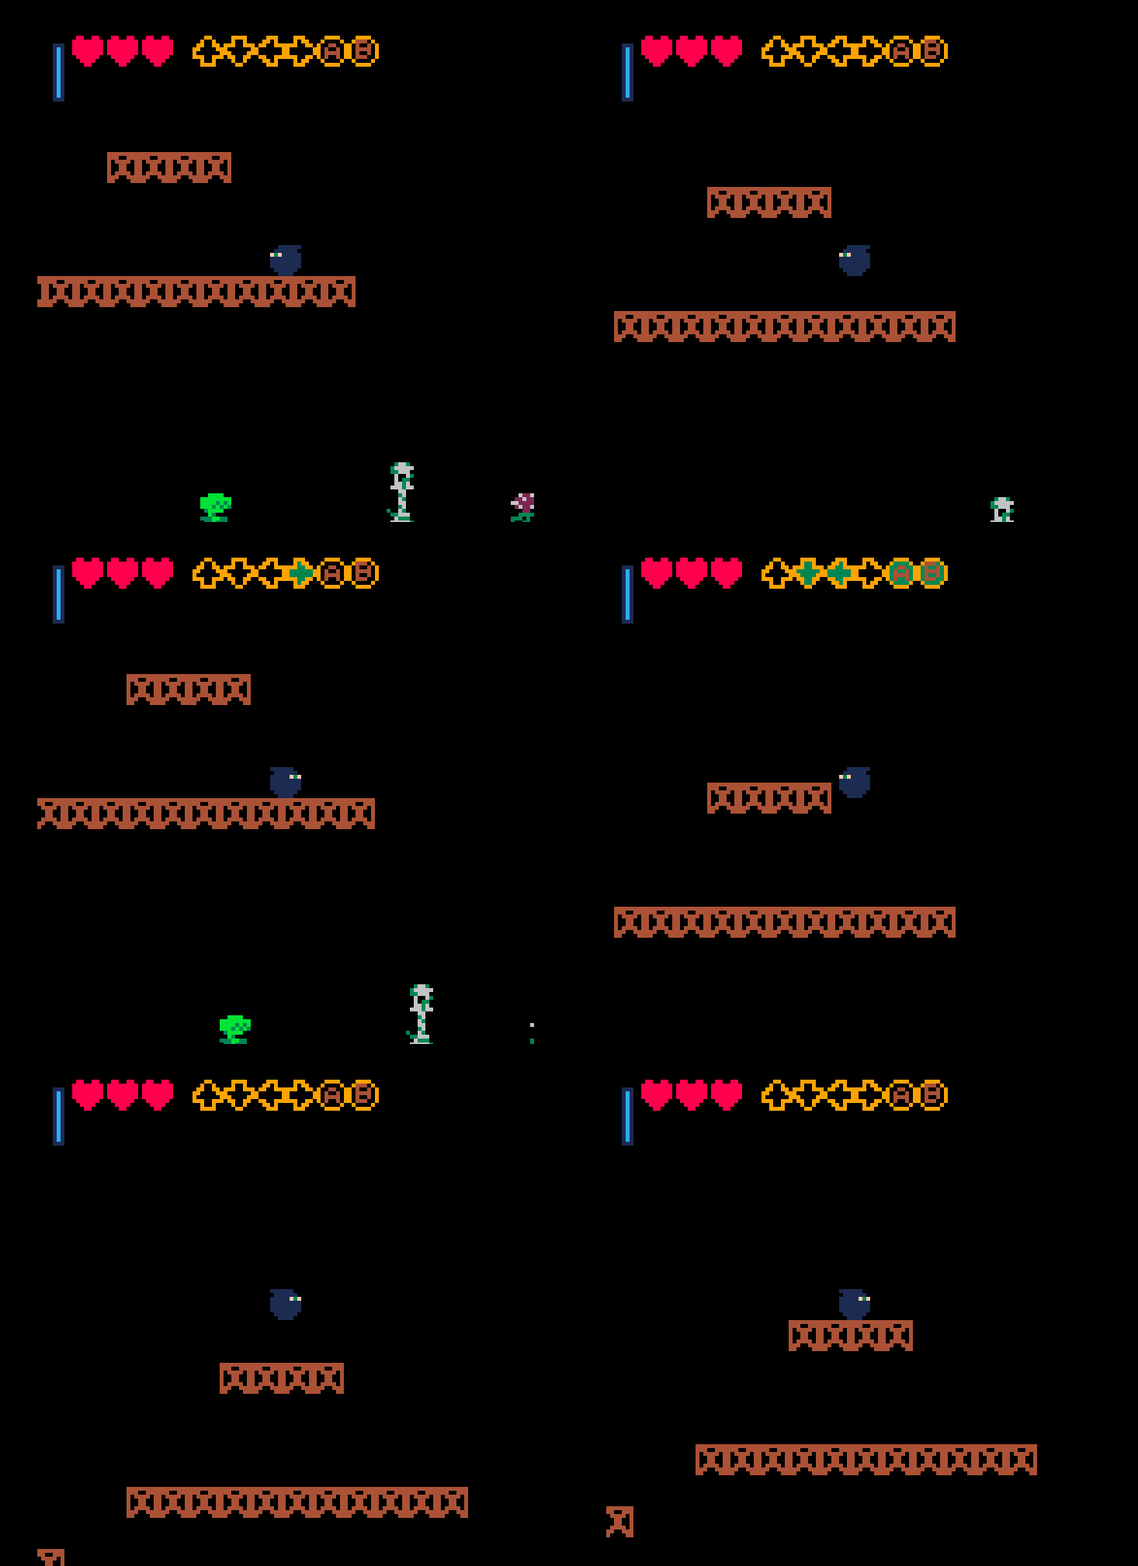
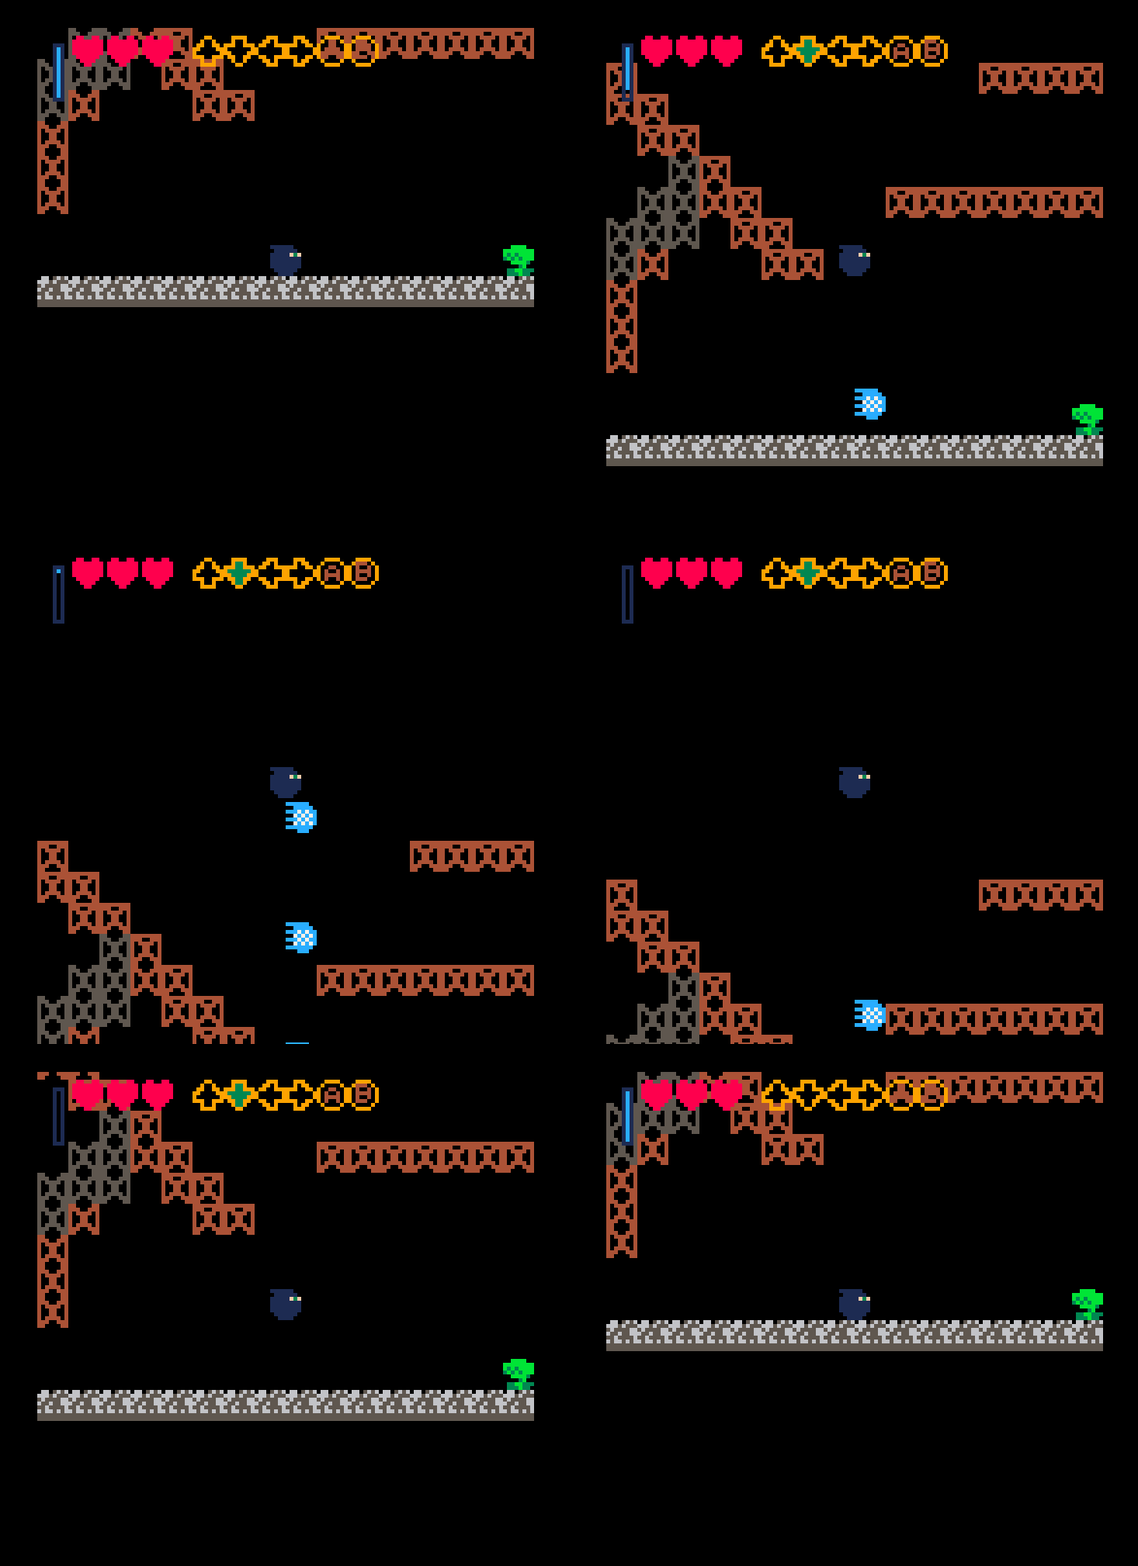
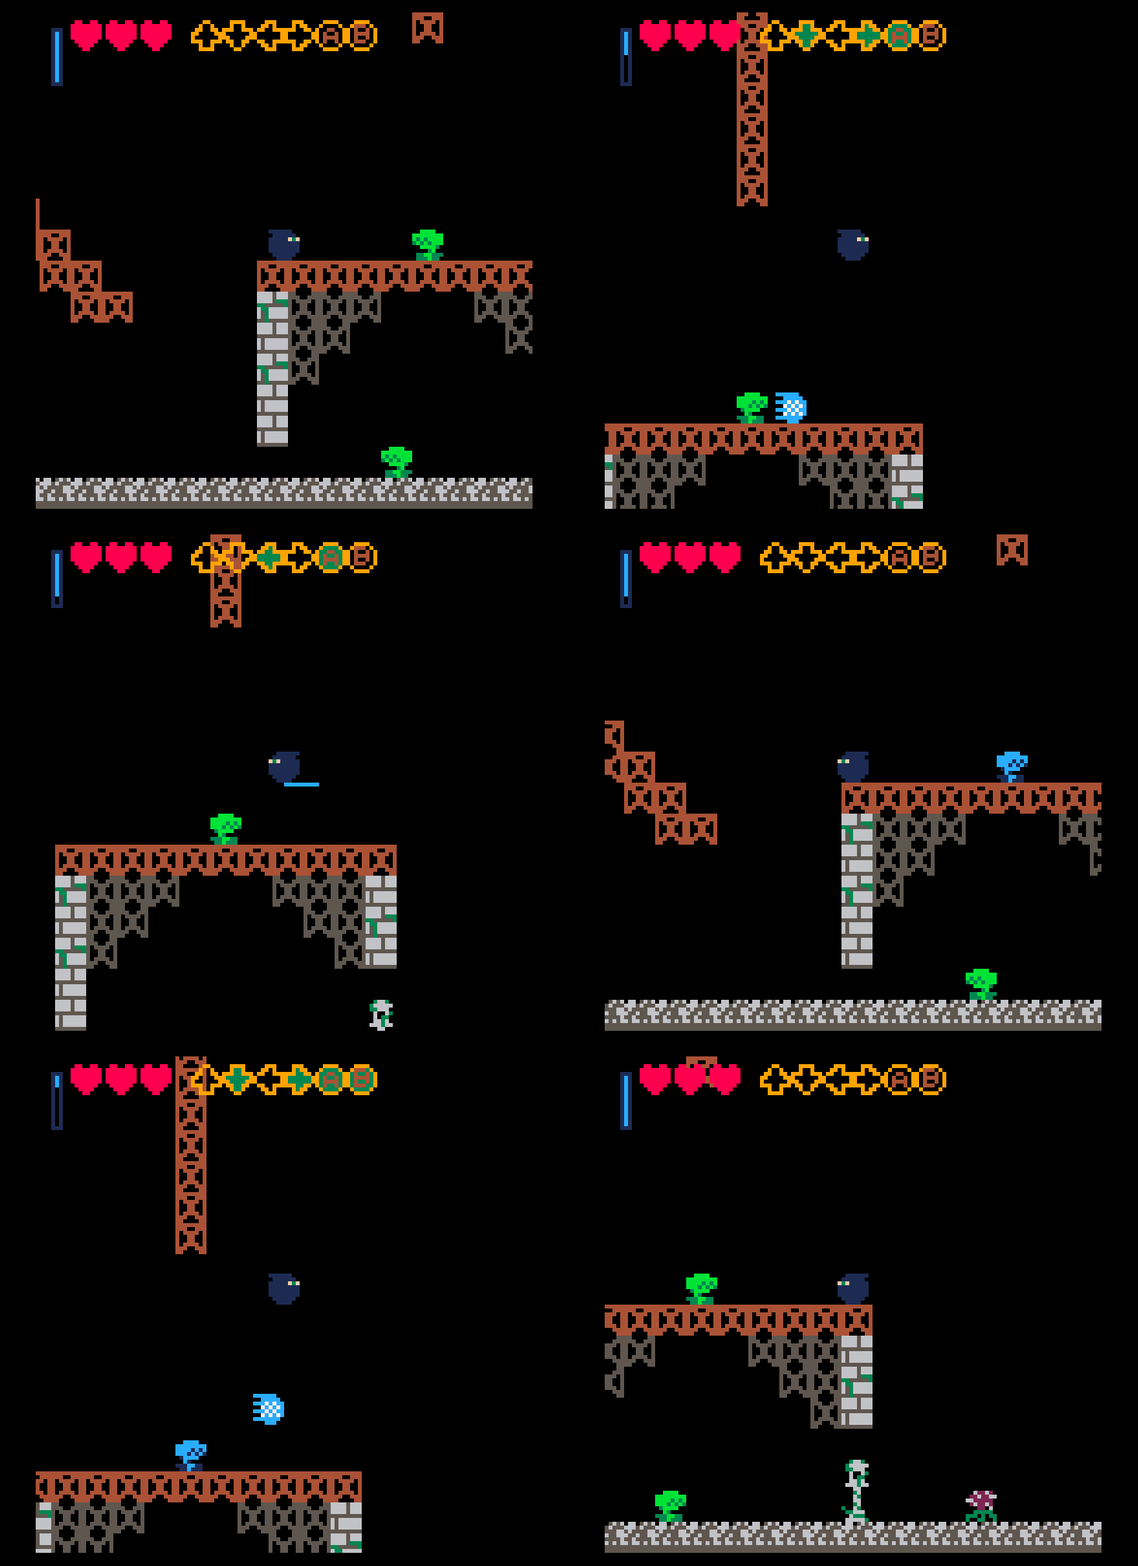
Nothing crazy. We have a few things to jump on, we have walls to run into and floors to try to not clip through. Great! How do we actually do things though?

The prototype code

Fundamentally, there are three things to try to handle at the very, very beginning:

  • Handling player input
  • Handling collision
  • Adding some simple walking and jumping

This will give us the skeleton to add things onto like enemies, platform interactions (wall jumping / climbing up ledges/ etc), and lots of other things. We'll handle input first, and then in the next post we'll do a deep dive comparing how the PICO-8 example collision compares to the PICO-8 Celeste's collision. (They're not as similar as you might think!)

---TECH TALK----
PICO-8 has, effectively, three functions built in for us to consider. They all begin with an underscore to differentiate them from user defined functions. We'll be using _draw(), _init(), and _update60(). (We could also just use _update() if we wanted to run at 30 fps instead of 60, but this is an *action game*!). _init() happens right when the game loads up, _update60() happens once per frame, and _draw() happens after we're done updating. PICO-8 makes it very easy to see if we're either currently pressing a button (of which PICO-8 has only seven, four directions, O, X, and Pause), or have *just* pressed a button, which are helpful for moving and jumping. We'll increment some horizontal speeds for moving and some vertical speeds for jumping. Notably, these speeds aren't inherent properties of anything in PICO-8, so we'll be defining what that means for our player.
---END TECH TALK---

Next post is going to be a very tech heavy one, as we discuss a few different ways of dealing with collision and comparing a few real world examples. Turns out Celeste's collision code is pretty neat! Who knew!

I am a big PICO-8 fan and am looking forward to reading about your progress!

>

@TheFragranceOfDarkCoffee#17012 Turns out Celeste’s collision code is pretty neat! Who knew!

Have you read some of the assumptions Celeste Classic and Celeste AAA make about movement? It’s super cool. There is a great breakdown on the MMG website that I will try to find as an edit. For example, They provide a several frames after stepping off a ledge when you are still allowed to jump.

This is cool! I‘ve always wanted to do PICO-8 but I’ve always been a little intimidated by it.

@Balrog#17032 yeah same! I‘ve done the absolute minimum tinkering with it (downloading, opening, making a sprite) so i’ll be following along. thanks for doing this @TheFragranceOfDarkCoffee !

I hope this thread helps show that making games in PICO is quite accessible!

An empty PICO-8 file has no way of checking whether or not two things are colliding. But not to worry! Once you understand the basics of how it works, you can just modify the collision example (or do your own thing!) to get it running. And heck, maybe your game doesn't even need to check collisions! But what do we mean when we say "colliding" in this context anyway?

---TECH TALK---

An Introduction to Actors and their Collision

Basics of Collision

Let's briefly go over the very, very basics of how to implement 2D collision before comparing ways of building on top of it.

Determining if one thing is overlapping with another thing (or colliding) is a generally useful thing to know in a lot of different kinds of games. We'll begin with the most straightforward method, representing the shape of all the things in your game as rectangles.

Consider the following two rectangles with points on the printed PICO-8 X/Y screen coordinates, where the upper left coordinate is position 0,0:

How might you check that the two are overlapping in code? It's pretty easy, since we know where all the corners are! Essentially, we can check each corner of rectangle A against the tops and sides of rectangle B like so:

If this point is below the top of B and above the bottom of B, and is further to the right than the left edge of B and further to the left than the right edge of B, then it must be inside rectangle B

As long as this is true for one point of rectangle A, we can say they are colliding. We don't actually need to store all four points of our rectangles, though! We only need to know the center point, the width, and the height. From there we can calculate each point and then make the same check. Note that the above implementation does not cover the case where two rectangles are overlapping but with none of the corners touching (think a + sign, where the middles of the two rectangles are touching but not the corners). This is fairly easy to add and is left as an exercise for the reader.

If you were so inclined, you could also fairly easily add collision with circles by using the distance formula to determine if a point is within a circle.

How does this work for your game though? Simple! When you want to know when two things in your game are colliding, check a rectangle around them! (Or slightly inside/outside of them, but don't worry about that for now)

If your game consists only of stationary rectangles where you need to know if they're overlapping, congratulations! You're done! The rest of this post will assume that your game has rectangles which may move. How are you supposed to keep track of all these rectangles, anyway?

Intro to Actors

Your game has a lot of things in it. Maybe it has something controlled directly by the player. Maybe it has enemies, or collectables. Regardless of what kinds of things you put into your game, the different kinds of things share many traits. They all need to be drawn to the screen. They likely all have a collision rectangle. Perhaps they can move.

It's helpful to group together all the common traits of all these things into an abstraction. We'll call them "actors", which is pretty common game engine talk for "anything in your game that isn't just a wall". This will make it easier to ask any given object what its basic properties are (its position, its velocity, whether or not it can be passed through or picked up) without having to first check what it is. The PICO-8 collision demo defines its actors like this: (original code by Zep, additional annotations by me)

actor = {} -- all actors

-- make an actor
-- and add to global collection
-- x,y means center of the actor

function make_actor(k, x, y)
-- We'll call our actor "a"
	a={
		-- k is what number sprite on the sprite sheet we use
		k = k,
		-- The x and y coordinates
		x = x,
		y = y,
		-- The x and y velocity
		dx = 0,
		dy = 0,
		-- How many frames of animation this sprite has		
		frame = 0,
		t = 0,
		friction = 0.15,
		bounce  = 0.3,
		frames = 2,
		
		-- half-width and half-height
		-- slightly less than 0.5 so
		-- that will fit through 1-wide
		-- holes.
		w = 0.4,
		h = 0.4
	}
	add(actor,a)
	
	return a
end

Why bother making a list of all your actors like this? Well it lets us do things like this:

function _draw()
	cls() -- Clear the screen
	map() -- Draw the map
	foreach(actor,draw_actor) -- Call the function "draw_actor" on each actor
end

Saves you a lot of time!
---END TECH TALK---

This post has already gotten quite long, and we haven't even touched on coordinate systems, or how PICO-8 stores sprites! And I said we were gonna look at Celeste here! What gives!

I intended to put all that stuff in here but I realized there are some points that we should probably cover before we get to that. So, next we'll talk about how PICO-8 stores sprites, how it stores a map, and how to draw them.

If you have questions, let me know! Stay tuned for a look into the mysterious spr() function.

Sprites, Maps, and Coordinates

In order to understand the rest of the collision demo, you should know how PICO-8 stores image data, map data, and how those things can be drawn to the screen at varying positions. It should also be noted that the PICO-8 screen resolution is 128x128.

Sprites

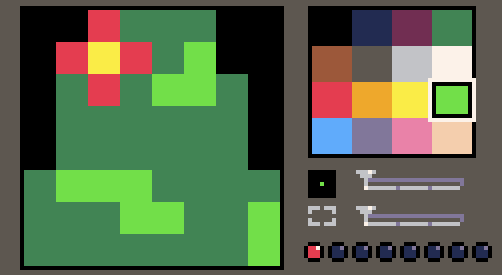
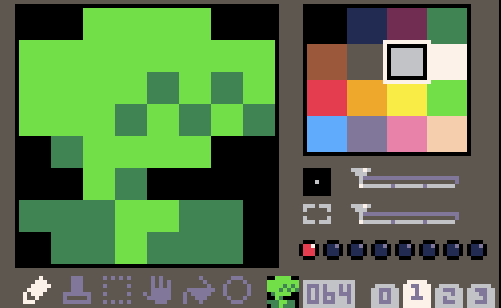
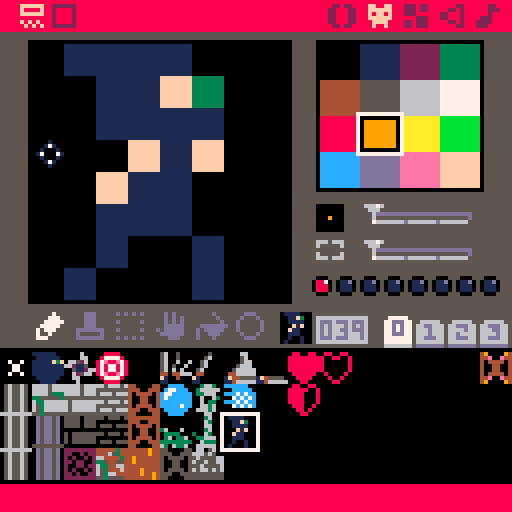
PICO-8 can store 255 8x8 images in its sprite sheet. Each 8x8 square of pixels on the sprite sheet is given an index to make it easier to retrieve and draw it. Consider Ball Ninja:

Most of this screen will be pretty self explanatory if you poke around on it (a canvas to draw on, various simple art tools, etc), so let's focus on the highlighted sections.

The green rectangle represents this sprite's flags. A flag is just a bit you can turn on or off and then later check (or set, if you are so inclined). Later on, we'll be turning on the second bit (bit 1) for our wall tile as a way of saying that it is solid. These bits don't mean anything inherently, but allow you to store some information cheaply and easily without bloating your code. You might be setting bit 1 to true as a way of saying "this is collectable" or "this is an enemy". What these bits mean is up to you!

The orange rectangle is drawn around our sprite number. The revised Ball Ninja sprite is noted here as sprite 2. This makes it easy to use later.

The blue rectangle is drawn around the pages, which are just a convenient way to group sprites in the editor. We're editing the sprites of page 0 right now, but the four pages are contiguous on the back end.

Note that next to Ball Ninja's sprite on the sprite sheet there's a big scary red jiangshi who takes up more space! Your sprites can be bigger than 8x8 if you'd like, it just takes a little extra finagling to draw them. (This particular big red circle is Ball Ninja's nemesis, who went unnamed in my school doodles but fought with a spiked chain and I assure you it was *very cool*.)

Note that we're also using the sprite sheet to store our map tiles. Which chunks of the sprite sheet we use to build a map and which chunks we use to represent game objects is up to us. Here I've moved the map tile to the second page of the sprite sheet and set flag 1 to true.

Speaking of,

Maps and coordinates

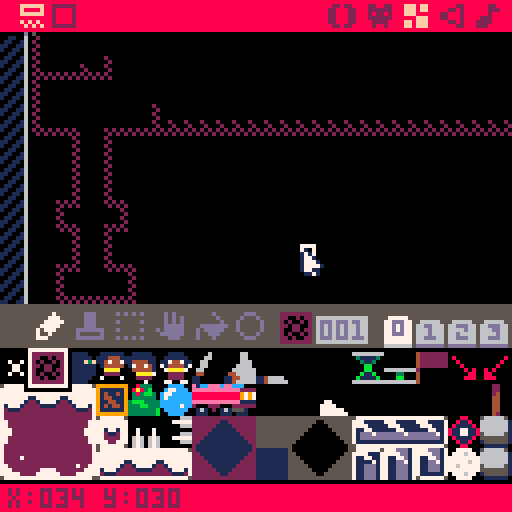
Here's the map editing panel. It lets you take sprites and put them into a map.

Here we've taken sprite 64 and placed it to make a simple platforming area.

Now, if we scroll up to the upper left section of the map:

Note the coordinates in the bottom left portion of the screen. The upper left tile of the map has an X and Y value of 0. As we move to the right, the X value of a tile increases and as we move down the Y value increases. Each tile of the map is 8x8 pixels. Here it is important to stress something: PICO-8 has two different sets of coordinates; map X/Y and screen X/Y! Sometimes we will want to check what tile is at a tile position. Sometimes we will want to draw something at a particular screen position. It is important not to mix these up in your collision math!

Drawing Sprites and the Map

Rendering things to the screen is easy in PICO-8! Here's a very simple usage of the built in _draw() function.

function _draw()
	cls() -- Clear the screen
	map() -- Draw the map
end

cls() is a built in function which will clear the screen. If you don't do this, then anything you drew last frame will stick around and you'll just draw on top of that. map() will render your map. If you don't pass it any arguments, it'll put tile 0,0 at the upper left corner of the screen. You can read more about the other things you can do with map() (and a whole lot of other, incredibly useful things) in the official PICO-8 manual or the very helpful PICO-8 wiki.

Drawing a sprite is similarly easy. Remember though that drawing a sprite uses screen coordinates for X/Y, not map coordinates. Let's modify the above code to also draw Ball Ninja:

function _draw()
	cls() -- Clear the screen
	map() -- Draw the map
	spr(2, 50, 50) -- Draw sprite 2 at screen coordinate 50, 50
end

Note that if you need to convert between screen coordinates and map coordinates you can easily do so. Screen coordinates are scaled up by eight compared to a map position. So the upper left pixel of tile 1,1 is at screen coordinates 8,8, the corner of tile 2,2 is at 16,16 and so on. This will be important to remember for next time when we talk about how to store and check coordinates for actors, especially when comparing against map tiles.

For next time, if you want to follow along in the demo code and you have a copy of PICO-8, boot it up and run the following commands:

  1. INSTALL_DEMOS
  2. CD DEMOS (cd stands for “change directory”)
  3. LOAD COLLIDE.PB

You now have the collision demo loaded into PICO-8 and are free to poke around its code, sprites, map, etc by pressing the `Esc` key. Note that this is true for all PICO-8 carts, not just the demos! If you can load it into the console, you can go look at the source. How cool!

How The Collision Demo Works

---TECH TALK---

The collision demo is interesting in that it uses entirely **map coordinates** for its collisions. Let's take a peek!
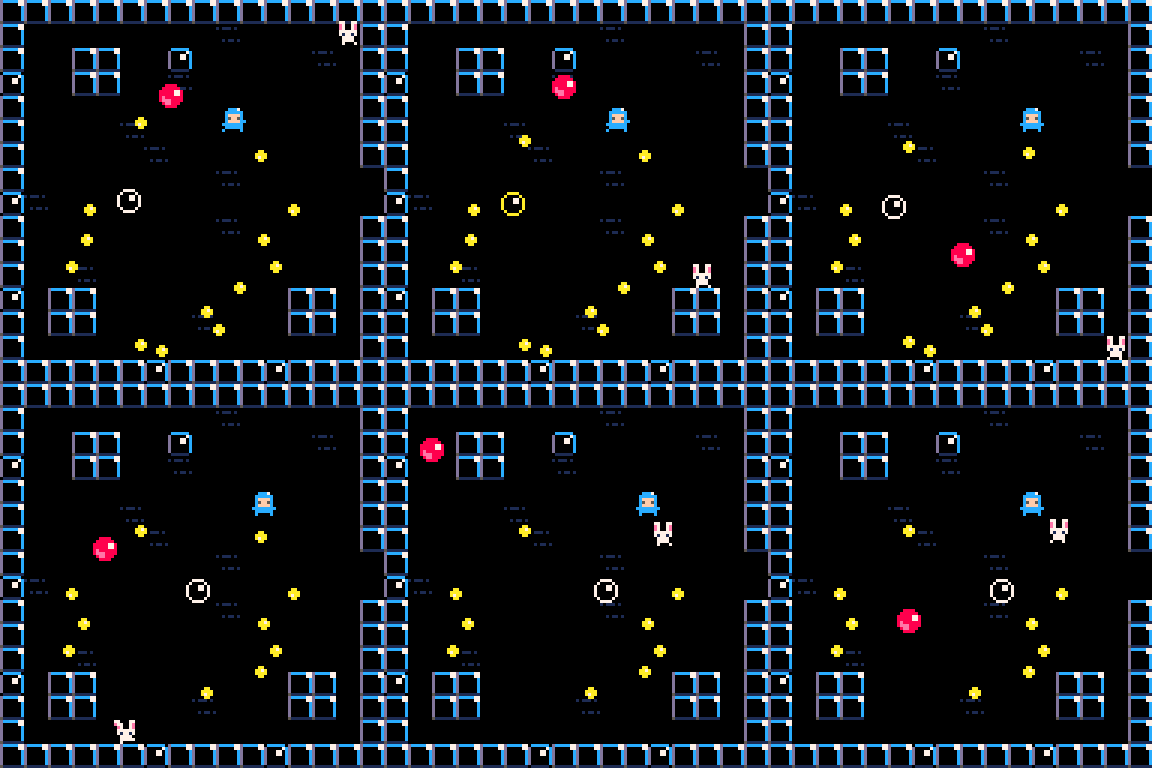
001 example

Here you can see a short snippet of how the demo looks. The player character bunny can run around and be stopped by walls or other solid objects. They can pick up coins, and things can bounce off of each other. Each of these items, the player, the little blue fellow, the red ball, the bubble, and the coins, are all actors in our code.

Here's how this demo defines its actors:
(original code by Zep, additional comments by me)

actor = {} -- all actors

-- make an actor
-- and add to global collection
-- x,y means center of the actor
-- in map tiles
function make_actor(k, x, y)
	a={
		k = k,      -- sprite number on the sprite sheet
		x = x,      -- Map X position
		y = y,      -- Map Y Position
		dx = 0,     -- X Speed
		dy = 0,	    -- Y Speed      
		frame = 0,  -- current frame offset
		t = 0,      -- timer for how long this actor has existed (unused)
		friction = 0.15,
		bounce  = 0.3,
		frames = 2, -- total frames of animation
		
		-- half-width and half-height
		-- slightly less than 0.5 so
		-- that will fit through 1-wide
		-- holes.
		w = 0.4,
		h = 0.4
	}
	
	add(actor,a)
	
	return a
end

The _update() function (which runs every frame) is quite simple:

function _update()
	control_player(pl)
	foreach(actor, move_actor)
end

control_player checks for button inputs and increases the player's dx or dy depending on which arrow key was pressed.

The real meat of how this engine works come in the form of move_actor and subsequently the functions it calls.

function move_actor(a)

	-- only move actor along x
	-- if the resulting position
	-- will not overlap with a wall

	if not solid_a(a, a.dx, 0) then
		a.x += a.dx
	else
		a.dx *= -a.bounce
	end

	-- ditto for y

	if not solid_a(a, 0, a.dy) then
		a.y += a.dy
	else
		a.dy *= -a.bounce
	end
	
	-- apply friction
	-- (comment for no inertia)
	
	a.dx *= (1-a.friction)
	a.dy *= (1-a.friction)
	
	-- advance one frame every
	-- time actor moves 1/4 of
	-- a tile
	
	a.frame += abs(a.dx) * 4
	a.frame += abs(a.dy) * 4
	a.frame %= a.frames

	a.t += 1 -- unused
	
end

Essentially, in X and Y, only move in that direction if doing so would not cause you to overlap with something solid. If it would, instead bounce off of that thing. This works pretty well and can be adapted into a great many kinds of games where things move around in real time. We'll talk more about the limitations of this system later on. Let's dig into "solid_a", to really understand when an actor is allowed to move somewhere or not.

-- checks both walls and actors
function solid_a(a, dx, dy)
	if solid_area(a.x+dx,a.y+dy,
				a.w,a.h) then
				return true end
	return solid_actor(a, dx, dy) 
end

Simply put, if we check an actor a who is moving with velocities dx and dy against two other functions, solid_area and solid_actor. If either of these return true, then solid_a will return true.

solid_area does a series of checks on the four corners of this object's collision rectangle, checking from (x - width) to (x + width) and (y - height) to (y + height). Our X/Y coordinate in this system then represents the center of our actor and their hitbox is similarly centered.

-- solid_area
-- check if a rectangle overlaps
-- with any walls

--(this version only works for
--actors less than one tile big)

function solid_area(x,y,w,h)
	return 
		solid(x-w,y-h) or
		solid(x+w,y-h) or
		solid(x-w,y+h) or
		solid(x+w,y+h)
end

This series of checks is essentially the simple rectangle overlap discussed before, but calculated outwards from the center to find the points of our rectangles.

solid() utilizes a pair of very common PICO-8 funtions, mget() and fget(). mget() checks the map tile at map coordiante x,y and returns the sprite number it finds. fget() tells you what flags have been set for that sprite.

-- for any given point on the
-- map, true if there is wall
-- there.

function solid(x, y)
	-- grab the cel value
	val=mget(x, y)
	
	-- check if flag 1 is set (the
	-- orange toggle button in the 
	-- sprite editor)
	return fget(val, 1)
	
end

In an earlier Ball Ninja example, we're checking to see if a map tile has flag one (the orange flag), which we choose to represent a solid wall.

solid_actor() on the other hand is more complicated. After all, any of the other actors in our scene could be moving at any velocity! How do you know if a given actor is about to bump into any other? Simply, you check every actor against every other actor it could bump into every single frame. This function is comparatively long, so I've added some comments to it to explain as we go.

-- true if a will hit another
-- actor after moving dx,dy

-- also handle bounce response
-- (cheat version: both actors
-- end up with the velocity of
-- the fastest moving actor)

function solid_actor(a, dx, dy)
	for a2 in all(actor) do
	       -- Make sure we're not comparing collision against ourselves. After all, both the actor 
	       -- we're checking and the actor we're comparing against are part of the same list, so without 
	       -- this check we'd always register a collision against ourselves.
		if a2 != a then
		
		        -- Store the differences between where our actor a will be and the compared actor a2 currently is
			local x=(a.x+dx) - a2.x
			local y=(a.y+dy) - a2.y

                        -- We use the absolute value here to avoid doing two checks. We only care that the difference 
                        -- between the two actors is less than their widths. Consider this example:
                        
			if ((abs(x) < (a.w+a2.w)) and
					 (abs(y) < (a.h+a2.h)))

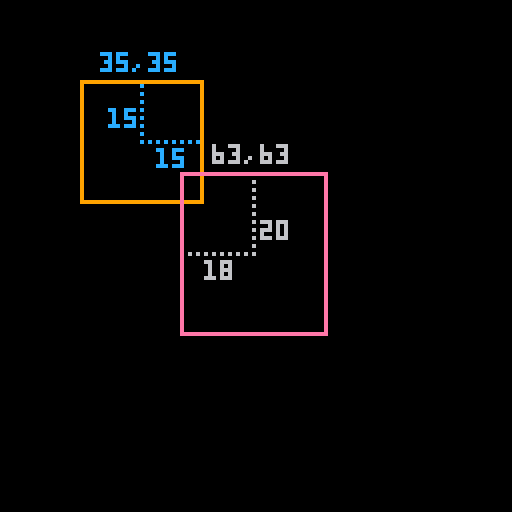
abs(35 - 63) = 28

width1(15) + width 2(18) = 33

33 > 28, so they are overlapping on the X axis by five pixels. If the same is also true for Y, the two rectangles are overlapping. Continuing,

			if ((abs(x) < (a.w+a2.w)) and
					 (abs(y) < (a.h+a2.h)))
			then 
				-- If we reach here, the two will collide. 
				-- moving together?
				-- this allows actors to
				-- overlap initially 
				-- without sticking together    
				
				-- process each axis separately
				
				-- along x
				
				if (dx != 0 and abs(x) <
				    abs(a.x-a2.x))
				then
					
					v=abs(a.dx)>abs(a2.dx) and 
					  a.dx or a2.dx
					a.dx,a2.dx = v,v
                                        -- collide event is a function used to determine if one of these
                                        -- actors should remove the other when they collide
                                        -- (e.g. A player picks up a coin)
                                        -- or if they should just bounce off each other
					local ca=
					 collide_event(a,a2) or
					 collide_event(a2,a)
					return not ca
				end
				
				-- along y
				
				if (dy != 0 and abs(y) <
					   abs(a.y-a2.y)) then
					v=abs(a.dy)>abs(a2.dy) and 
					  a.dy or a2.dy
					a.dy,a2.dy = v,v
					
					local ca=
					 collide_event(a,a2) or
					 collide_event(a2,a)
					return not ca
				end
				
			end
		end
	end

       -- If we reach here, we've checked against every other actor and there's no collisions
	return false
end

So simply put, if we're about to move into a wall we bounce, and if we're about to move into an actor then figure out what that interaction should be based on who those actors are.

One small note about this collision system before we go: This uses X and Y as the center of our actors. However, the draw function spr() uses X and Y as the upper left corner of a sprite. So for this example, where all of our actors are 8x8, we can offset by 4 in each direction after we convert their coordinates from map to screen to draw the actors in the correct position.

function draw_actor(a)
	local sx = (a.x * 8) - 4
	local sy = (a.y * 8) - 4
	spr(a.k + a.frame, sx, sy)
end

---END TECH TALK---

Limitations of this system

Overall this system works pretty well and can be adapted for a great number of different games. However, in its current form, there are some things it cannot do. Consider the simple case where you don't want your actors to bounce when they bump into things. If you remove the bounce (which I encourage you to try), fast objects will be stopped from moving far before they actually hit walls, since instead of bouncing they are simply stopped from moving. If you remove bounce and add gravity, this problem becomes even more apparent, since a fast falling object ends up hovering above the ground.

One solution to this is to break up your collision checks into smaller chunks, slowly inching your object towards their directions until they hit the collision. But if you take this approach in a map coordinate system, what unit do you use to inch forward your objects? Using a full tile would get you almost nowhere. You could use a tenth of a tile, which would probably work fine but may still occasionally result in some weird behavior. If you want something like a Ninja Gaiden (or a Celeste) where a character can grab onto walls with pixel perfect positioning, you need to consider ways of extending or changing this system. Remember: collision principles are universal, but collision implementations are rarely one size fits all! What happens when entities collide and how precise you are in your calculations are up to what kind of game you're making and how your implementation solves the collision problems of that game!

Now, let's look at how Celeste, a platformer with pixel perfect collision, deals with this in our next post.

(Small bonus note: You can now find this page by accessing the URL ball.ninja)
Finally, we arrive at:

—TECH TALK—

How Celeste's Collision Works

Celeste's collision is a notable departure from the demo in a number of ways. Firstly, it uses screen coordinates as the basis for all its collision math instead of map coordinates. Additionally, it allows for the rectangle used for an object's collisions (also known as its hit box) to be something besides a the size of the entire object and to be somewhere besides that object's center. This gives the designer great flexibility for things like having collectables have larger hit boxes than their sprites or more precisely tweak how far out the player's hit box should be positioned. One small note before we continue: Celeste calls its actors "objects".
Here's a snippet of the init_object() function detailing some of the properties of a generic Celeste object (with added comments by me):

local obj = {}
obj.type = type -- What kind of object is this? (Fruit, platform, spring, etc)
obj.collideable=true -- Can this object collide with anything?
obj.solids=true -- Is this a solid object, or can it pass through things?

obj.spr = type.tile -- After establishing type, go that that type's sprite (defined elsewhere)
obj.flip = {x=false,y=false} -- Should we flip this object's sprite in the X or Y direction

-- X and Y position on the screen
obj.x = x
obj.y = y
obj.hitbox = { x=0,y=0,w=8,h=8 } -- The hitbox, which has a position, width, and height

obj.spd = {x=0,y=0} -- This object's dx and dy
obj.rem = {x=0,y=0} -- The movement "remainder", a sort of buffer system

Before moving on to other object properties, lets dig a little more into the rem (or "remainder") property. This exists largely to account for a difference in coordinate systems. Unlike in a map based coordinate system, we can only move in integer units. Put another way, you can't move half a pixel. To accommodate for this, we use the remainder to make sure we're moving, over time, the correct number of pixels. Let's look at some of movement code to really understand how this works. (Don't worry if it doesn't all sink in immediately, there will be an example thereafter)

-- ox and oy are how far we intend to move this frame in the x and y direction
 obj.move=function(ox,oy)
	local amount
	-- [x] get move amount
        obj.rem.x += ox
        amount = flr(obj.rem.x + 0.5)
	obj.rem.x -= amount
	obj.move_x(amount,0)
		
	-- [y] get move amount
	obj.rem.y += oy
	amount = flr(obj.rem.y + 0.5)
	obj.rem.y -= amount
	obj.move_y(amount)
end

Consider the case where our object is moving at 2.5 pixels per frame in the x direction. You can't move half a pixel, so what happens? Do you move 2 pixels? Do you move 3? Let's make a demo cart and find out what movement at various pixel and sub-pixel speeds looks like!

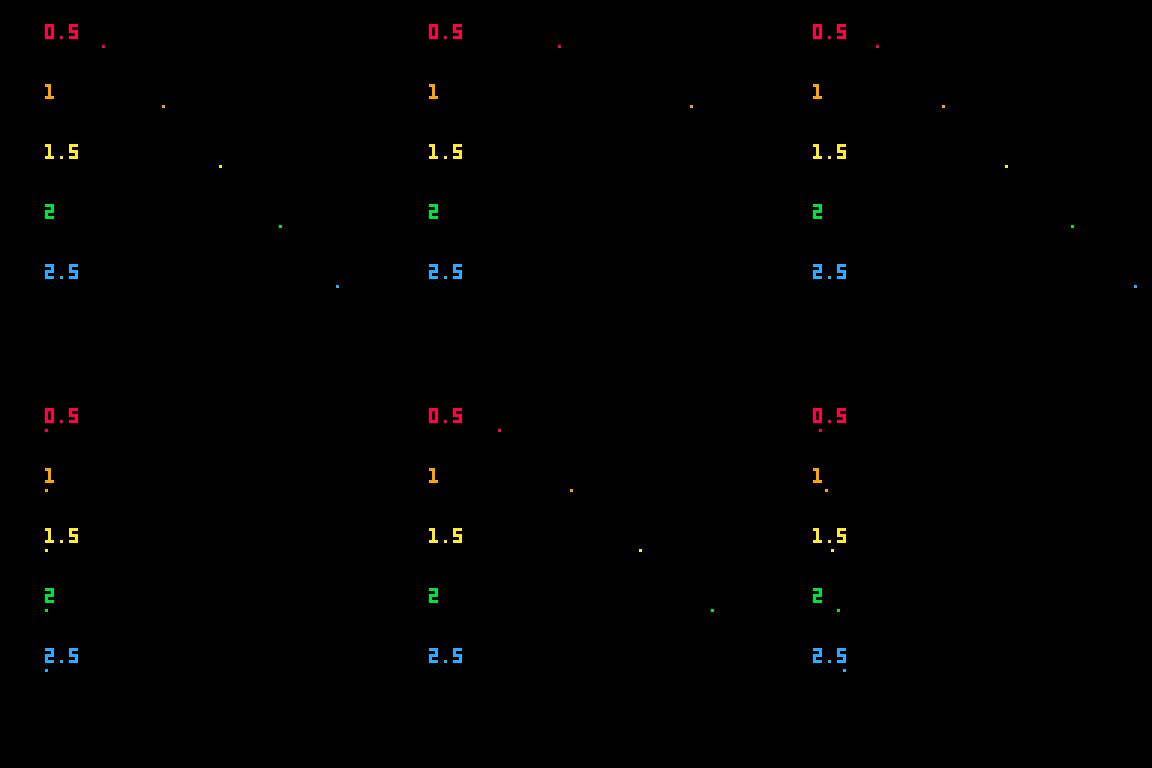
Here's a demo cart which draws a series of dots moving at various speeds in the positive X direction. It also notes what this speed is above each dot.

001 Movement

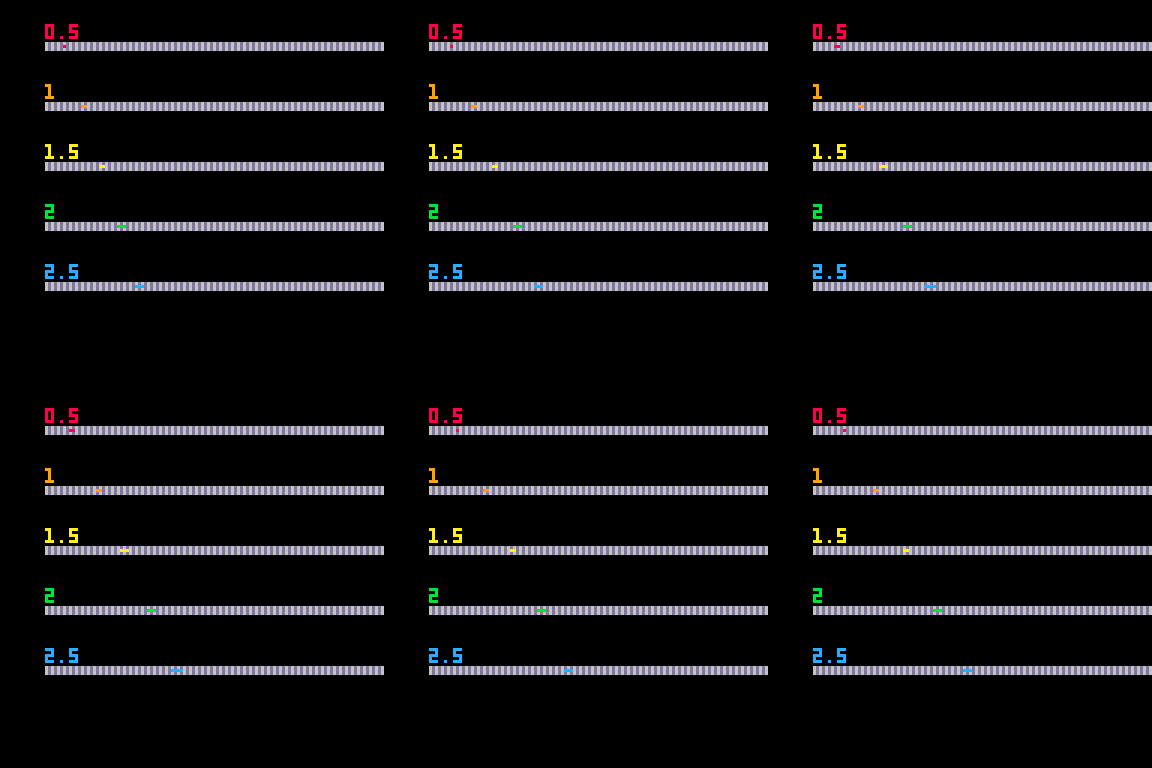
As you can see, the integer pixel speeds look pretty smooth and the non-integer speeds look kind of choppy. To get a better feeling for exactly how these dots are moving, here‘s a slowed down version that draws a line betwen each dot and that dot’s previous position.

002 Movement

The integer speeds are rock steady, and the non-integer speeds alternate in precise number of pixels moved each frame. You can imagine how these variable movements would get even more jumpy at other, non integer speeds like .3 or .7.

(Or, if you'd prefer to see for yourself, load this cart into your PICO-8 and experiment!)

003 cart

Some amount of pixel stuttering is inevitable for any non-integer speeds. You might then wonder then why bother with the remainder function if we still run into sometimes moving 2 and sometimes moving 3 pixels. The answer is this: **by enforcing an integer pixel distance for each frame's movement we can achieve pixel perfect collisions much more cleanly!** How does this work? Let's take a look at Celeste's move_x() function (as called from above in the move() function). As usual I've added comments to clarify.

 obj.move_x=function(amount,start)
	if obj.solids then --If this object is solid, we need to make sure it doesn't bump into things
		local step = sign(amount) -- step will be 1 for positive numbers and -1 for negative
		for i=start,abs(amount) do -- from our start x to our move distance 
		       -- Check one pixel in the direction we're moving. 
		       -- If that spot wouldn't cause us to overlap with something solid, move there
			if not obj.is_solid(step,0) then 
				obj.x += step
			else -- If it is solid, we stop moving in this direction
				obj.spd.x = 0
				obj.rem.x = 0
				break
			end
		end
	else
	        -- If this object isn't solid, don't bother checking collisions for movement
		obj.x += amount
	end
end

Simply put, Celeste calculates its collisions by moving its objects one pixel at a time. It nudges each object bit by bit until doing so would result in it overlapping something it shouldn't be. This combined with ensuring only integer pixel movements creates a pretty watertight pixel perfect collision system. There are reasons you might not want that, but we'll get into that later. There's lots of other stuff going on in Celeste's code of course, but the last thing you need to understand to have a broad overview of its collision engine is, of course, its collision function. Note that hitboxes in Celeste have a position (offset from their parent's upper left corner), and height and width.

 -- We provide three arguments: What type of object we're checking against, and our X and Y movement
 obj.collide=function(type,ox,oy)
		local other
		for i=1,count(objects) do
			other=objects[i]
			-- Check collision against every object that:
			-- isn't this object
			-- has the type we're checking
			-- is allowed to be collided with
			-- and exists
			if other ~=nil and other.type == type and other != obj and other.collideable and
			        -- compare overlapping hitboxes via rectangle point menthod
				other.x+other.hitbox.x+other.hitbox.w > obj.x+obj.hitbox.x+ox and 
				other.y+other.hitbox.y+other.hitbox.h > obj.y+obj.hitbox.y+oy and
				other.x+other.hitbox.x < obj.x+obj.hitbox.x+obj.hitbox.w+ox and 
				other.y+other.hitbox.y < obj.y+obj.hitbox.y+obj.hitbox.h+oy then
				return other
			end
		end
		return nil
	end

And there you go! There are a number of other, more subtle nuances to the Celeste collision engine (checking if the player is on the ground or touching a wall, etc) but you now know most of how it works!

Here's a brief clip of these pixel perfect collisions in action:

004 Celeste

And here's one where I draw all the hitboxes:

005 Celeste

---END TECH TALK---

Limitations of this system

Celeste's collision works very well for the kind of game it is, but consider what this gameplay this is optimized for: a small number of on-screen objects, most of which aren't moving very fast. Each object which is solid runs collisions not just against every other object every frame, but the faster those objects move the more checks it has to do. If you had just five objects on screen moving at a speedy 4 pixels per second, each object now has to do 16 checks per frame against the others instead of just four. This number of checks per frame can get quite high if you have lots of objects, especially ones which can move very fast!

You collision code then must be made with your limitations in mind. You can spend all your cycles on pixel-perfect accurate collision if you don't have all that many collisions to check. You can spend all your cycles on having lots and lots of objects if a cheaper collision system doesn't impact your gameplay too much. Simply put, your collision code has to balance between accuracy and quantity of objects!

Am I allowed to use this system?

So now that you know exactly how Celeste does its collisions, are you allowed to copy it?

Well, if Celeste were just any old game then the answer would be no. Publishing a game as a PICO-8 cartridge means your game has publicly viewable source code, but that doesn't give people permission to plagiarize. You still own that code, even if you allow other people to look at it.

HOWEVER

Celeste's collision code has been published under an MIT license So yes, you are allowed to use it! Heck, you can even sell it as long as you also publish the original MIT license with it.

Additionally, if you wanted to use the collision code for Celeste 2, that game was published under a CC4-BY-NC-SA license. (If you want to check that cart out, you can do so here.

Also, if you want more info about Celeste's engine, check out this post by one of Celeste's authors:

Celeste and TowerFall Physics. A short tutorial on the nitty gritty of… | by Maddy Thorson | Medium

Now you know about collision! With that out of the way, let's start actually talking about Ball Ninja again, huh?

Ball Ninja Movement Prototyping

In order to make Ball Ninja feel like, well, a cool ice ninja, I thought it'd be fun to make some ice sliding. Think Iceman or Frozone; I want the player to be able to skate through the air on a sheet of ice. I can't recall any other games that let me do that in a way I found really fun, so let's play with that idea!

Additionally, the goal of prototyping this movement is to answer the question of "does this idea have potential" as fast as possible. In order to do that, I'm using the Celeste 2 cart as a base. I *could* write a bespoke collision and movement engine, or I could one that I'm already allowed to use to answer the core question of "is this fun" faster. I'm far more interested in making a cool ice skating mechanic than I am in re-inventing a collision engine right now, so lets do just that.

So, what does it mean to skate around on ice mid-air? I thought about it like this: "I should be able to glide forward, mid air, and I should be able to convert my downwards momentum into forwards momentum."

I thought about what might be a fun amount of time for this to happen and figured it should take maybe a third of a second or so to go from straight downwards to straight forwards. Here's how this works:

---TECH TALK---
First, we check in the player's update function to see if the player pushed the other button besides jump in mid air. This will signal that they are current in a "skating" state (which I've added as state 3)

if btn(5) and not on_ground then
	self:start_skate()
end

start_skate() kicks us off

function player.start_skate(self)
	self.skate_frames = 0
	self.skate_start_dy = self.speed_y
	self.state = 3
end

Elsewhere in our player's update code, we initialize the skating code. Currently, skate as long as you're holding down the button

elseif self.state == 3 then
               -- If you let go of the button, stop skating
		if not btn(5) then
			 self.state = 0
        else
			-- Ramping
			-- For the first ten frames of skating, convert downward velocity into forward velocity
			if(self.skate_frames < 10) then
				if(self.speed_y > 0) do
					self.speed_x += (abs(self.skate_start_dy) / 10) * sgn(self.speed_x)
				end
				-- Even if you're not currently falling, slowly remove vertical velocity
				self.speed_y -= (self.skate_start_dy / 10)
            end
        end
		
        self.skate_frames += 1

---END TECH TALK---
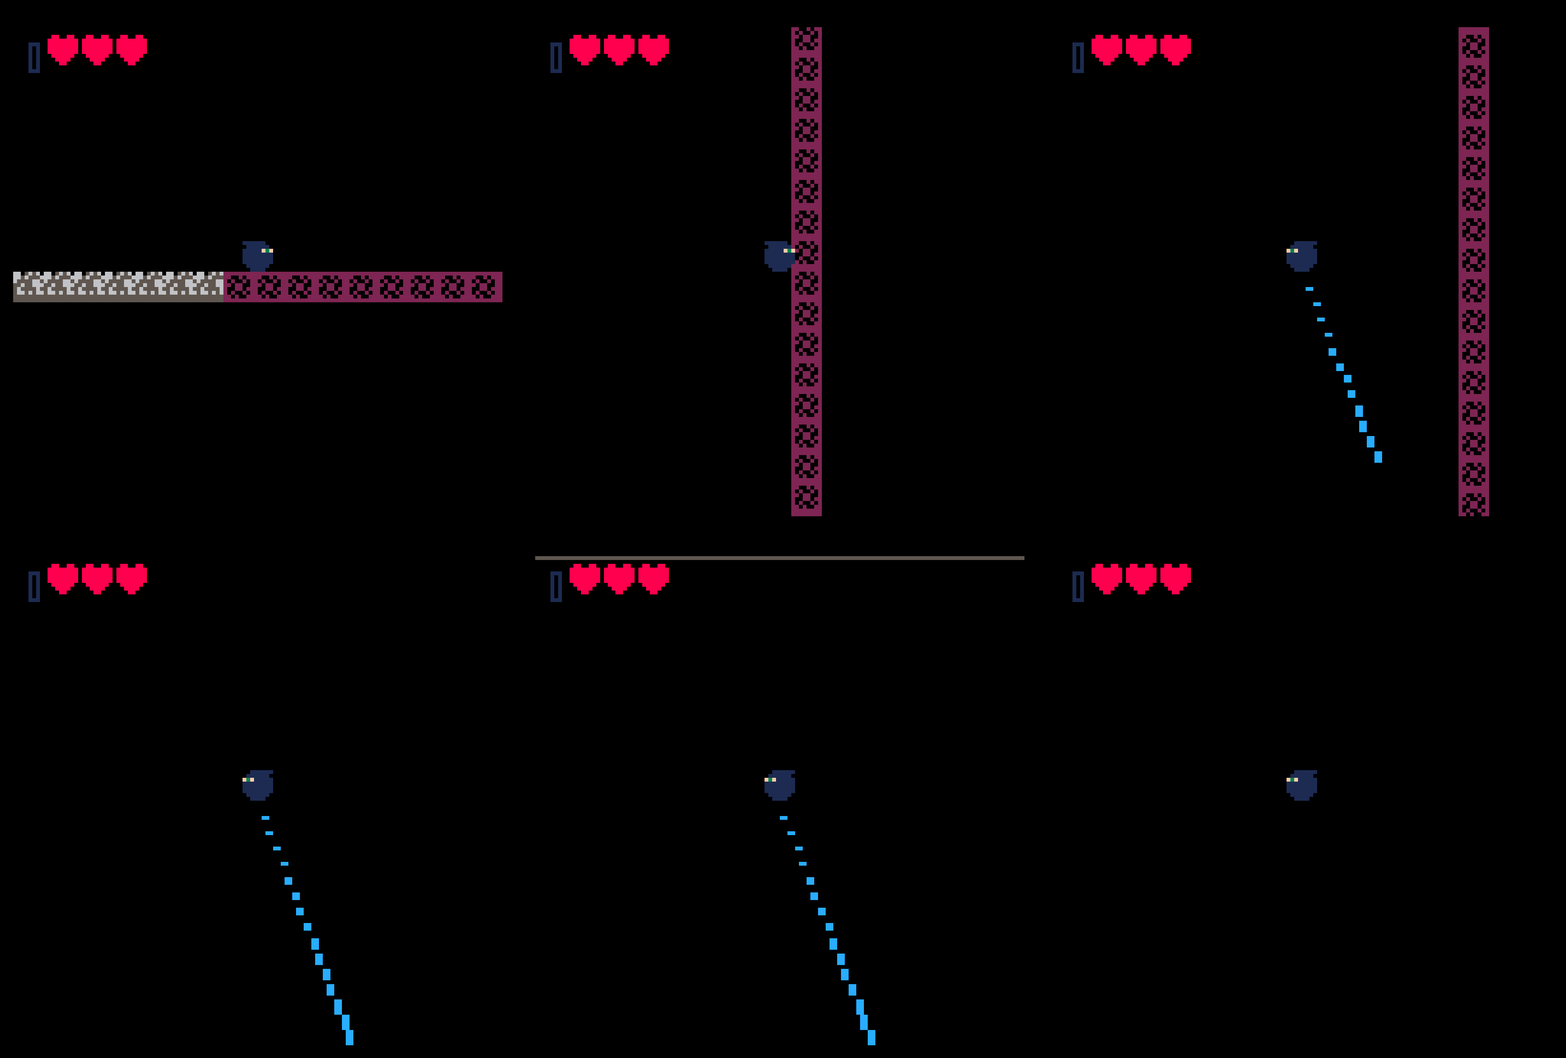
Altogether, it looks like this

001

Hey, that's kinda fun! Let's add some icicles under the skate path to really sell the illusion. These icicles are just a table of points with a few values:

</i>new_icicle = {}
new_icicle.x = self.x
new_icicle.y = self.y + self.hit_h
new_icicle.age = 0
add(icicles, new_icicle)

Each icicle gets longer as it ages, so they slowly grow over time.

002

Well that‘s… kind of right? Those icicles are being drawn each frame under Ball Ninja, but Ball Ninja is moving at more than one pixel per second. We should draw not just directly under Ball Ninja, but also along his entire movement path. Let’s also add a random variation per icicle to make it look more like an ice path.

for i=0,(self.speed_x),sgn(self.speed_x) do
    new_icicle = {}
    new_icicle.x = self.x + i
    new_icicle.y = self.y + self.hit_h
    new_icicle.age = 0
    new_icicle.rand = rnd(3)
    add(icicles, new_icicle)
end

003

That‘s better, but oops we were adding his height too much. Let’s fix that.

004

Hey, there we go! That's skating on an ice path!

Note that the above skating movement code is what I *ended* with, but along the way there were a few bugs:

Not correctly accounting for upwards movement when you start skating:

005

Not correctly accounting for skating to the left when moving upwards:

006

Not correctly applying a speed increase when skating to the left:

007

Eventually, all those got ironed out and now you can skate around *mostly* correctly. Wheeee!

008

Notably, there are still some bugs. The biggest one is this:
If a player is skating and still has downward momentum while they hit the ground, they'll bounce and stop losing vertical speed

009


(Also in this gif the snow has been turned into cherry blossoms)

One other fun quirk of the current system: If the player stops skating and then starts skating again fast enough, they can gain a hell of a lot of speed

010

Broadly speaking, a success! I can confirm that this idea has potential with this little prototype. Now that that question is answered, there's lots to do!

Rough out some levels
- Replace the level loading (for now) with "regular" map() calls/camera calls
- Might have to rewrite the camera system
Play with some level stuff
Fix(?) Ground bounce on ice?
Prototype out:
- Magic meter system
- Increase that meter via pickups (that's our loop!)
- Combat
- Sword
- Ice Magic
- Aesthetics
- Settings
- Music
- Vibe
- Movement changes
- Change wall jump?
- Wall stick instead of jump?
- Wall stick *and* jump?
- Cap move speed?

Finally, if you want to mess around with the movement prototype (which I suggest you do cuz I think it's pretty fun) here's the cart!

011 Cart

https://twitter.com/wondervillenyc/status/1371554255841136641?s=19

Fixing The Map And Adding More Movement

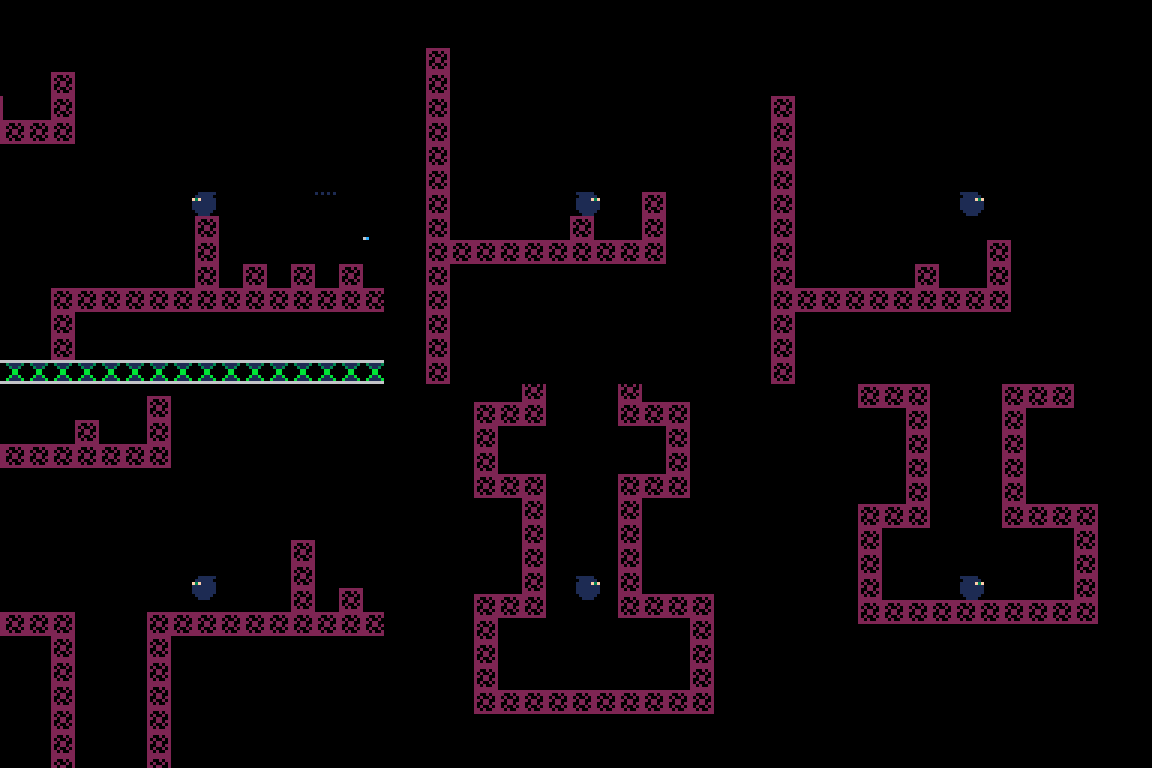
The Celeste 2 Map is great and all, but we want one big map. Let's make a quick test map and change the collision to account for this. Luckily, Celeste 2's collisions are pretty easy to update for this. Note that, for now, we don't have a good camera system in place yet, so we're just going to draw the entire map every frame. This is wildly inefficient and will be high on the list of things to optimize later when we update the camera. But for now, map:

001

Basically we have a pit with some rooms, a starting ledge, and a chunk off to the side for testing movement speeds with a block on the ground every other tile to provide context.

Modifying the Wall Jump

We already had a wall jump, but I also want there to be a wall cling and slide, since that feels ninja-y. To make sure the player isn't velcro-ing to every wall they briefly touch, we'll make sure they're pressing against the wall for three consecutive frames before initiating the wall cling. The wall cling will be a new player state, and while you're in it you can:

  • Cling
  • Slide
  • Jump

I'm not sure skating from a wall cling would feel right, so if the player wants to skate they can jump off the wall first. The code for all this is pretty straightforward:

-- Add a couple extra variables to the player
player.wall_frames = 0
player.on_left_wall = false

-- Then, over in the player's update function, add these checks to the 0 (or normal) state
-- If the player is holding up against the wall for 3 frames in a row
-- If we're holding left and there's a wall 2 pixels to our left,
   if btn(0) and self:check_solid(-2) and not on_ground then
	self.wall_frames += 1
	if self.wall_frames &gt;= 3 then
		self.on_left_wall = true
		self.facing = 1
		self:start_cling()
	end
-- Same but for right
elseif btn(1) and self:check_solid(2) and not on_ground then
	self.wall_frames += 1
	if self.wall_frames &gt;= 3 then
		self.on_left_wall = false
		self.facing = 0
		self:start_cling()
	end
else
	self.wall_frames = 0
end

The wall cling state is also pretty simple

-- wall cling state
elseif self.state == 4 then
	if self.on_left_wall then
               -- If the player slides down off a wall, they stop gripping it
		if not self:check_solid(-2) then
			self.state = 0
			self.wall_frames = 0
		end 
              -- If they're holding left, cling
		if btn(0) then 
			self.wall_frames = 0
			self.speed_y = 0
               -- If they're holding right for three frames, fall off the wall
		elseif btn(1) then
			self.wall_frames += 1
			if self.wall_frames == 3 then
				self.state = 0
			end
		else 
                       -- Otherwise, slowly slide down the wall
			self.speed_y = min(self.speed_y + 0.1, 1) 
		end
               -- If they jump, do a wall jump
		if btnp(4) then 
			self:wall_jump(1)
		end
	else
	-- Do the same for the right wall, but reversed

003

So now we can cling to walls, like a ninja. Neat!

Adding a Magic Meter and Pickup

If the core gameplay loop is going to be:

  • Explore as far as you can
  • Find something that lets you ice skate farther
  • You can now go new places by skating further
  • Repeat until end

Then one way to implement this simply is with a meter. We can have the meter deplete as you skate, and replenish as you're on the ground. One fun consequence of this system is that a skilled player can use vertical momentum to go further with the same amount of magic, potentially being able to skip some upgrades!

-- Add a couple more traits to the player
player.max_magic = 30
player.current_magic = 30

-- Modify the check to see if we're on the ground in the state 0 update for replenishing magic
if not on_ground then
	local max = btn(3) and 5.2 or 4.4
	if abs(self.speed_y) &lt; 0.2 and input_jump then
		self.speed_y = min(self.speed_y + 0.4, max)
	else
		self.speed_y = min(self.speed_y + 0.8, max)
	end
else
	self.current_magic = min(self.current_magic + 1, self.max_magic)
end

-- Modify our skating function to account for magic
 elseif self.state == 3 then

	if not btn(4) or self.current_magic &lt;= 0 then
		 self.state = 0
		 --self.speed_y = -4
		 -- Delete our icicles
		 --self.jump()
		 --player.jump(self)
		 icicles = {}
       else
		-- Ramping
		self.current_magic -= 1
		if(self.skate_frames &lt; 10) then
			if(self.speed_y &gt; 0) do
				self.speed_x += (abs(self.skate_start_dy) / 10) * sgn(self.speed_x)
			end
			self.speed_y -= (self.skate_start_dy / 10)
           end
		for i=0,(self.speed_x),sgn(self.speed_x) do
			new_icicle = {}
			new_icicle.x = self.x + i + 4
           	new_icicle.y = self.y + self.hit_h
			new_icicle.age = 0
			new_icicle.rand = rnd(3)
			add(icicles, new_icicle)
		end
       end
		
 self.skate_frames += 1

Lastly, add a little UI element to show how much magic the player has.

-- In our player.draw function,
-- magic meter
rect(camera_x + 4, camera_y + 4, camera_x + 6, camera_y + 6 + (self.max_magic / 2) , 1)
if self.current_magic &gt; 0 then
	line(camera_x + 5, camera_y + 5, camera_x + 5, camera_y + 5 + (self.current_magic / 2), 12)
end

004

Lastly, let's add a pickup that can increase your magic. I drew a simple ball and hijacked the Strawberry code from Celeste 2.

magic_pickup = new_type(21)
function magic_pickup.update(self)
	if self.collected then
		player.max_magic += 5
		player.current_magic = player.max_magic
		self.destroyed = true<i>

Now we can add some magic pickups around the level.

005

As for how much magic the player should start with, how fast it should be consumed, and how much each pickup should give you are all questions for another time. Now we have all we need to block out some simple levels!

The next step is combat. I have a little bit now, but I'll make another post when the sword I added can actually hit something. After we have basic combat, a health system, and a way to handle death, we can make a pretty robust sketched out level!

Level and Enemy Design

The primary loop of Ball Ninja is exploring new spaces and accumulating enough magic there to get to new places to then explore. The purpose then of the enemies in these spaces is to make the exploration more interesting. For the moment I plan to design the enemies which would be interesting to encounter in the spaces rather than vice versa. Put another way, I plan to start by sketching out the environments and level geometry and then designing obstacles that fit those spaces.

The Premise

My starting idea is for the player to explore an abandoned ninja temple. This gives us an easy premise to communicate to the player and also informs our other decisions. What kind of enemies would live in an abandoned temple? Well there might be some ninjas in it, but then it wouldn't be terribly abandoned. Instead I'm going to put a bunch of plants in it. Both because they fit the premise easily (an abandoned temple would, of course, be overgrown with vegetation) and because killing a plant feels less bad than killing a person.

From there, we have lots of questions to answer.

  • How long ago was the temple abandoned?
  • Who lived here?
  • Why are we exploring it?
  • Curiosity?
  • Grandma Ninja used to live here and wants to fetch a childhood item?
  • Ninja clan needs a new home?

These are all useful questions and we'll come back to them as we go. For the moment though, my goals are to block out some level geometry to get a feel for what kinds of shapes and spaces are fun to navigate with our sliding mechanics. Mechanically, we have three things to work out:

  • Wall Jumping
  • Swiging a Sword
  • Skating

I've designed a small space which explores all three of these. To start, the player will begin in a small, safe room which leads to a hallway. In the hallway is an enemy who can't be jumped over. What should this enemy look like? It's stationary (to give the player ample time to react to it), it's a plant, and it's clearly not friendly.

Draft 1

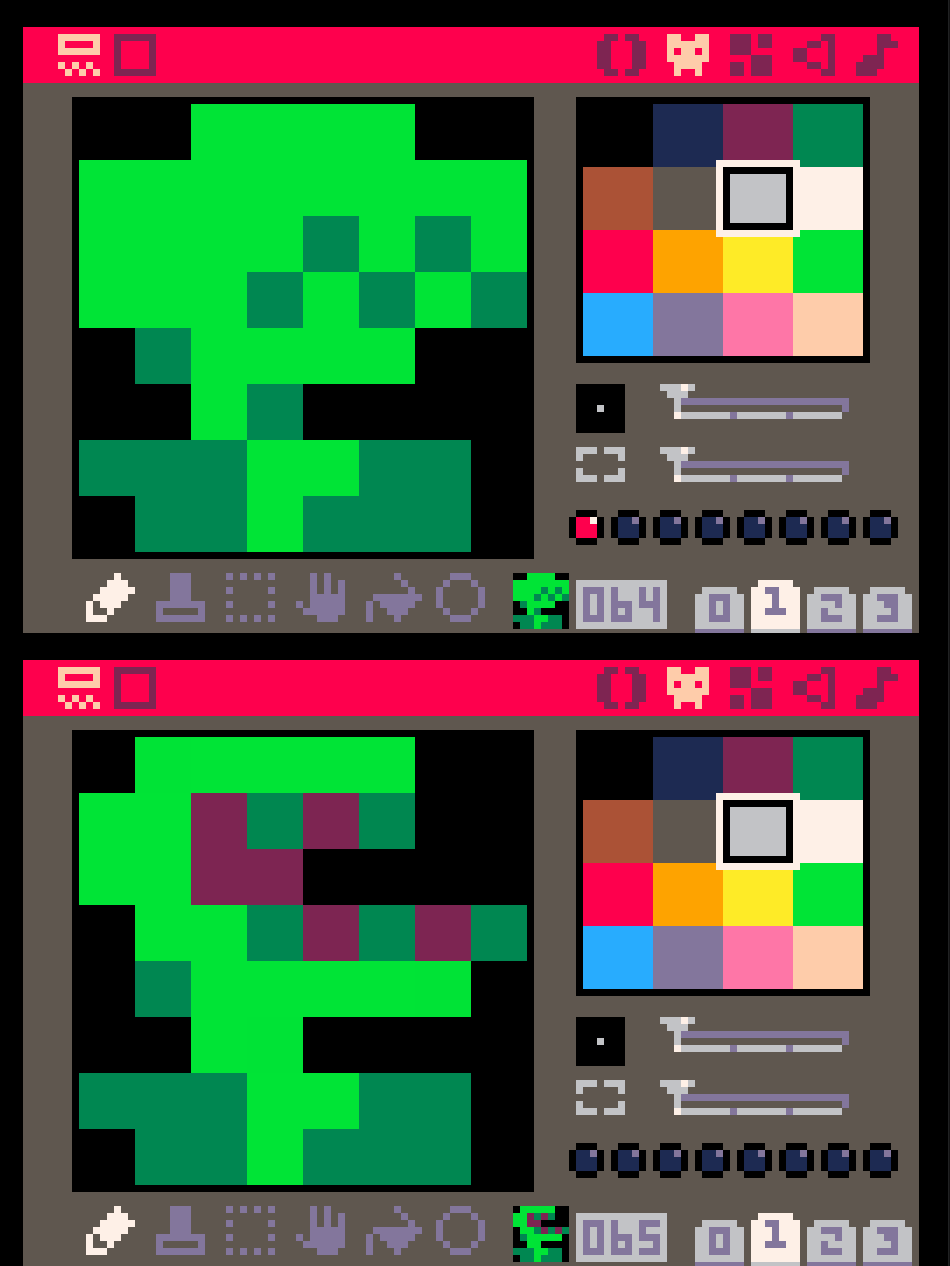
Let's make a stationary, thorny bush. That would be both dangerous and something the player would have to cut through to access a narrow hallway.

001

It has a little flower on it, but it doesn‘t really look like a plant. We don’t have the resolution to easily communicate lots of small thorns, so right now it sort of just looks like a green blob with a flower on it. It‘s not only not threatening, it doesn’t even look like it should hurt you. Let's try again.

Draft 2

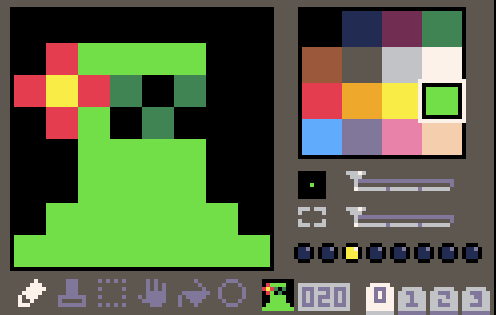
002

Now it has some angry teeth on it, but it looks even more like a slime. The only thing about this which communicates “plant” is the flower. It‘s certainly doing the job of looking threatening better, but it’s not quite communicating all it needs to.

Draft 3

003

Now this I think we can work with. The premise has shifted away from “thorny bush” and has become “venus flytrap”. A little cliche maybe, but it fits all our criteria! It looks threatening, it looks stationary, and the player should be able to tell what it actually is. Plus we can add an additional frame with the mouth open to really sell it.

004

The First Space

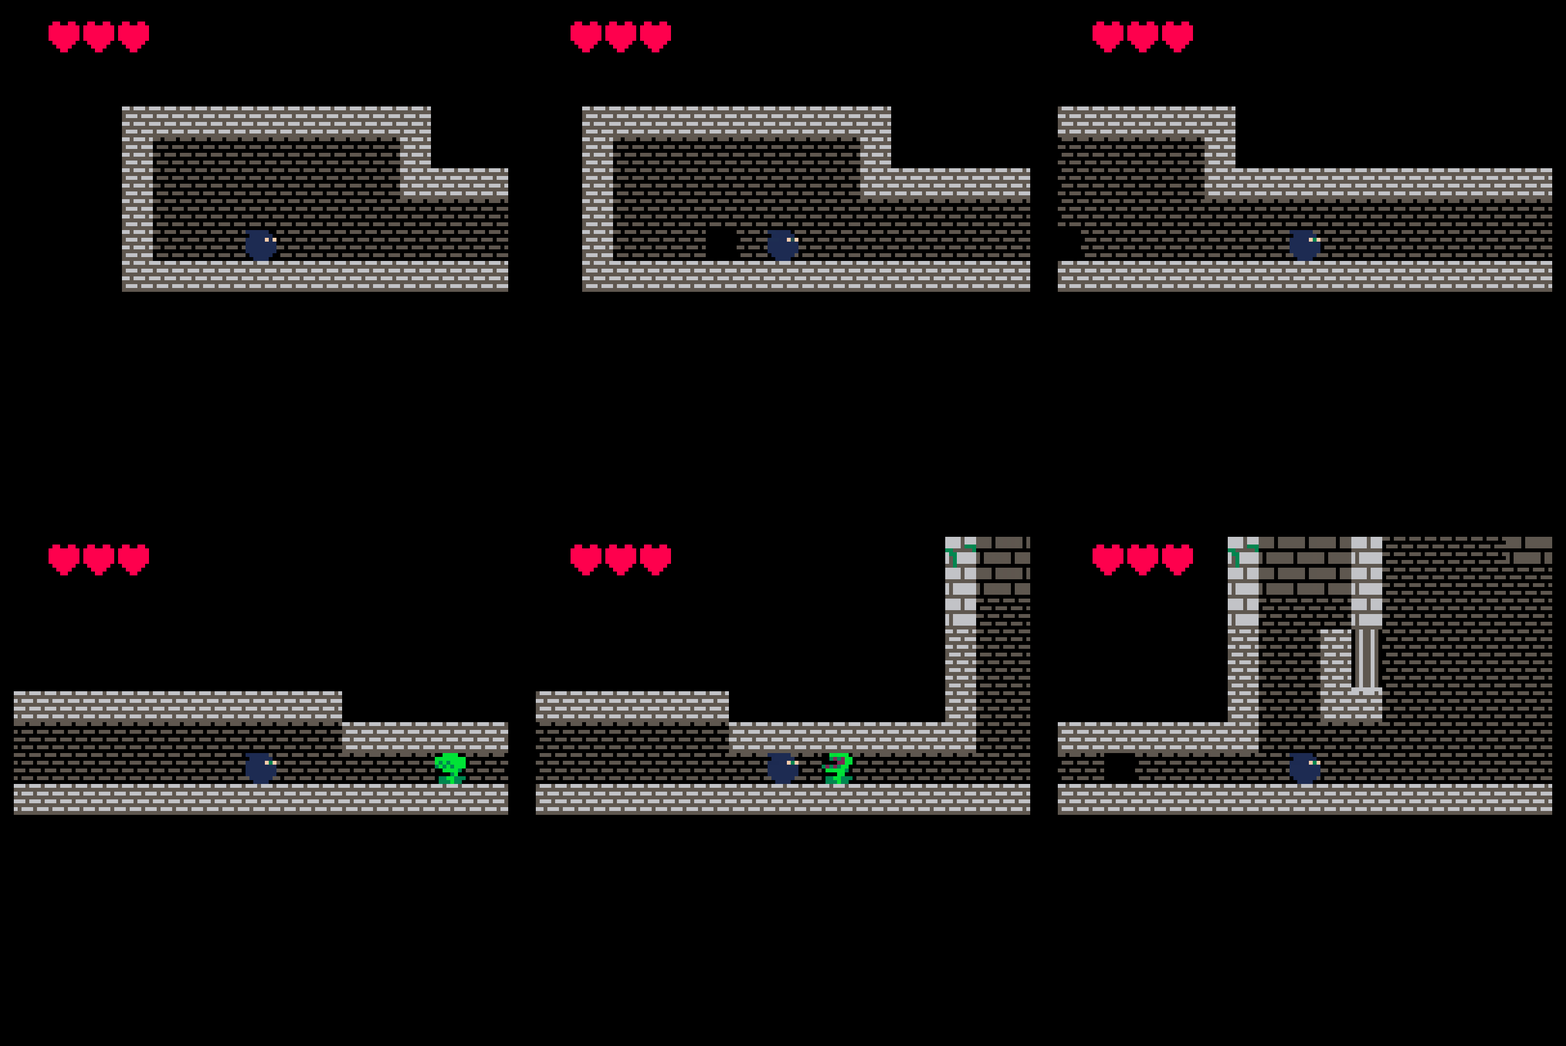
Here's a bird's eye view of the entire space labeled per section

This section is made of several different sizes of brick to help differentiate the higher and lower levels. That same brick is matched with a darker variant for the background. Additionally, the larger brick has an "overgrown" variant to help sell the plant life taking over the temple/castle.

Section 1

We begin with a safe space for the player to move around in followed by an opportunity learn which button is jump and which is attack.

006

We've even added some very simple behavior to the flytrap to face the player and open its mouth when the player is near. If the player gets very close, it will close its mouth to bite them.

function enemy_1.update(self)
	-- If within 10 pixels of player, open
	if sqrt( (abs(player_ref.x - self.x) * abs(player_ref.x - self.x)) + (abs(player_ref.y - self.y) * abs(player_ref.y - self.y)) ) &lt; 20 then
		self.spr = 65
	else
		self.spr = 64
	end

	-- If the player is to "my" left, face left
	if player_ref.x &lt; self.x then
		self.flip_x = true
	else
		self.flip_x = false
	end
end

The details of swinging a sword will be covered in the next post.

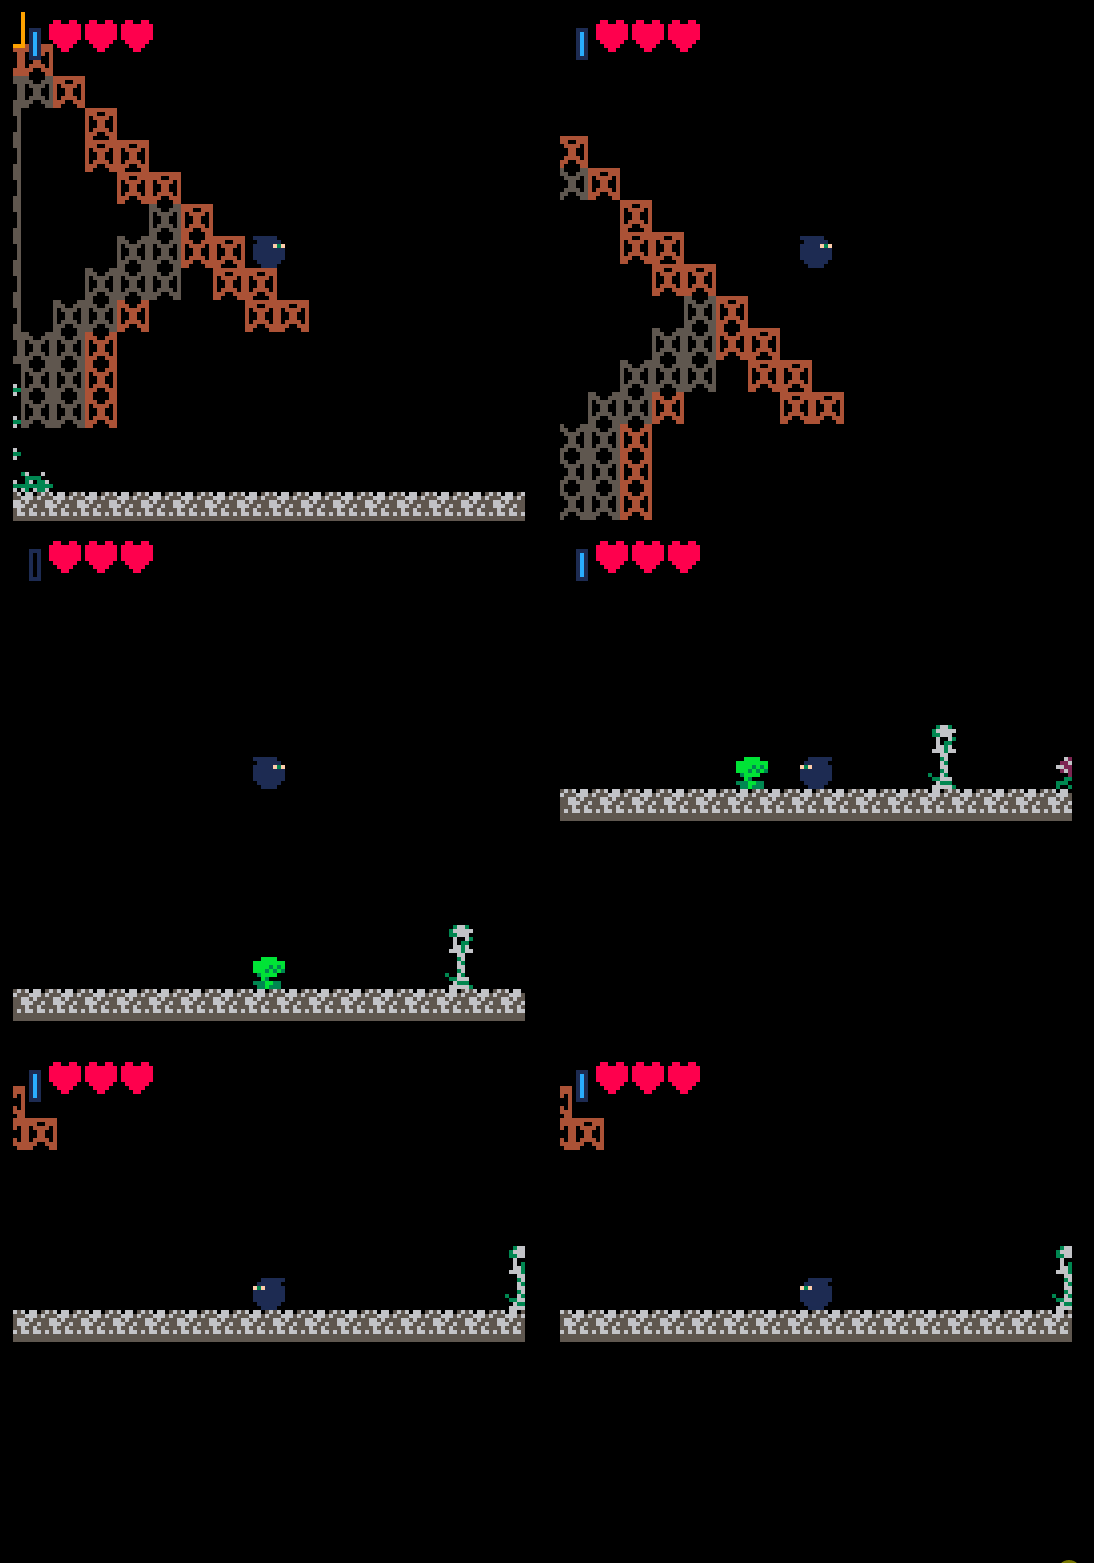
Area 2

Next, the player will walk into the next room and find nothing. The only way out is up.

007

Area 3

At the top of the chimney is a large gap. The player may well try to jump over it.

008

But your jump just barely can't make the gap. Fiddlesticks! Falling in this gap takes you back downstairs next to area 2. You have to climb back up and explore the other direction.

Area 4

If the player goes left from the chimney they'll discover the first upgrade of the game. Once they figure out how this works (which may need a tutorial textbox down the line), they can now clear the gap.

009

Now we can start designing what to do after this tutorial section! In the next post, I'll show you the full combat implementation used in the above scenarios.

A Basic Combat System

Fundamentally, we want the following things:

  • Pushing a button swings a sword in front of Ball Ninja
  • The sword can collide with enemies
  • After collision enemies react appropriately

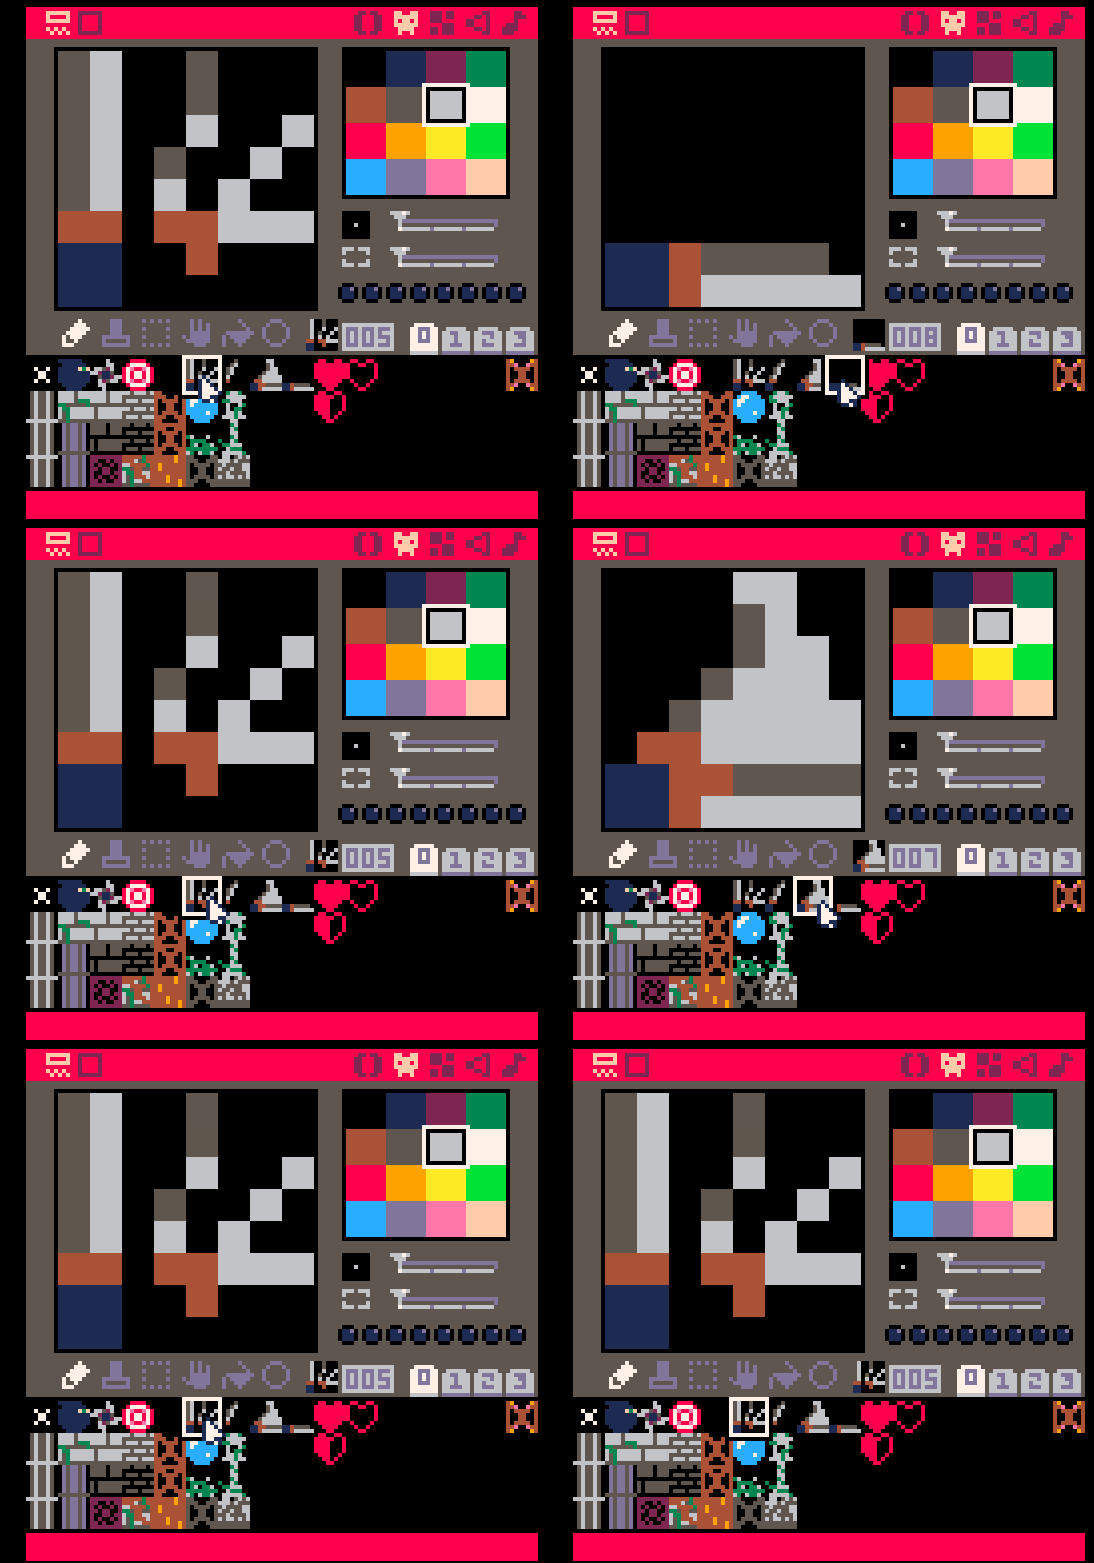
This seems pretty straightforward at first. We start with some sprites for raising and swinging the sword:

001

Having this sword appear in front of the player when they push a button is also fairly straightforward. We check to see if the player has pressed the attack button and toggle a new boolean called "swinging_sword" on the player, and then check that in the draw function. Then simply position the sword sprite to be in front of the player in the right direction and iterate across the frames with a different variable, sword_timer, which increases over time while the player is swinging their sword.

if self.swinging_sword then
	if self.facing == 1 then
		spr(5 + self.sword_timer, self.x + 4, self.y - 11)
	else
		spr(5 + self.sword_timer, self.x - 12, self.y - 11, 1, 1, true)
	end
end

The interesting decisions come from how to handle collision with the sword and enemies!

---TECH TALK--
Our collision handling right now is all set up to act between objects. So then should the sword be a persistent object?

Well it certainly could, but where should it go? Either when it isn't being swung by the player it would have to teleport way off screen or be present but invisible and inactive. This would all work fine enough, but there's an easier solution for our purposes.

Simply put, we make a sort of partial sword object that only exists while the sword is swinging. I say partial because we're not making it have all the traits of our other objects in the game, just the ones the collision will check for. Remember, Lua doesn't really have classes like C++ or Java, it just has tables. We can pass these tables around however we like and we only hit a problem when we're looking for an entry in that table that doesn't exist. So as long as we pass something which does have entries which match those an object uses in its collision checking (position, hitbox, etc), we're fine! What does that actually look like in practice?

-- object interactions
	sword_obj = {}
	sword_obj.x = self.sword_hb_x
	sword_obj.y = self.sword_hb_y
	sword_obj.hit_x = 0
	sword_obj.hit_y = 0
	sword_obj.hit_w = self.sword_hb_w
	sword_obj.hit_h = self.sword_hb_h
	sword_obj.overlaps = object.overlaps

	for o in all(objects) do
		if o.base == magic_pickup and self:overlaps(o) then
			--magic_pickup
			o:collect(self)
		elseif o.enemy == 1 and self:overlaps(o) then
			if self.hit_timer &gt;= self.hit_grace then 
				self.current_health -= 1
				self.hit_timer = 0
				if self.current_health &lt;= 0 then
					self.x = self.spawn_x
					self.y = self.spawn_y
					self.current_health = self.max_health
					self.hit_timer = self.hit_grace + 1 
				end
			end
		elseif o.base == checkpoint and self:overlaps(o) then
			self.last_checkpoint = o.id
		end
		if o.enemy == 1 and sword_obj:overlaps(o) and self.sword_timer ~= 1  then
			o:take_damage(1)
		end 
	end

When the player is swinging their sword ( and is no longer raising their sword) the enemy resolves whatever action happens when it takes damage.

Notably we also handle the beginning of the sword swinging outside the various state updates. The player can be in any state and swing their sword!

-- swinging a sword, which can be done in any state 
	if input_sword_pressed &gt; 0 and self.sword_timer == 0 and not self.swinging then
		self:swing()
	end

	-- TODO: Cooldown peroid between swings? Track with sword_timer
	if self.swinging_sword then
		if self.facing == 1 then
			self.sword_hb_x = self.x + 4
		else
			self.sword_hb_x = self.x - 8 
		end
		self.sword_hb_y = self.y - 3
		if self.sword_timer == 3 then
			self.swinging_sword = false
			self.sword_timer = 0
		else
			self.sword_timer += 1
		end
	end

Add to this a small function to kick off the swinging (and some other light bookkeeping not worth mentioning)

function player.swing(self)
	self.swinging_sword = true
	sfx(1)
	if self.facing == 1 then
		self.sword_hb_x = self.x + 4
	else
		self.sword_hb_x = self.x - 8
	end
	self.sword_hb_y = self.y - 3
end

--- END TECH TALK--

Altogether we can now swing a sword in various states and have enemies react to that properly.

002

We'll get to all that new tile art next time for the next post on level design.

The Next Post (On Level Design (Kinda))

Right now our core movement mechanics enable a fairly small possibility space. You can move horizontally over obstacles or you can ascend slightly if you find a nearby wall but most of the resultant level designs will be focused around this horizontal movement; whether the player is simply coasting over spikes or outrunning a wave of lava, they're moving horizontally. Consider this potential early game environment:

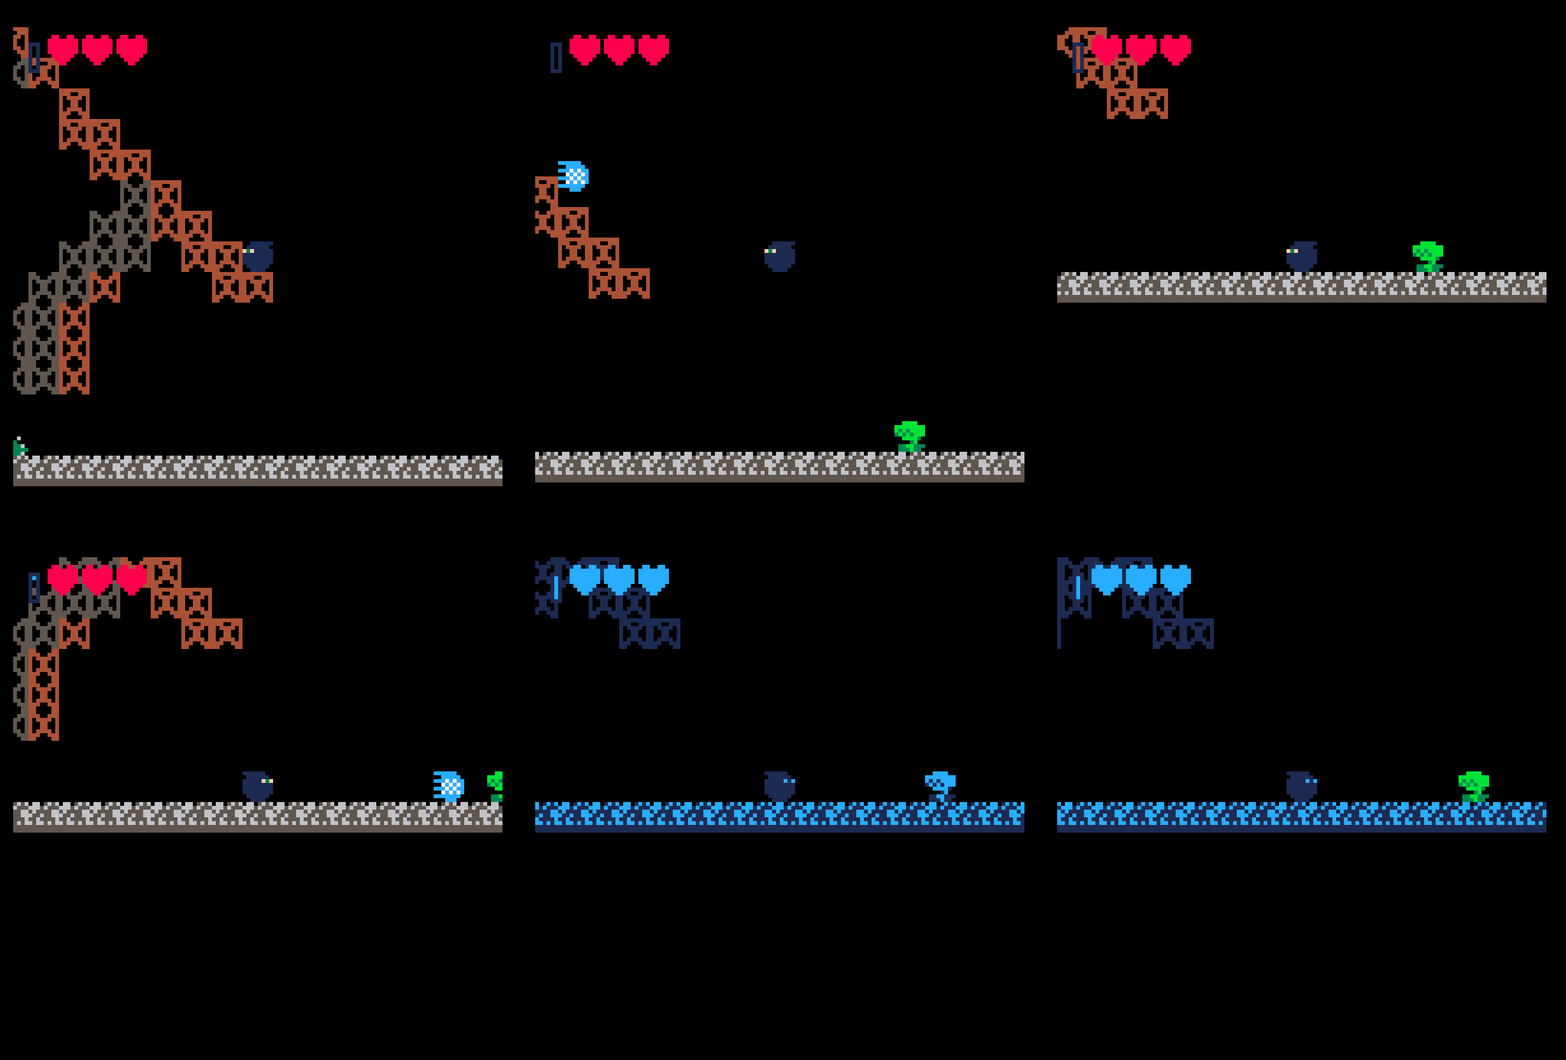
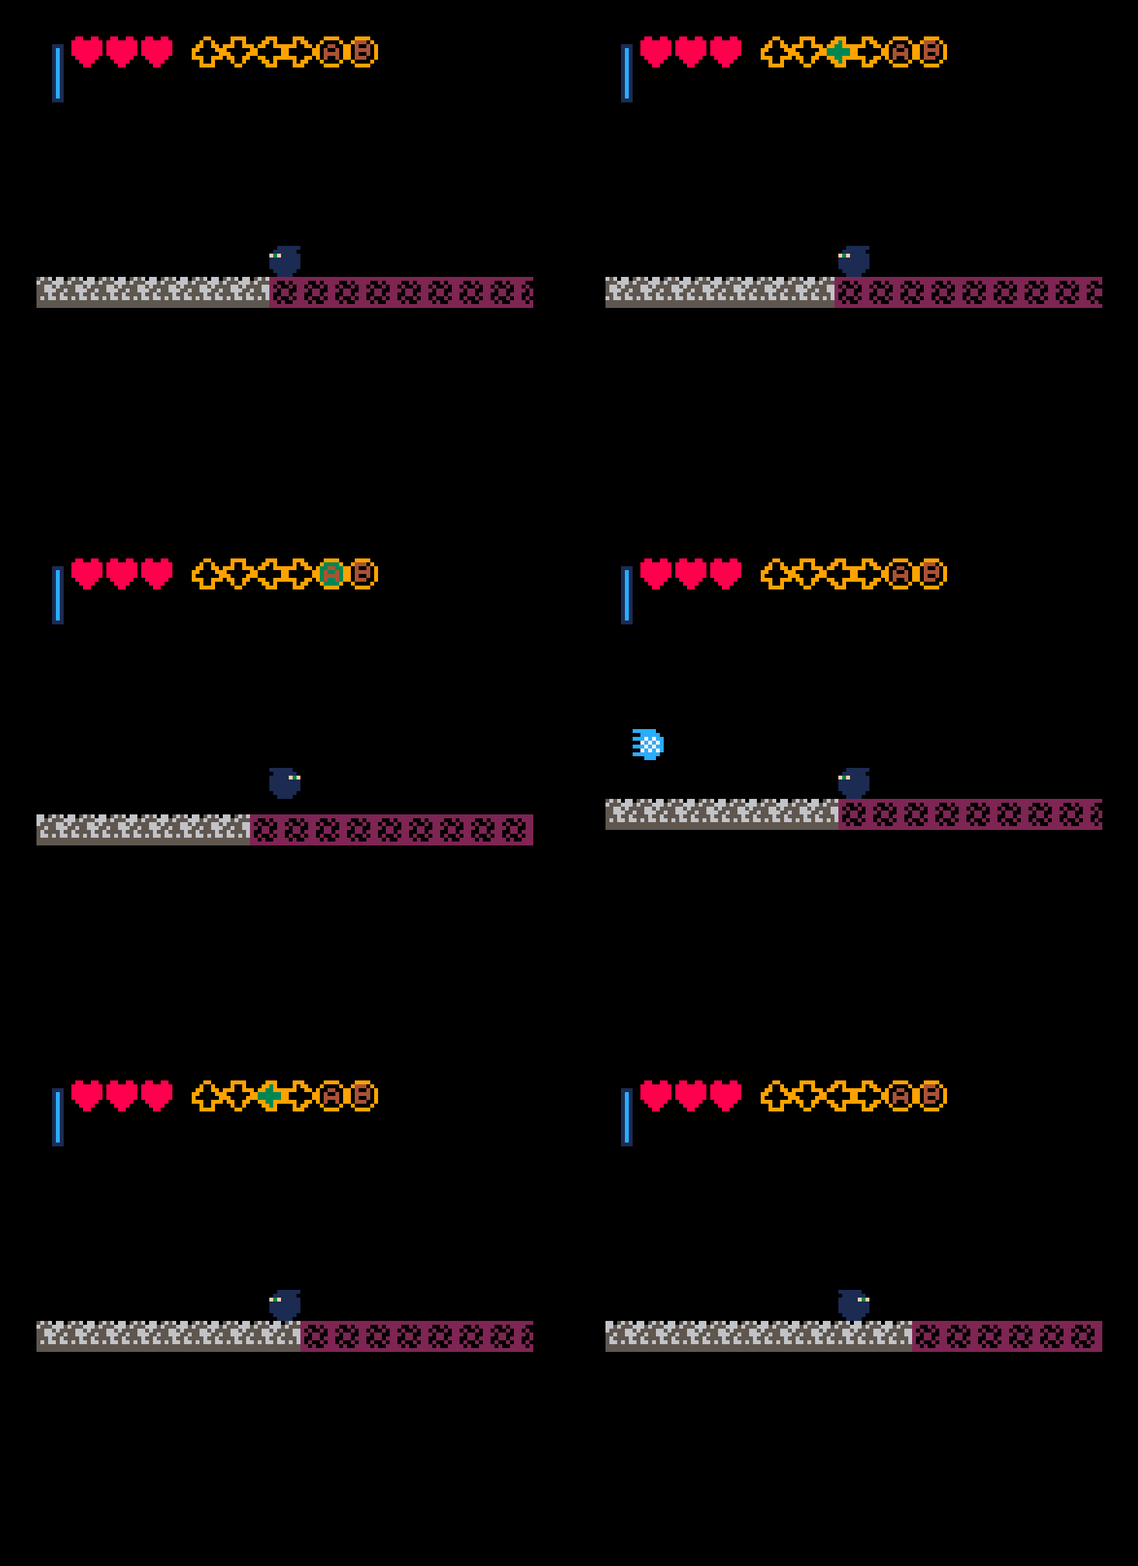
By gaining height with the wall jump combined with the horizontal boost of ice skating the player can get over this pile of thorns. We could, in theory, stop here with movement mechanics. Lots of great games get a lot of mileage out of even fewer systems! Super Mario Bros. is a great game, and that basically just has jumping. However, before I dive fully into level design I think it would be useful to have some additional ways to manipulate Ball Ninja's movement mid-air to allow for some more dynamic level shapes. Let's add an ice ball that also uses magic which sends Ball Ninja away from the direction that it's shot. This lets the player do some fun momentum tricks (shooting upwards while wall jumping for a larger vertical boost, shooting downwards to save themselves from spikes in a quasi double jump, turning around mid air to shoot an ice blast and quickly change direction, etc) while also making combat more interesting. For now we'll have the ice blast freeze enemies in place but do no damage to them; this will make it beneficial to use magic in non platforming segments while avoiding the play pattern of simply shooting ice balls at a safe distance to kill things. Here's an early version of what that might look like:

002

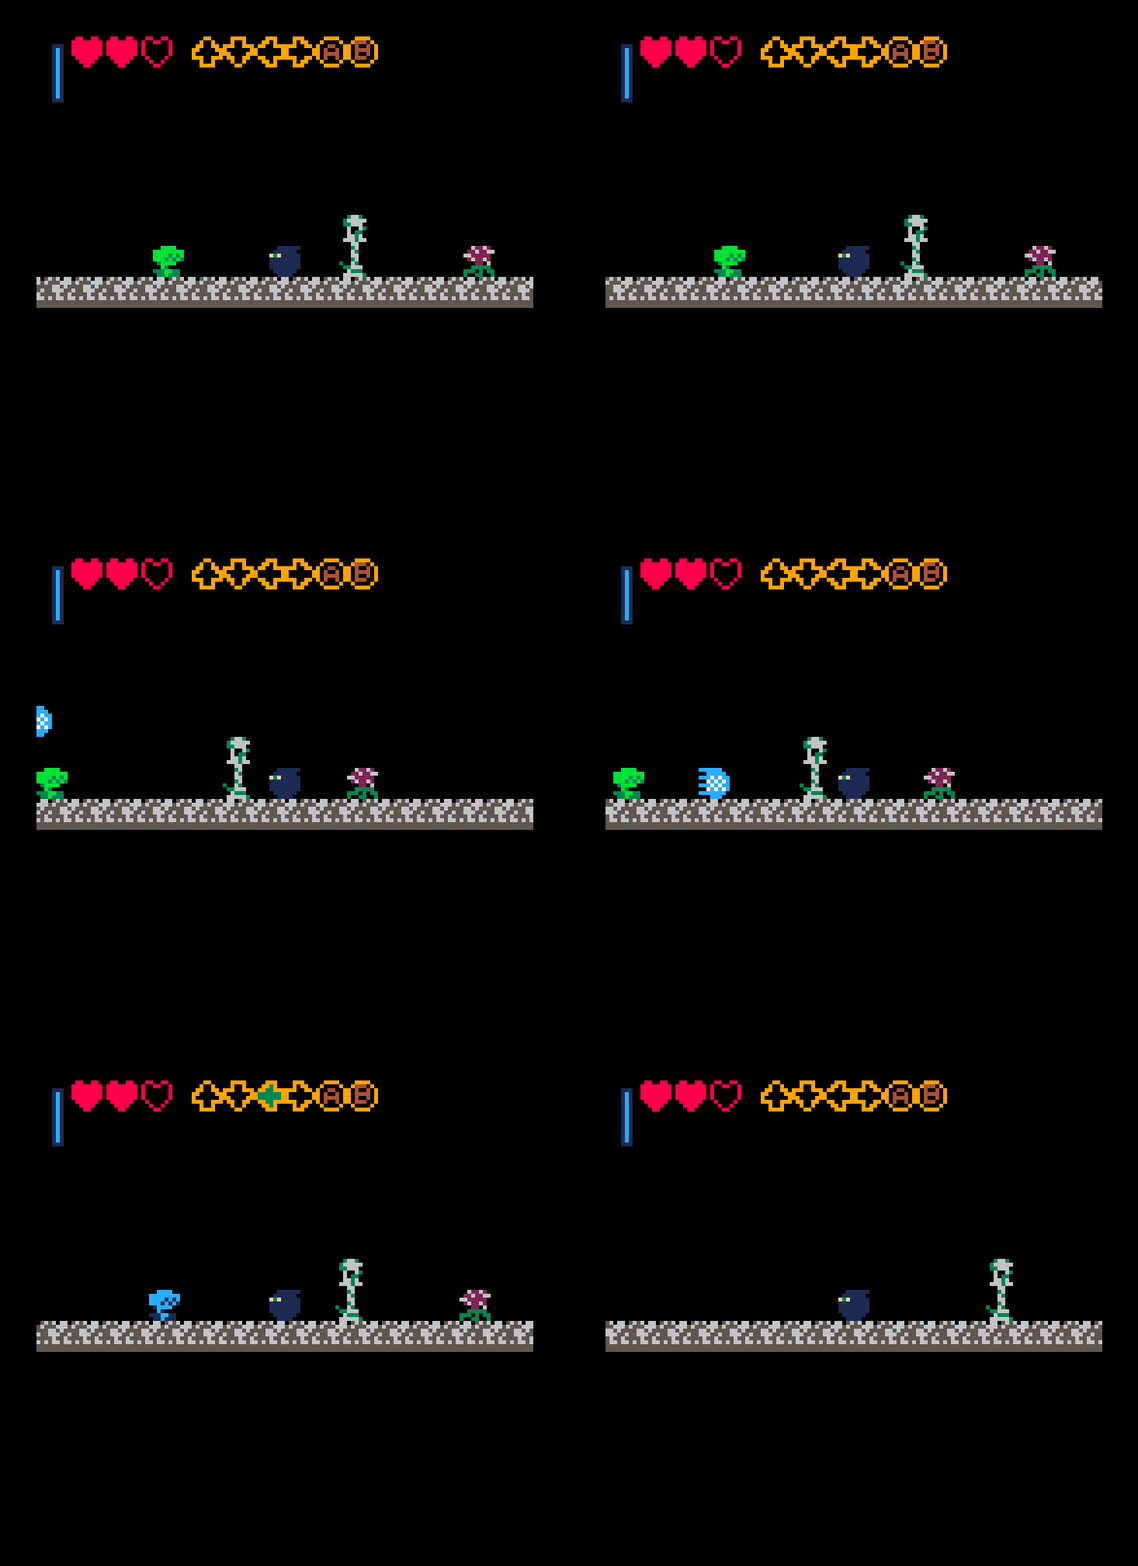
We even add in a fun effect for the frozen enemies where we swap all light colors for light blue and all dark colors for dark blue to indicate that they're frozen and oops we froze the whole world. Right now the ice blast could use a lot of tweaking (you need to press both jump and attack on the exact same frame to shoot it, which is very hard to do reliably) but I think it has a lot of potential. Note that in this early stage the ice blast can cause some weird behaviors with skating:

003

Certainly needs more refinement, but already fun to play around with. Here's a bit of the relevant code for shooting an ice blast: the blast itself is an object that checks for collisions with enemies and if it finds one will freeze that enemy and destroy itself:

ice_blast = new_type(23)
ice_blast.age = 0
ice_blast.vertical = false
function ice_blast.init(self)
	self.age = 0
end

function ice_blast.update(self)
	self:move_x(self.speed_x)
	self:move_y(self.speed_y)
	self.age += 1
	for o in all(objects) do
		if self:overlaps(o) and o.enemy == 1 and o != self then
			o.freeze = true
                       --If you remove the next line you get the frozen world bug
			self.destroyed = true
		end
	end
	if self.age &gt;= 30 then self.destroyed = true end
end

All objects now have a flag they check, called "frozen" to see if they should do anything or draw themselves differently. We make use of the very handy PICO-8 function "pal" to swap out certain palette colors on the fly, or swap them back to the defaults. PICO-8 even orders its internal palette to put all the light colors before the dark ones, so we can replace both sets in some simple for loops like so:

function object.draw(self)
	if self.freeze then
		-- replace light colors with light blue and dark with dark blue
		for i=0,5 do
			pal(i,1)
		end
		for i=6,15 do
			pal(i,12)
		end
		-- TODO: Wiggle left and right when about to unfreeze
	else
		pal()
	end
	spr(self.spr, self.x, self.y, 1, 1, self.flip_x, self.flip_y)
end

...

function enemy_1.update(self)

	if self.freeze then 
		if self.freeze_timer &lt;= 0 then
			-- TODO: spawn some particles
			self.freeze_timer = 60
			self.freeze = false
		end
	else 

         ...

The other route we could go down (or possible even an *additional* route) would be to allow the player to influence the ice skating's direction after starting. Allowing the player to move up or down would potentially enable them to build up speed by creating vertical dips or fling themselves upwards on an icy half pipe. Let's let the player hold down to shift the skating towards the ground and release it to ramp back into pure horizontal movement and whoops that's very very buggy. Looks kinda neat though! And gives at least some idea of how it might work (minus the changing horizontal direction) in the future.

Unfortunately that's all the time we have for this post, so next time we'll fix the skating bugs, make the ice shots a little less finicky, and start exploring what kinds of level geometry would make best use of these abilities. We may even find that the levels do better without them! Just have to test and see.

Quick update: The GDC talk I gave describing much of this thread has just gone live:

A Few Notes on Scope

So, I've returned to the project after being pulled away from it for many months by some Life Stuff. If you've ever had a big creative project which you've taken some time away from you've probably also come back to said project with a hundred million ideas. If all you can do for a work is think about it, you sure have a lot of thoughts when you come back!

Not only did I want to further explore ice skating, but I realized a potential difficulty with some of the current aesthetic designs. Mainly, it is very hard to convincingly pose a ball. A ball needs, at the very least, some easily readable hands to actually convey posing. So what if Ball Ninja wasn't a ball? What if he was instead a little guy?

Well if he's a little guy, should he still be called Ball Ninja? What if instead of being a ball, he had a ball. Perhaps the ball is his primary weapon! Instead of slashing a sword, you can throw the ball like the Megaman 10 rubber ball

What if you could catch the ball after you threw it, and catching it transferred its momentum back to you, which you could then use while skating!

All those ideas sound cool as heck to me, and you know how else they sound?

OUT OF SCOPE

I was reminded of an old game dev chestnut; by the time the dev team was almost done making Super Mario Bros, they were good enough to make Super Mario Bros 2. But first they actually finished Super Mario Bros. So while all of these ideas sound cool and are potentially worth exploring, let's not let the scope creep up too much. After all, it's just about the one year anniversary of starting this thing and I would like to actually finish it. The core idea as originally described still sounds like a game worth finishing, even if it could be better, more interesting, and more fun with more features in it. So let's tuck all these ideas away for later and actually finish making Super Mario Bros 1 first, shall we?

I'm going to get back to refining the ice blast mechanics, which I look forward to sharing with you all soon.

How To Shoot and Not Shoot A Big Ice Blast

As mentioned a few posts ago, the player can hit both the jump and attack button to spend some magic and shoot a big ice blast. It uses either a small, fixed amount of the magic meter or just the rest of it if you only have a little (otherwise you'd try to shoot a blast which wouldn't fire, which would be confusing). It looks like this:

001

There's also a small buffer here so an ice blast can be fired as long as A and B are pressed within a few frames of each other to make things smoother; otherwise the ice blast doesn't fire when you expect it to and it feels bad. Functionally the ice blast will allow the player to disable an enemy temporarily without actually damaging them; this makes them easy prey for a quick approach with a melee attack without actually replacing the sword as the primary damage dealer. After all, if the ice ball did damage then why ever use your sword?

002

The ice blast serves several functions:

  • Allow the player to interact with things that aren't directly in front of them
  • Allow the player a second action to take in combat to add more variety
  • Create an additional movement capability which feels distinct from skating

As you've probably already noticed, the ice blast sends the player backwards after being shot. There's more friction on the ground and less in the air. The delay in firing in addition to the backwards force makes the blast feel more powerful and enables a few new movement scenarios (the most obvious of which is a sort of double-jump).

However: If we treat all ice blasts the same (apply a force opposite the direction of the fired blast to the player) we end up with some untinutitive behavior. The "double jump" aspect feels either very weak or weirdly strong depending on the player's initial vertical momentum. In this setup if the player shoots an ice ball directly down right after a wall jump they shoot up much higher than they would probably expect.

003

The easiest solution to this is to simply modify the player's vertical momentum to a set value after a downwards shot. This makes the "double jump" feel more consistent and has the added benefit of simplifying level design. After all, if the scope of what the ice ball can do is consistent and grokkable we can use it in our level designs with much less friction.

004

It should be noted here that the delay between inputting an ice blast and actually firing one had to be carefully tweaked to avoid making skating obsolete. If the delay is too low,

005

That's not an ice blast, that's a jetpack.

The last thing that needs tweaking is the interaction between skating and blasting. The expected interaction here, I imagine, is to skate forwards and then "double jump" at the end of a skate. However, the current input methods make this difficult. The player would need to stop skating and then immediately push A, B and down. To simplify, if the player is skating and they push down and attack they are automatically transitioned to a downwards blast.

006

This simplifies input and hopefully still feels intuitive. After all, every other ice blast interaction relies around pushing A and B at the same time. If you're holding A to skate and push down and B, why not fire an ice beam down? At the moment any other B press while not pushing down just swings the sword, making down a special case.

There's still some tweaking to be done to make this all feel good to do, but if you want to play around with it here's an exported cart! Next up, lots and lots of level design iteration.

007

I'm going to double-post this and bump another thread with this info too.

https://www.lexaloffle.com/bbs/?tid=47278

PICO-8 is now free on the web for educational use. The only difference between the standalone and the web versions is some hassle in the file system (files are saved temporarily in your browser's directory), no access to the "SPLORE" integrated BBS, and you can't export out of the web version to build binary files to run on Win/Mac/Linux. But you can load and save *.p8.png files via browser cache and use them in the web environment.

I learned a ton as a hobbyist from using PICO-8 and if you're interested in it, you should consider playing around with it.

A Few Notes on Level Design

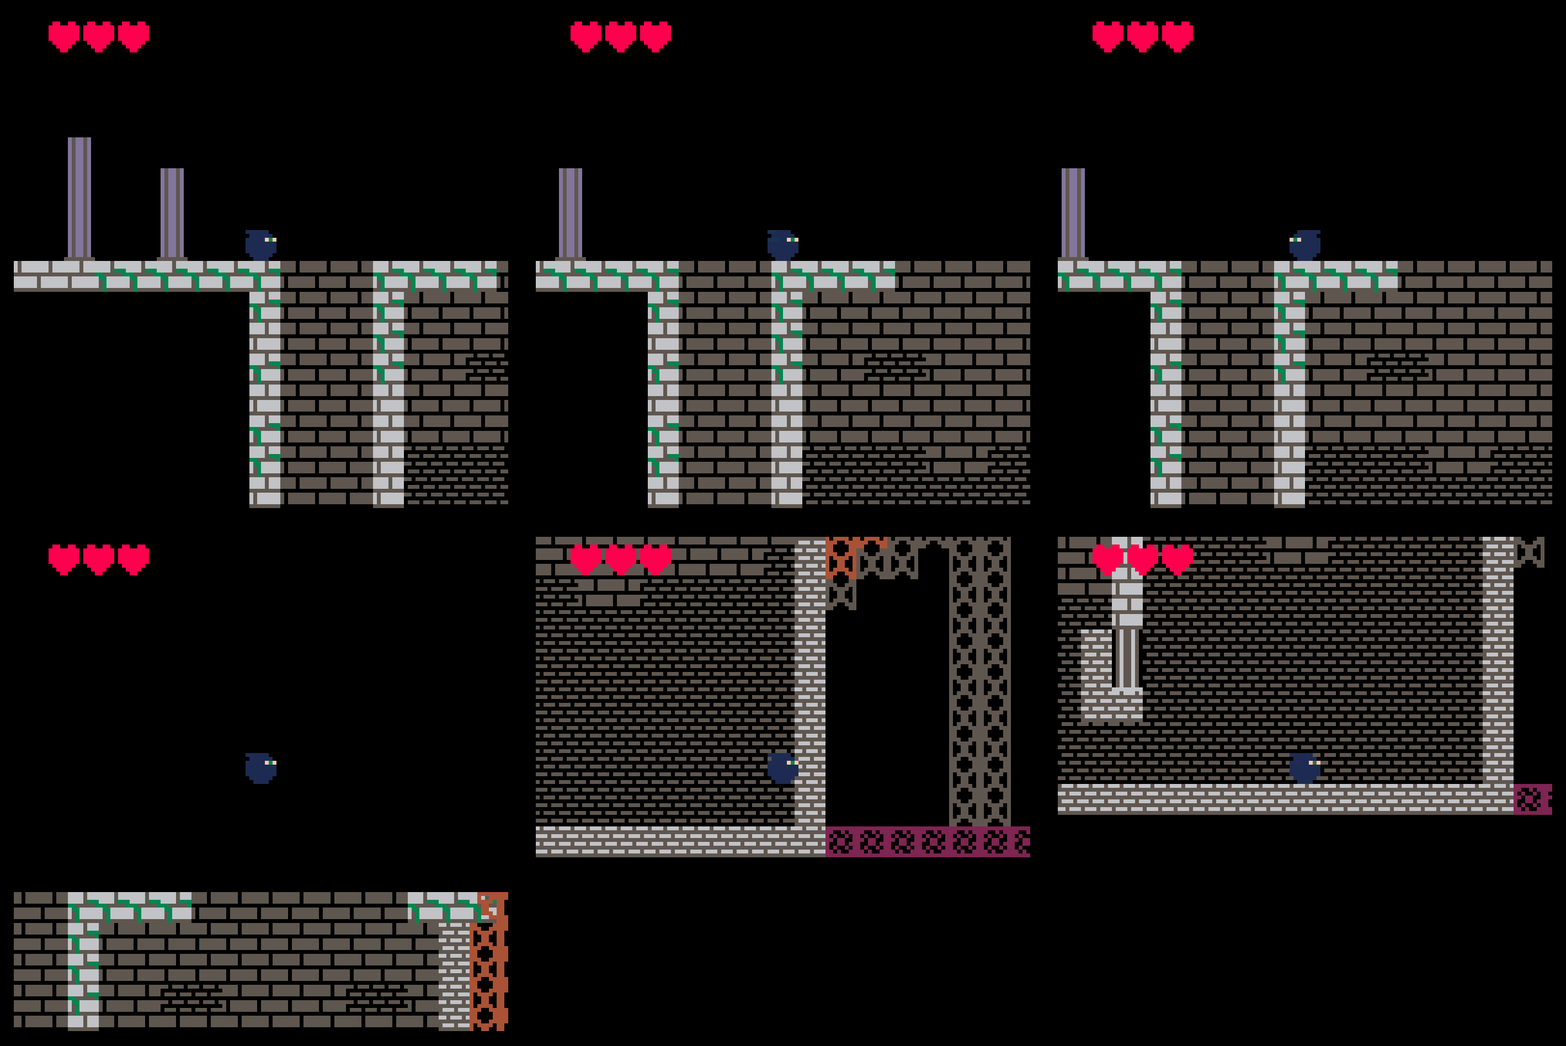
The high level description for what shape the world should be hasn't changed; it's a big abandoned Japanese castle. But what did those actually look like, and how do we turn that into an interesting traversable space? What things do we need to be in the level as a whole in order to meet the broader design goals?

Let's begin with that first question.

The Design of a Japanese Castle

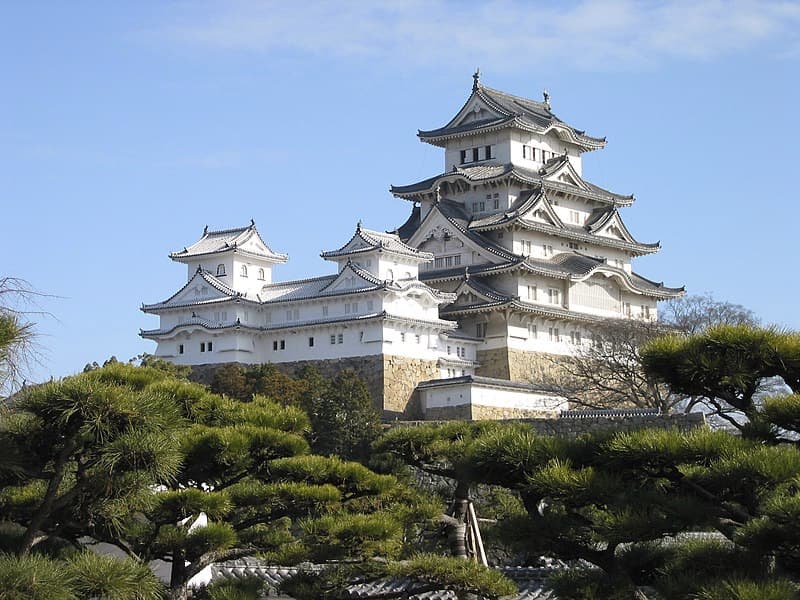
The Japanese castle, as it exists in pop culture, takes the form of those found from the 1300s to the 1600s. The most famous one, and a good one for reference, is Himeji Castle.

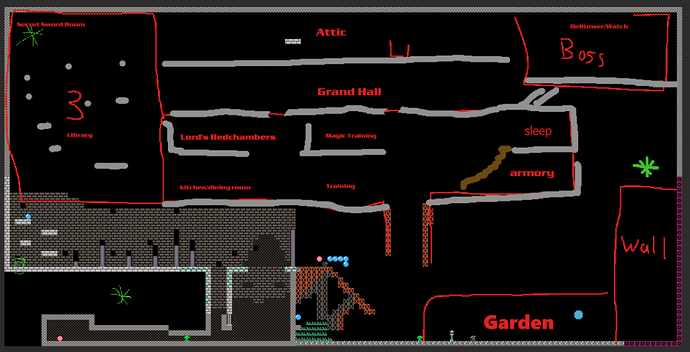
Himeji Castle, and many others, have a pretty similar high level description for their layout and materials. They feature an outer wall and a courtyard, their base was made of layered stones and the tops out of stone, wood and plaster. Other than these general principles we have a lot of room to play with. At a high level we want to make our setting feel authentic while providing enough variety in the shapes and aesthetics of spaces to still be fun to explore. Considering those two factors combined with the existing tutorial zone led to this:

Let's break down the purpose of these sections.

The Zones

The player begins in the base of the castle made of stone in the lower left. (There's a green asterisk in that dark section where a little secret area for changing the player's gi color will go but that's for another blog post). After the player leaves the intro, where they've learned almost all the basic mechanics they enter the garden. At this point the player can see the way into the castle but can't skate far enough to get up to it. The garden has enough power ups to get the player up there after some exploring and is found next to the wall. The wall serves both to keep the player's explorable spaces bounded and to provide a smaller, secondary goal. As they explore the garden they're likely to see the lip top of the wall just a little bit as they jump to incentivize them to go up there later, should they notice. The green asterisk on top of the wall represents a small simple cutscene where Ball Ninja looks out over the beauty of the Japanese countryside.

Why bother with this cutscene? Why even think about it this far ahead of time when it's irrelevant to the gameplay? The answer is simple; to re-enforce to the player that not all nature is evil for the tone. All your enemies are plants here, but for the themes to really shine (that of reclaiming an abandoned space from nature) we need a moment to remind them that nature can be dangerous, but it isn't all that way in this world. Should this be an optional area? Should this be shifted to the actual ending of the game? Perhaps. But for now it serves as a fun little bonus for exploratory players.

Next the player reaches the castle interior. This feels different from the fairly open aired garden by being a much denser series of platforms and walls. In order to really sell the differences between the inside and outside of the castle it's important to change how they function mechanically, not just aesthetically. These rooms are dilapidated and overrun with plants of course but remain individually distinct in decoration. In the lower right area of the castle interior is also where the player can leap from the castle and glide to the wall if they so choose. As they finish the interior they make their way left to the library.

Why a library? Well this needs to be a very tall room to differentiate it from the previous zones (This area is all about climbing in comparison to the previous mostly horizontally oriented spaces) and there just aren't that many types of room that tend to be tall. This could've just been a stairway, but that's not that interesting on its own. A library on the other hand can be very tall without looking out of place and has the benefit of a repeating texture (books on bookshelves) to communicate what it is. At the very top of the library, unreachable from any of its platforms, is the secret sword zone. This is just a fun little bonus for curious players who've found most if not all of the magic upgrades in the game. This room adds an upgrade to the sword to make it the ice katana, capable of freezing enemies with melee attacks instead of just ranged shots. Fancy! Also easy to implement and easy to show; just change the sword's color from grey to ice blue with a simple pal() call and we're good to go. Exiting the library the player finds the grand hall.

The grand hall is the final gauntlet leading up to the final boss room, more or less. It has large horizontal areas to skate over to make use of all those upgrades you've been collecting and many dangerous foes. It also has an opening to the attic, an optional zone leading to a few more magic upgrades and the path to the secret sword room. At the top right of the map is the final boss room, leading to the final challenge of the game. Why a boss as the final challenge in our platforming game? A boss can take up one screen and generally speaking people like boss fights. I know I do.

And that's it! That's the whole map! Look how far we've come from the base. The challenge now is to fill that space with interesting level geometry that evokes the sense of exploratory wonder and danger that we're looking for.

Also, as a brief aside,

Development Time

Gosh I've been working on this thing for over a year and a half, huh. Not full time by any stretch (I have a 9-5 and get only a few hours a week to chip away at this project), but I think I can beef up that number a bit. Let's try to aim for a less than two year full cycle on this one, see where that goes. Let's try for the end of 2022! We'll see! See you next time as we discuss the small upgrades to the skating system, the changes in animation state for wall jumping and the level design of the garden.

@“Syzygy”#p87642 My usual go to is a program called Screen2Gif, but PICO-8 has native support for recording and exporting gifs if that's your bag.