The Insert Credit Cookbook (the recipe thread)

I recently saw a tub of beetroot hummus at the shops, remembered this post, and thought I would grab it to try. Dang, that was good.

I need to have a go at making some beets hummus of my own now. @ana, any tips on the ratio of beets-to-hummus you used, how hard you roasted them, etc etc?

@rejj if i remember correctly, I made my usual hummus recipe and just added 2 small-ish beets. I donā€˜t cook with beets pretty often so I when I made this hummus I think I roasted them the wrong way since they were pretty dry and Iā€™ve seen people with pretty juicy roasted beets so maybe try to cook them in a way that makes them juicy? (that probably will enhance the color).

I used my ovens roast function (which I use for a ton of things) but that was probably not the best way.

@rejj This was and is one of my go tos. I make it with Marsala from time to time and any decent mushroom would do wonders, although Portobellos are the ones I like the best (imo). The best thing to do in this case is to at least infuse the broth with mushrooms (dried are a really well option if you want to do the extra step, and I use them from time to time in a homemade mushroom broth).

I have to put up a simple recipe that works wonders for those who want to make a warm, comforting recipe, which is a salmon in a coconut lime sauce (although I guess it'd be fine to try it with some crispy tofu).

It has been a whole year since the April 2022 Art Jam and the Delicious Goulash recipe. I've been cooking meat-free (and mostly fully plant-based, but I still eat some cheese and I still use some eggs) since July 2022 and I wanted to revisit and update that recipe. The weather is turning cold over here, which means that it is officially Goulash Season.

Vegan Goulash, 2023 Edition

Prep Time: 20 - 60 mins, depending on how fast you chop?
Cook Time: 3 - 4 hours
Total Time: 5 hours + overnight rest
Servings: 6 - 8? depends on how big your serves are but you should get a lot out of this

Ingredients

Veggies and stuff:

3 brown onions (or 2 if theyā€˜re huge)
4 cloves garlic (or more, Iā€™m not gonna stop you if you want to use 12)
1 tsp ginger (about 2" worth from a root)
1 leek, most of the very green part removed
3 ribs celery
2 large carrots
750g potatoes
400g mushrooms
1/2 cup red lentils
2/3 cup brown or green lentils

Dry spices etc:

2 tbsp sweet paprika
1 - 1.5 tsp hot paprika
1/2 tsp smoked paprika
1/4 tsp turmeric powder
1/4 tsp nutmeg
2 tbsp nutritional yeast
1/2 tsp cayenne pepper
1 tsp majoram, or ā€œmixed herbsā€ if you donā€˜t have or canā€™t find it (my market ran out!)
1/4 tsp msg (optional, but I find it is an excellent umami booster)
1/2 tsp ground black pepper (I donā€˜t measure this I just grind with my pepper mill until it seems about right)
1/2 tsp salt (I donā€™t measure this I just take a good pinch that is approx 1/2 tsp)

Liquids etc:

1 tbsp tomato paste
100ml red wine
1 cup veggie stock (I use this ā€œchicken styleā€ one)
1 sachet instant dashi powder (I use this kombu & shiitake one)
1 tsp soy sauce
1 tsp worcestershire sauce
1 tsp balsamic vinegar

Sundry:

3 tbsp plain flour
1 large bay leaf (or 2 small ones)
1 tbsp coconut oil
olive oil
1 - 2 cups water

Directions

Prep:

Slice the leek lengthwise, leaving about 1" still connected at the root end. This will let you wash it thoroughly and get between the layers ā€“ they are always full of dirt and sand.

Finely dice the onion, celery and leek. Mince the garlic, mince or grate the ginger.

Peel the potatoes and cut them in to about 5cm chunks (about 2"), and put the pieces in a large bowl with water so they are covered.

Chop the carrots in to pieces approx the same size as your potato. I like to use a rangiri rolling cut for this.

Wash and slice your mushrooms. These can be in 1/2 or 1/4 chunks, or thinner slices based on your own mushroom preferences.

Rinse both types of lentils together until water runs clear through them.

Measure out all the dry spices. These can all be placed in one small bowl or container, they will all be added to the pot at the same time.

Cook:

Cover the bottom of a large, heavy pot (I use a large dutch oven) with olive oil, and add the coconut oil.

On medium-low heat, add the onions, leek, celery, garlic, and ginger with a pinch of salt. Stir and sweat these until the onion turns translucent, but be careful not to brown them. By the time the onions are ready the leek should have also wilted/sweated down a bunch.

Add the tomato paste, and stir and mix through while frying off the raw paste for a few minutes.

Once the tomato paste has started changing colour (it should start heading towards a rich teracotta) add all the dry spices and stir through continually for about a minute, until they become fragrant.

Drain the potato bowl.

Add the potato, carrot, and mushrooms to the pot, stir to mix through and get all the veggies covered in the spices and onions.

Raise the heat slightly, and add the wine (or water, or juice) to deglaze the bottom of the pot. Allow this to simmer for a couple of minutes, to reduce down a little and to cook off some of the alcohol.

Add the dashi powder and the liquid stock, stir well to combine everything and allow the mixture to come up in temperature to a simmer.

Add the lentils and mix through.

Add the flour one tablespoon at a time and stir through, resulting in a fairly thick mixture.

Add about a cup of water while continually stirring, to thin everything back out.

Add balsamic vinegar, soy sauce, worcestershire sauce, and bay leaf. Stir through, and allow everything to come up to a gentle simmer.

Put the lid on the pot and reduce heat to very low. After the first 20 minutes you'll likely need to add another 1/2 - 1 cup of water, because the lentils will be soaking it up.

Continue to cook with the lid on over low heat for at least 2 hours, up to about 3.5 - 4 hours. Every 15 - 20 minutes give it a good stir and scrape the bottom to make sure nothing is sticking. Be sure to test a piece of potato and carrot with a knife before stopping, to make sure they are properly cooked through.

Take off the heat and allow to cool down. Once cooled, remove the bay leaf and then place in the fridge to rest overnight.

To serve, reheat in the same pot. If you don't use it all, allow to cool and put back in the fridge. Next time, reheat in the same pot again. It will improve with every iteration of this, and will keep in the fridge easily for 4-7 days without a problem.

Notes

The red wine can be omitted if you want to not use any alcohol. You can use water in its place when deglazing, or apple juice.

The sharpness of this dish can be adjusted via the amount of cayenne or hot paprika used. To make it sharper I usually use more cayenne rather than more paprika. To make it milder I would suggest omitting the cayenne entirely, but still using the hot paprika. Taste the sauce after it has been simmering covered for about an hour, to see if you need to adjust anything. An extra splash of vinegar or perhaps some lemon juice can help balance it out if it is a little too sharp and not feeling quite right. If a touch of sweetness is required you can add a splash (1/2 - 1 tsp) of maple syrup.

Can be served with some crusty bread or rolls, with rice, or over pasta ā€“ however I still highly recommend that you pair it with the knƶdel as detailed in the original Art Jam post.

Like any dish of this sort (stews, curries, etc) it only gets better over time. If you really must you can serve it right away, but letting it rest for at least overnight in the fridge helps build the flavour and significantly improves the overall experience.

This dish also freezes well. I like to portion out individual serves to freeze, and they'll keep well for 3 - 6 months frozen. To serve, defrost and then reheat in a small pot, probably adding a little bit of water.

I donā€˜t recommend microwaving to reheat, Iā€™ve had uneven results attempting to do so in the past.


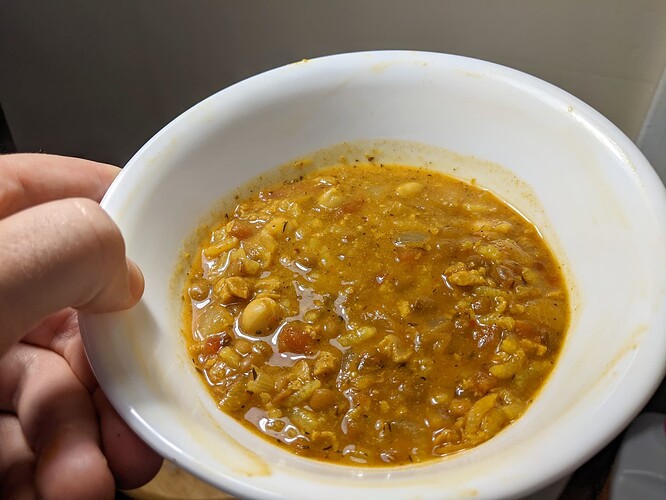
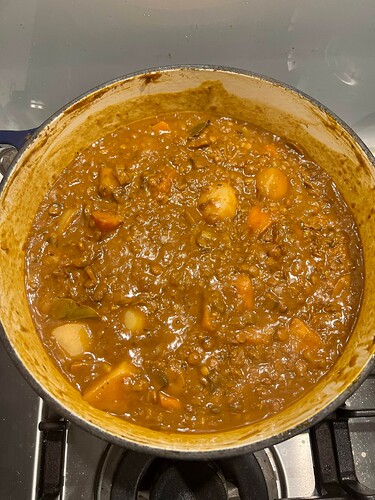
Hereā€˜s a pic of this after about 3 hours of slow simmering this evening. It is now cooling off before I put it in the fridge, to be eaten tomorrow. Iā€™m using all my willpower to not have some right now, but it really does make such a difference that the wait is worth it.
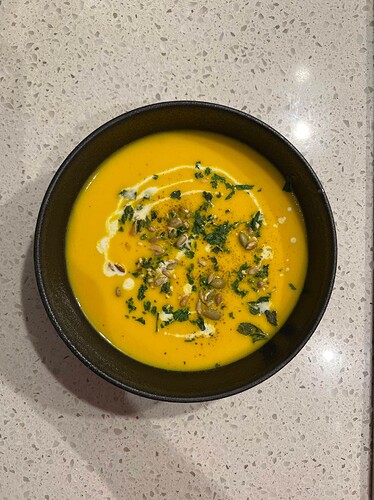
Yesterday I mentioned that I'd made a carrot & ginger soup, and this was my first time making (or eating!) this particular soup. Maybe that's weird? Is this a popular soup format (to borrow IC terminology for game categorisation)? In any case, I did a bunch of reading and youtube-watching to see how everyone else makes this soup, and combined a Frankenrecipe out of all the various bits that sounded good. I figured I might as well share what I ended up with.

Carrot & Ginger Soup

Prep Time: 10 mins
Cook Time: 45 mins
Servings: 4 - 6, depending on how large your bowls are

Ingredients

Soup

2 tbsp neutral oil (I used vegetable oil)
1 large onion
4 garlic cloves, roughly chopped
2 - 3 inch piece of fresh ginger, roughly chopped
1/2 tsp ground cumin powder
1/2 tsp ground turmeric powder
1 kg carrots
1 - 2 tbsp cooking sake, or white wine, or chinese cooking wine, or water
4 cups vegetable stock
400ml coconut milk (one normal can)
1 lemon
1 tsp white wine vinegar (optional, if your lemon is small or not very juicy)
2 tbsp maple syrup
1/2 tsp black pepper
salt

Topping and garnish

Fresh parsley, basil, or chives
black pepper
toasted mixed nuts/seeds (I have sunflower seeds, pumpkin seeds, almonds, sesame seeds, pine nuts)
red pepper flakes (optional)
coconut milk

Directions

Chop the onions to a medium dice, smash and roughly chop the garlic, peel and roughly chop the ginger. Everything is going to be blended later so you do not need to take care to finely dice or mince anything here.

Peel and roughly chop the carrots in to 2cm (about an inch) pieces. It is more important that you get everything roughly the same size than what that exact size is, in order to ensure they all cook evenly.

Put a large pot over medium heat, and add the vegetable oil.

Once up to temperature, add the onions and a pinch of salt and cook until softened and turning translucent (likely 5-8 mins), stirring regularly. Take care to not brown the onions, if that starts happening consider lowering the heat.

Add the garlic and ginger with another pinch of salt, continue to cook stirring frequently for 2 minutes until they become strongly fragrant.

Add the cumin and turmeric, stir for about 30 seconds (they should become fragrant quickly), then add in your splash of wine (or water if not using alcohol) to deglaze the bottom of your pot and help ensure those spices do not burn.

Add the carrots and a large pinch of salt and cook for about 8 minutes, stirring occasionally. If anything is getting too stuck to the bottom of your pot, add a splash (1 - 2 tsp) of water to help deglaze.

Add vegetable stock, freshly cracked black pepper, and the juice from your lemon. Bring the pot to a boil and then cover with a lid and reduce heat to a simmer. Cook for 25-30 mins, until the carrots are fully cooked and a knife easily pierces them with no resistance.

Add the maple syrup. Using an immersion blender (or in batches with a bench top blender), blend until everything is smooth. Add half the can of coconut milk, and stir through until well combined. Check for seasoning and consistency/thickness ā€“ this is a soup, not a puree, so I did not want it too thick and added some extra coconut milk (using about 2/3 of the can overall). Add salt if needed, and a splash of vinegar if it is missing acidity/tartness (I added a splash here since it seemed my lemon was not particularly juicy).

Bring back up to temperature if you've allowed it to cool (for safety with a bench top blender, for example), and ladle in to bowls.

Top with your herb of choice (I used a combo of basil and parsley), a crack of black pepper, a sprinkle of red pepper flakes if you feel like it, 1tsp drizzle of coconut milk, and a sprinkle of toasted mixed nuts/seeds if you have them and feel like it.

Serve with a nice slice of bread, or perhaps even some garlic bread.

Notes

I guess you could use honey, sugar, agave, or whatever sweetener you like in place of the maple syrup. I had some on hand already so I used it.

I use an immersion blender and do not own a high speed bench top blender, and everything blended just fine. I guess if you were to leave the skin on your ginger then perhaps a high speed blender would be required.

The cooking alcohol is absolutely not required, I just always have a bottle of cheap cooking sake around.


Pic

I thought Iā€˜d try my hand at making some ā€œprotein ballsā€ or ā€œbliss ballsā€ or whatever people like to call them. Like the carrot soup above, I researched a bunch of different recipes and cobbled together bits and pieces and ideas from the ones that sounded good to me and put this together. I did some testing, and after a few test batches Iā€™m pretty happy with how these turn out. There's lots of room for experimentation and changing things if you want to try different flavours, also.

Almond & Oat Protein Balls

Prep Time: none
Cook Time: 10 mins
Total Time: 40 mins
Servings: 15-20

Ingredients

3/4 cup almond flour
1.5 tbsp cacao powder
2 tsp chia seeds
2 tsp desiccated coconut
1/2 tsp ground cinnamon
1 cup toasted muesli
1 pinch salt
1/2 cup almond butter
2 tsp vanilla extract
4 tbsp maple syrup

Directions

Add all the dry ingredients to a large mixing bowl, and stir together with a spatula.

Add the vanilla, maple, and almond butter. Fold together until well combined, it should hold together in the bowl in one consistent clump rather than falling apart. If it is too dry add a teaspoon of water or non-dairy milk at a time until it comes together. If it is too wet, add small amounts of extra almond flour until everything folds together nicely.

Spread some extra desiccated coconut on a plate or in a small container.

Ensuring that you have clean hands, grab small amounts of the mixture and roll between your palms to form balls. You shouldn't need to press too hard, the mixture should stick together and easily roll together. Once formed, roll each ball in the coconut and place in a container or tray lined with parchment.

Place in the fridge for at least 30 minutes so they firm up and set.

Notes

You can use plain rolled oats rather than a muesli mix. If you want to add your own things for flavouring, use 3/4 cup rolled oats and 1/4 cup of whatever else you want to add. Mixed seeds and nuts, dried fruits, cut up dark chocolate pieces, anything goes really. Just make sure you are using rolled or toasted oats, not quick oats.

Maple syrup can be substituted with agave, honey, or whatever other sweetener you have or prefer.

Will keep in the fridge for longer than it will take to eat them (a week or two easily), and freeze for a few months.


@treefroggy Iā€˜m curious how similar (or not!) this is to your fatherā€™s recipe, it seems there are heaps of variations out there. I deliberately put this together to not require any equipment like a food processor, this only needs a big bowl, a spatula, a measuring cup, and some spoons.

@rejj they can also be a great conduit for cannabis, if that's your thing (fat-soluable)

itā€˜s not my thing, but itā€™s a real crowd pleaser.

This is a good base to use for sandwiches, and is quite adaptable as a template. Add radishes, don't add capsicum (bell peppers), you can mess around with this a fair bit.

Chickpea salad (for sandwiches etc)

Ingredients

2 cans chickpeas, drained and rinsed
3 stalks celery, finely chopped
1/4 green capsicum, finely diced
1/4 red capsicum, finely diced
1 carrot, finely diced
1/2 red onion, finely diced
1/4 cup walnuts, chopped (optional)
1/2 cup mayo
1 juice of a lemon
1/2 tsp dried dill
1/2 tsp pepper
1/4 tsp garlic powder
1/4 tsp Italian seasoning
1/4 tsp curry powder
1 tsp dijon mustard
1/4 tsp salt
1/4 tsp msg (optional)
pinch of black salt (optional)
1/2 tbsp plain yoghurt (optional)

Directions

In a large mixing bowl, mash chickpeas well with the back of a fork. You want them mostly broken up, but a mix of textures is nice so don't try to perfectly mash everything.

Add everything to your bowl chickpeas, and stir with a spatula or wooden spoon to combine thoroughly.

Serve or let chill in fridge in air tight container for up to 5 days.

Notes

When dicing the veggies and chopping the walnuts you want everything to be about the same size at the end, so you can easily spread this over bread to start a sandwich for example.

Vegan mayos and yoghurts work perfectly well here.

@rejj I made this and it ruled. I really appreciate the recipes youā€˜ve lovingly crafted here and I have them on my list of recipes to work through. Iā€™m definitely making this lentil soup again.

I made a few small substitutions (like vegan oyster sauce for the soy sauce and tamari, because I didn't have tamari and was out of soy sauce (??)) and a series of less-small substitutions stemming from my Old Lady Who Swallowed the Fly decision to add too much textured vegetable protein (so I had to quickly through together a reinforcement batch of onions, garlic, lentils, and tomatoes).

edit: proof

Looks great!

substitutions

As Chef John would say, that's just you cooking. Unless you are baking (where tiny changes in amounts and ratios can have drastic effects) my view is that recipes are guidelines and inspiration rather than rulebooks that must be followed exactly.

I'm glad it worked out well for you, and that you liked it

I want to talk about bigos.

Yesterday I was out for a walk with a friend and we stepped into a European grocer because I wanted to try to find powidła (plum butter) to make bigos and the Polish store owner told me he just makes it with prunes like I've already been doing. I had a taste of the bigos he makes in the store and it was incredible. I've made bigos twice and in comparison mine is too sweet and like the wrong kind of soggy. He offered that his might've been too sour but it didn't taste that way to us.

(The first time I made it was the weekend I came down with covid. It was the middle of summer and the virus made everything taste like garbage so this was about the worst first impression possible.)

I bought some of his sauerkraut to make it again this week and I'm going to try to change up how I do things. I might not have fried it enough last time.

I talk a lot about cooking in here, and finally Iā€˜m contributing something to this thread. I tend to be too harsh on my own food and that leads me to thinking I need to improve everything before sharing recipes, but this time Iā€™m breaking that cycle.

Pea (or cashew) based vegan mozarella. Alpha release v0.6

The following quantities make approximately 1 kilogram.

Ingredients:

150g Cooked yellow split peas (or soaked cashews)
90g Refined coconut oil (melted)
50g Tapioca Starch
50g Potato Starch
10g Sodium Alginate
10g Psyllium Husk
15g Nutritional Yeast
15g Lactid Acid
15g Vinager
25g Salt
650ml boiling water

Instructions

  1. Soak peas or cashews over night

  2. If using peas cook them for about an hour or until they are soft.

  3. Combine the Psyllium Husk with some water and stir to form a stretchy substance.

  4. Add everything to a blender (boiling water last) and blend on high. It should thicken in a couple of seconds. (be careful not to force your blender). Remove from blender and add it to medium-low heat pan.

  5. At this point the cheese should be thick and heavy. Just turn it around the pan for a couple of minutes to achieve a better consistency.

  6. Transfer to mold and let it cool for a while. Store in the fridge overnight.

Notes:
Ā¹ You can replace Sodium Alginate with agar-agar or kappa carragenine. I feel that Sodium Alginate is way better at thickening with fewer quantities. My attempts with agar-agar and kappa carragenine didnā€˜t come up as solid as Iā€™d like, and I had to use a lot of them.

Ā² You can replace lactid acid by adding more vinegar and some lemon. Another way to replace it would be with fermented wheat starch.

Ā³ I prefer using peas instead of cashews because they are way cheaper and they make the final product taste better. The only downside to peas is that the cheese comes out more yellow-y.

Thanks for reading, feedback and suggestions appreciated:)
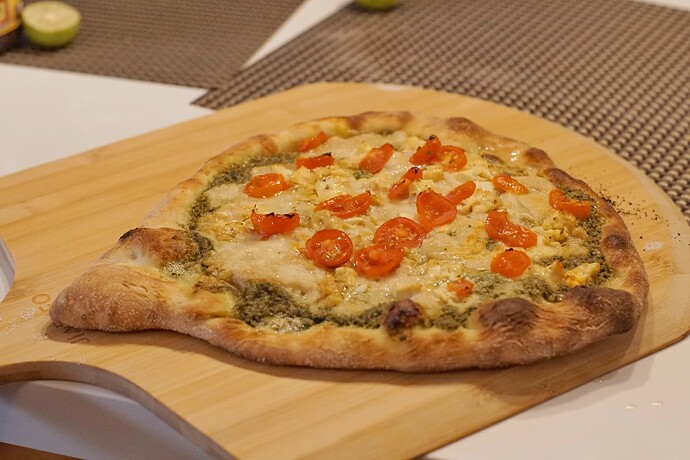
Here's a picture of how it looks used on pizza.

@ē©“ late feedback: this looks great!

How important do you think the bench-top blender is? I don't have one, but I do have a stick/immersion blender. I worry it would burn out the motor if this is instantly turning in to a real thick paste/blob however.

I wonder if it would be possible to make in a pot. Boil the water in the pot first, add the peas (or cashews), oil, starches, nutritional yeast, acid, vinagar, salt, and sodium alginate and give that a blend with the immersion blender ā€“ mostly to blend up the peas. Then add the psyllium husk and whisk that in by hand.

A concern I have is that this would just cause everything to go lumpy and not combine properly. I might try the experiment, but I don't have any sodium alginate or agar-agar. I think agar-agar is at least easily accessible in stores around here

@rejj Iā€˜ve been meaning to post an update because I realized the way I was doing it was kinda burning my blenderā€™s motor. The last time I made it, I didn't add any of the agar/alginate and added 1/2 of the required water with all the other ingredients and blended them for a couple of minutes to get them all smooth then I added the alginate along with hot boiling water in a pot.

As long as all the ingredients get mixed well and you have the hot water to activate the thickener.

I just posted this in the snacks thread, but figured Iā€˜d break it out on its own here for archival purposes. One thing I didnā€™t note over there is that this works equally well with about a cup worth of carrots, and this is a good base to start from if you want to experiment with flavouring your pickled veggies. Drop some pepper corns in the liquid, some dill, etc.

Pickled Red Onion

Ingredients

1 Red onion
1/3 cup rice vinegar
1/4 cup water
2 teaspoons plain sugar
1 teaspoon kosher/cooking salt

Directions

Cut the red onion in half through the root end, remove the skin, then cut thin slices in the direction from root to stem.

Whisk vinegar, water, sugar, and salt in a bowl or container until all the salt and sugar has dissolved in to the liquid. Add the onion slices, cover, and put in the fridge.

Notes

In a rush you can use them even after about 15 - 30 minutes, but ideally let them sit for a few hours or overnight.

Well, let's go:

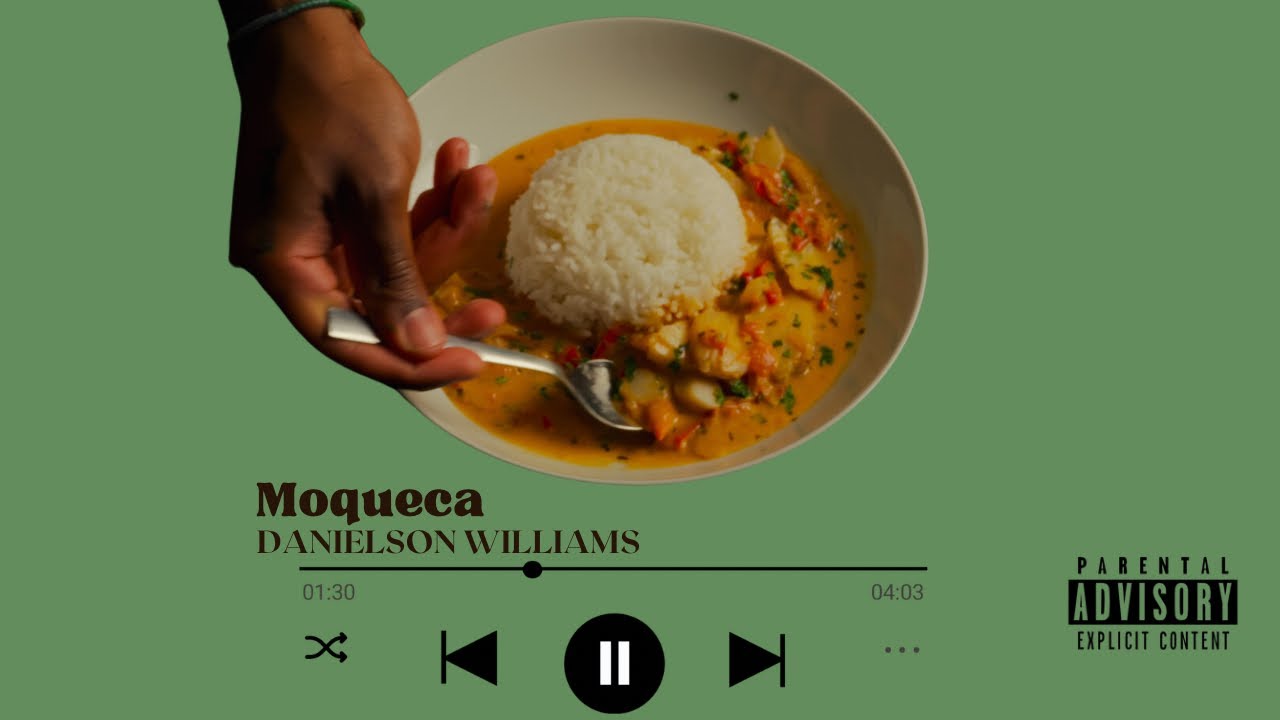
Moqueca:

Pretty self-explanatory video, thereā€˜s no missing thing. In my case, I didnā€™t have jalapeƱo, so I switched for some chili powder, and I think you could also use pepperoncino.

Also, more dishes. In this caseā€¦

Date and cilantro pesto

I'm going to try it later, but:

What you need:

  • Cilantro (50 grams might be the idea)

  • Pine nuts toasted (I used nuts and you could use anything else)

  • Cheese (in my case, I used pecorino cheese)

  • Lemon juice (to balance the thing and bring some freshness. I guess you could also use lime juice)

  • Oil (of course, to emulsify the whole thing)

  • Dates (I used three dates, so two might be a good idea)

Well, if you donā€˜t know how to use pesto, itā€™s quite easy. You toast the nuts and then mix it together in a blender. Use the oil and add little by little and if things doesn't mix well, you could put more oil or even water to help those ingredients integrate with each other.

And another recipe I found that is easy and works well:

Salmon with coconut lime sauce

Ingredients:

Salmon (one piece per person)

Coconut milk

Brown sugar (optional?)

A lime

Basil

Ginger (grated, fresh or the spice)

Garlic

Step by step:

  1. Put some oil into a pan and fry salmon until it gets a little bit browned and releases some of its juices. Then, you retire it.

  2. While that happens or before, chop your ginger (if you want fresh ginger) and garlic. I use a clove and you could use two if you love the taste of it.

  3. Toast the spices in the pan for a minute when the garlic gets a little bit browned. If the pan is hot, it will be quicker.

  4. Put the heat to medium or low and throw in the coconut milk.

  5. Let the flavors integrate for a while and put the mixture to simmer.

  6. Throw in your salmon and let that cook.

  7. Once it is cooked, cut the lime and put the juice to taste. Balance everything out and it's done.

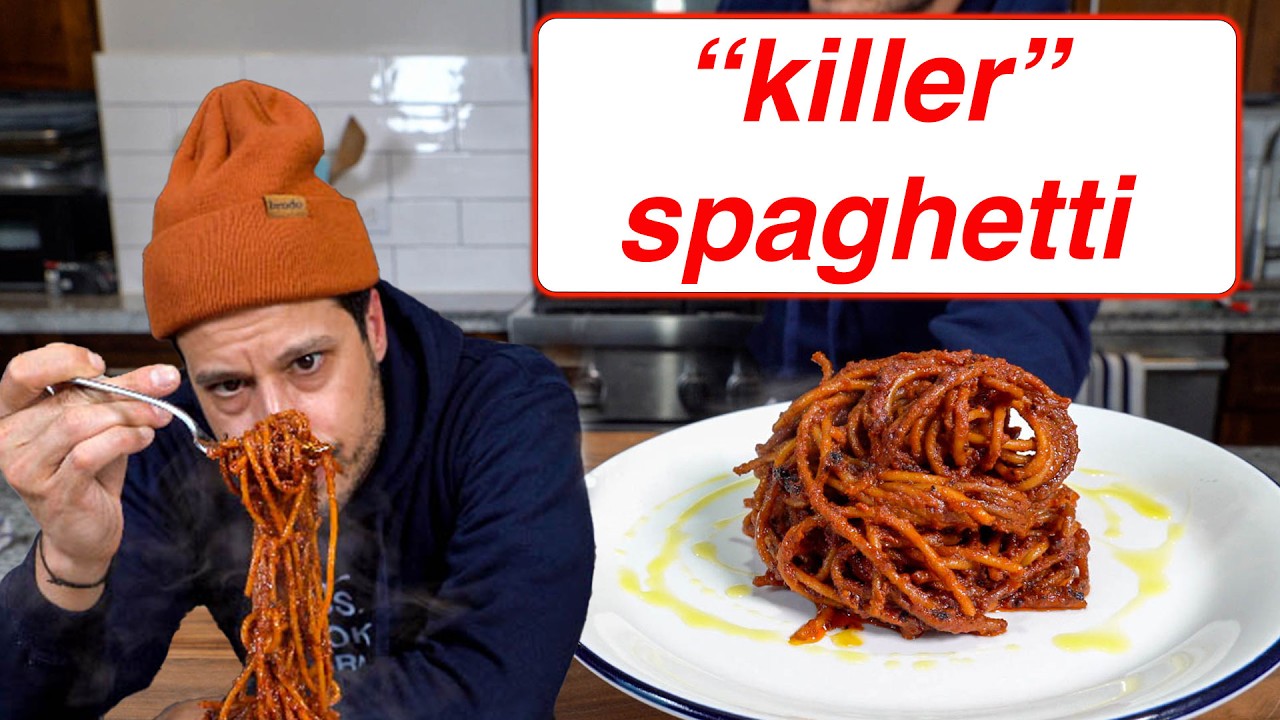
And one I haven'tr tried, but I know is becoming more and more popular:

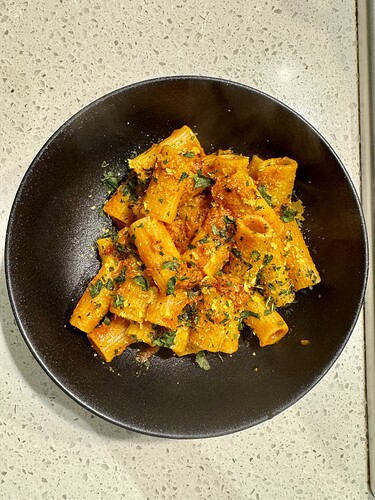
I made a batch of this last week to split portions and freeze. I had one of those portions today, so figured I may as well type this up. It is super-simple, most people probably already know this recipeā€¦ but it doesnā€™t hurt to document anyway. Also, I made a couple of highly-untraditional alterations.

An Easy Marinara Sauce

Prep Time: 5 mins
Cook Time: ~20 mins
Total Time: ~half an hour
Servings: Should be enough sauce for 8 serves of pasta

Ingredients

1 800g can of tomatoes (either whole peeled plum, or diced / pulpa)
80g - 110g tomato paste
2 tsp gochujang
1 small yellow onion, diced
6 cloves garlic, diced
small knob of ginger, minced or grated
olive oil
basil
salt
black pepper
1 tbsp nutritional yeast

Directions

Dice the onion, dice the garlic, mince or grate the ginger.

If you are using whole peeled tomatoes, pour the can out in to a large mixing bowl and either crush them by hand, with a wooden spoon, or give them a quick pulse with a stick blender.

Finely chop some fresh basil, keep the rest for serving when you want.

Pour enough olive oil to cover the bottom of a large pan, and heat over medium-low. Add the diced onion and sweat for about 5 minutes, stirring often, until they start to turn translucent. Add the garlic and ginger and continue stirring for about another 2 minutes.

Add the tomato paste and cook for 5 minutes while stirring, until it starts changing colour to a more like terracotta. Add the gochujang and cook for another 2-3 minutes.

Add your tomatoes and stir everything to mix. You may need to add a splash of water, depending on how thick your paste mixture ended up and how much water was in your can. Add in your finely chopped basil.

Raise heat to medium and simmer for about 10 minutes, stirring occasionally. If youā€™re adding the nutritional yeast, put that in now and stir to mix it through. Add a good pinch of salt and about 10 grinds of freshly cracked black pepper then taste to see if you need any more salt & pepper.

Can be served immediately by tossing with some pasta, or allowed to cool and stored in the fridge for 4-5 days or frozen for a few months.

Notes

I like adding nutritional yeast while making marinara, but it is not essential. I also sprinkle additional nootch over my pasta when serving.

Take care not to brown the onions, garlic, and ginger in the first steps. Weā€™re just sweating them here, not trying to fry or sautee them.

I had a 110g tube of tomato paste that I had used a little bit of previously, so I would estimate I had somewhere between 80g-90g remaining and just used all of that. You donā€™t need to be too concerned with precise measurements here.

Most marinara sauces do not include onion or ginger, and certainly do not include gochujang! Sometimes theyā€™ll have red pepper flakes or some chilli powder, so I figured gochujang would work well in place of those ā€“ and I liked how it came out. Gochujang is a thick paste, and I just grabbed a really heaped single spoon worth and used that. Iā€™m estimating in the ingredients list here that it was about 2tsp worth.

Pic with some rigatoni, taken on my phone that has mangled the white balance a bit it seems

4 Likes

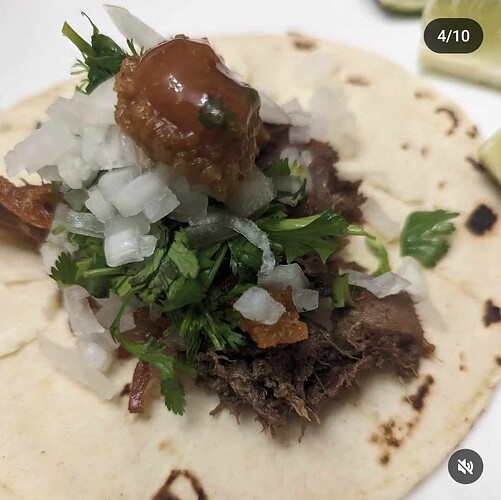
Gonna put this under a cut out of respect for the vegans and vegetarians. I made sous vide tacos de lengua while more or less following a recipe from the ultimate chef for gamers, Kenji Lopez-Alt.

Summary

Sous Vide Tacos de Lengua Recipe

I slightly modified the recipe as I couldnā€™t find canned chipotle peppers, so I used a chipotle sauce. I used duck fat and then also added a halved lime in there too, for kicks. Otherwise I did it pretty much as describedā€“stewed it in a vacuum sealed bag for about 36 hours, ground up the solids and about half of the broth into a salsa (also added some jalapenos), and then fried the cut up tongue with about half of the broth.

I would rank the resulting meat at a SSS Rank (Lifechanging). Havenā€™t been able to stop thinking about it since Friday. Absolutely mindblowing that you can pay roughly Wal-Mart ground beef prices and get something that tastes better than steak, so long as you can use the right approach. I also made sous vide carnitas (thanks again, Kenji) and the tongue even outshined that, which is normally something that canā€™t be beatā€¦

Also, as good as the tongue was, the salsa resulting from the blended solids and broth was good enough to almost steal the show in of itselfā€¦ There was enough of it to last for a few other things after we had eaten the tacos. Itā€™s not gonna last much longer.

At any rate it went well enough that I tracked down a small meat farm in the area and bought 3 more tongues, lol.

1 Like

Follow-up to this post, gonna put it under a cut again for the same reason as before:

Summary

One of the three tongues I got from that local farm has been turned into Pastel Azteca de Lengua, using the same recipe to prepare the tongue for tacos, but with some extra tomatoes and onion to give more substance to the salsa. I also got a meat shredder too, which made getting the tongue into a state where it could be turned into a delicious tender slop was super easy. It just soaked up the liquid I re-added to it like a sponge in the frying panā€¦

Tongue might be the best part of a cow for eating, for real. And itā€™s comparatively cheap!!! If you are reading this and you eat beef but you have never cooked tongue before, I could not recommend it highly enough. Go find some tongues.

i have way too many avocados that will go bad by the end of the week. Aside from guacamole, shoyu avocado slices or avocado smoothie i have no ideia of what to do with them. Any suggestions?

1 Like