MiSTer Project: Open Source FPGA Gaming
Disclaimer:
This intro post is by no means an in-depth tutorial. There are MUCH more detailed websites I will be linking to if you want to take a deeper dive into the MiSTer project. Think of this as more of a brochure with a testimonial from a non-expert user and a starting point for questions.
If you’d rather jump into the deep end - start here:
Home · MiSTer-devel/Main_MiSTer Wiki · GitHub
The MiSTer Project: Open Source FPGA Gaming
Accurate, Low-Latency, Multi-System Hardware Emulation
//////////////////
Table of Contents:
1. What is it?
2. Why use it?
3. Where do I get one?
4. What do I need?
5. How do I set up the hardware?
6. How do I set up the software?
7. Tips
8. Helpful Links
//////////////////
//////////////////\
1. What is it?
-
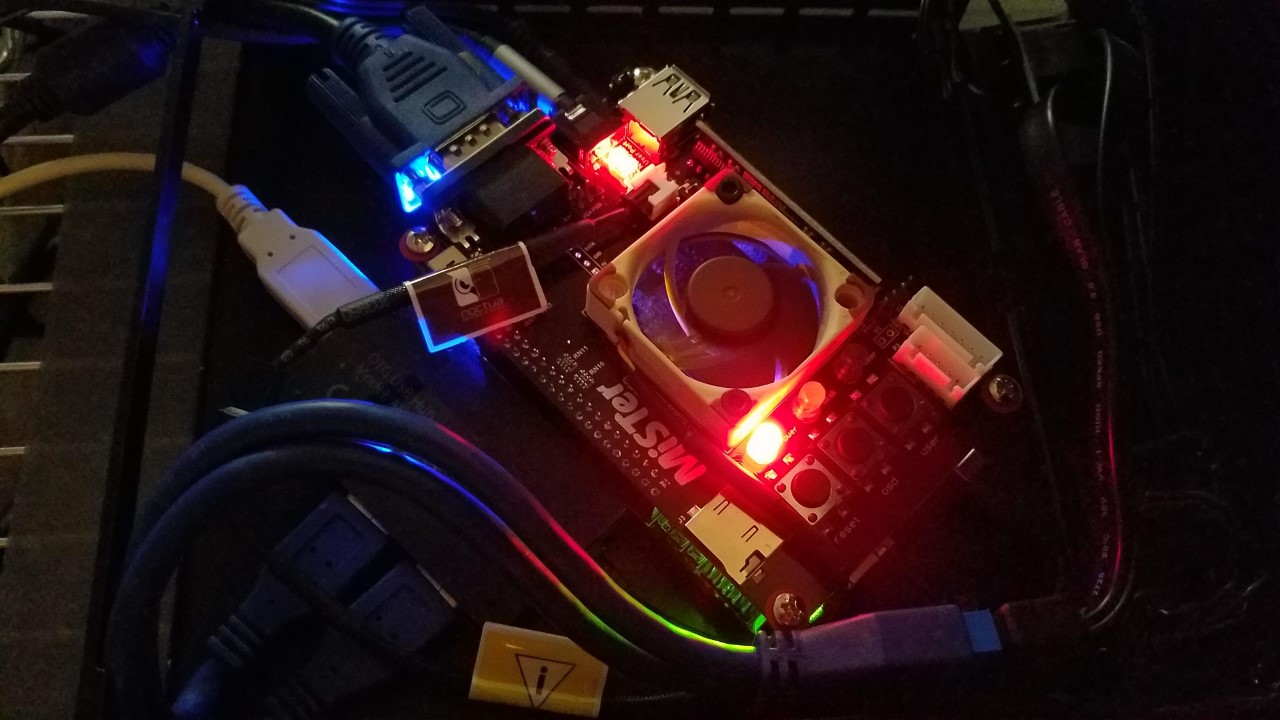
The MiSTer Project is an open-source low-level hardware emulation platform using the mass produced Terasic DE10-Nano board as it’s base. The board uses an Intel System-on-Chip (SoC) that consists of an 800 MHz dual-core ARM Cortex-A9 Hard Processor Unit (HPU) with a Cyclone V Field Programmable Gate Array (FPGA). It also has 1 GB of DDR3 RAM, HDMI, ethernet, a micro SD card slot, and uses a 5v 2amp power supply (about the same as a modern phone charger). It’s a great little board for learning how to program FPGAs and combine them with other hardware like Arduinos!
-
A MiSTer usually consists of a hardware IO board, SDRAM expansion module and the software for the DE10-Nano.
• The SDRAM expansion is the only completely necessary hardware part for the DE10-Nano since it provides memory for the game ROMs and the bigger the games, the more memory they need (for instance NeoGeo games requires the largest 128mb version).
• The IO board provides cooling, additional audio/video outputs, and some handy buttons if you don’t have a modern controller.
• You can buy the SDRAM and IO boards pre-assembled or in a solder-yourself kit.
• You will also need a USB OTG adapter or hub to convert the micro USB port to female Type A to plug in your controllers, keyboard, mouse, wifi and bluetooth adapters, or external USB storage (more USB devices might require a seperate power adapter).
• Finally you install the MiSTer OS onto a micro SD card, copy some cores (e.g. the emulated systems) and games onto it and you’re done! -
Since MiSTer is open-source it’s getting better all the time and all developed software is free*. Cores exist for several retro arcade boards, 80s low-end computers, and most 8 and 16 bit home consoles and handhelds (plus the NeoGeo!). Some cores in the works are the for Capcom CPS1 Arcade, PC 486 and the PlayStation (as of August 2020). You can even develop cores and add to the project yourself!
*Note: This does not mean the games, BIOS files, or any other copyrighted materials are free and I will NOT be linking to any sources here.
//////////////////
//////////////////\
2. Why use it?
-
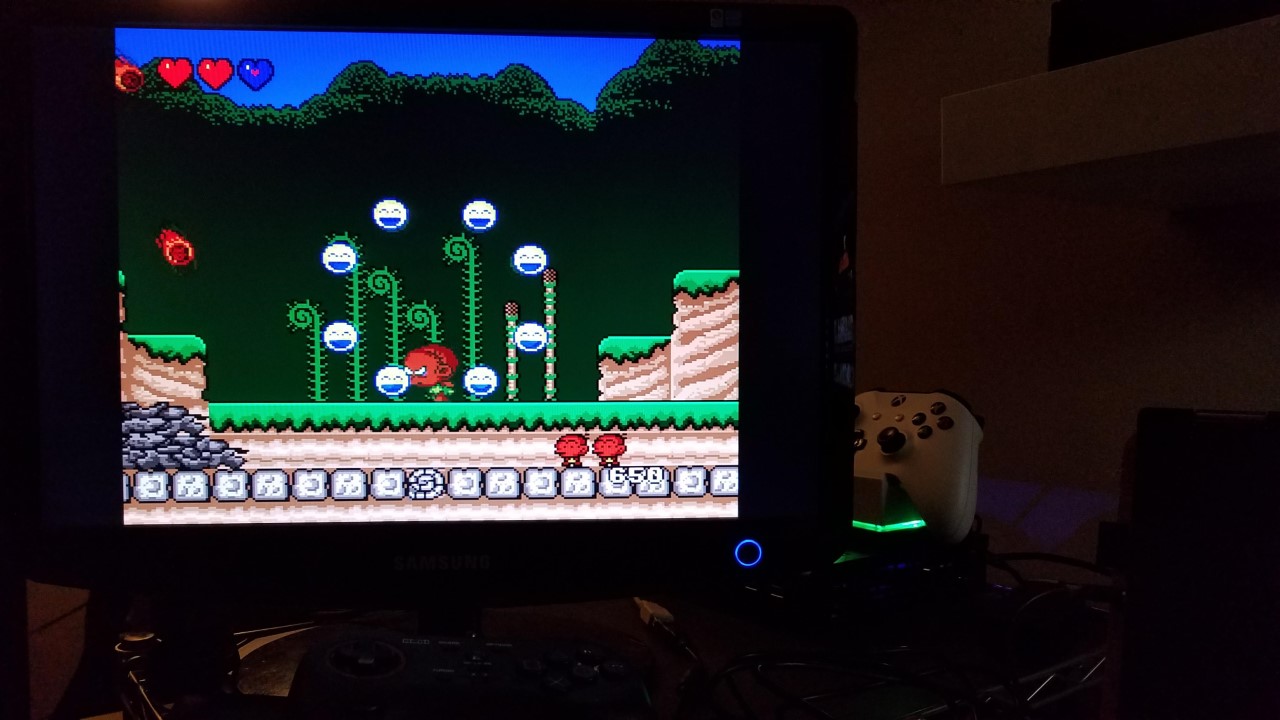
An FPGA is a kind of malleable hardware that allows developers to program the actual chips of a classic computer or console into the Cyclone V’s logic gates. This allows for cycle accurate and full-speed hardware emulation for the games to run on, rather than total software emulation which relies entirely on a CPU that is based on clock cycles - which can be quite demanding if you want accuracy and low lag. Games will look, sound, and play as good as you remember them (if not better) using the MiSTer.
-
The “luxury” retro consoles developed by Analog such as the NT Mini, Super NT, Mega Sg, and upcoming Analog Pocket all use FPGA technology. The MiSTer basically operates in a similar fashion, but you can play more than one system and there’s no need to jailbreak any firmware to load custom software since everything is already custom and open source. You cannot, however, run your own cartridges by just slamming them into the system. You would need to find a way to dump the ROMs into file on your computer using a device like the Retrode 2, then copy them onto the MiSTer.
-
If you want the most accurate, perfectly scaled, low latency, low wattage, multi-system retro gaming setup possible - the MiSTer is for you! If you’re happy with a Raspberry Pi, classic consoles or your gaming PC for emulation then stick with it! The MiSTer is a step beyond the Raspberry Pi for the same amount of electricity, but it certainly cannot do all of the enhancements a modern powerful PC can. It’s more for the purist who would be willing to buy the actual consoles and do all the modifications needed to play it on a newer screen (although you can use the MiSTer on old screens too!) but has neither the space nor the time.
A better explaination is here: Home · MiSTer-devel/Main_MiSTer Wiki · GitHub
and here: Home · MiSTer-devel/Main_MiSTer Wiki · GitHub
- Downsides? There are a few:
•Only the GBA core supports save states.
• It’s a little pricey. A complete MiSTer can range from $200 USD to $250 and beyond depending your customization. (I spent about $300) Premade kits go for about $600 in 2023.
• The interface is not a looker unless you like lo-fi terminal looking stuff. No boxarts, videos, descriptions or library customization in general.
• Only basic filters (HQx, sharpening, blur, bilinear, scanlines, LCD grids) so no crazy GPU powered faux glowing CRTs, borders or 3D transformations here. UPDATE: With the right TV, HDR and Shadow Masks you make the MiSTer look like a giant CRT!
• Setup is a little complicated, but if you’re used to running PC emulators it’s pretty simple. Similar difficulty to a Raspberry Pi.
• Good clean ROMs are required - Fan hacks, translations and mods can work if done properly so you can play stuff like full speed SA-1 modded Gradius and Contra 3 on the SNES! EDIT - SNES has MSU1 CD game compatibility now too!
- If a game does not work then you may have to get another version with proper headers or re-patch fan mods yourself.
• The project is relatively young so there are some notable systems available on other devices that are not on the MiSTer (yet?) such as:
- Sega Saturn (currently in beta!)
- Nintendo 64 (in development!)
- NeoGeo Pocket Color (currently in development!)
- Several Arcade boards (MAME is still WAY more comprehensive, but it can play Out Run!)
//////////////////
//////////////////\
3. Where do I get one?
- Here is a short list of vendors that sell MiSTer parts:
• (USA) MiSTer Addons - <URL url="https://misteraddons.com/">https://misteraddons.com/</URL> (this is where I got my stuff)
• (UK) MiSTer FPGA - <URL url="https://misterfpga.co.uk/">https://misterfpga.co.uk/</URL>
• (USA) zerohimself on Esty: <URL url="https://www.etsy.com/shop/zerohimself">https://www.etsy.com/shop/zerohimself</URL>
- Typically you'll just need the 128 SDRAM module and the MiSTer IO Board from these sellers, but you can also get cases and nicer USB boards for it too.
- Since the MiSTer consists of various parts, you can either buy each part seperately and save some money or get a completely assembled version if offered by a vendor. If you think you have faulty parts or have any questions about assembly you should contact them.
- The Terasic DE10-Nano board can be bought from multiple websites such as Amazon (<URL url="https://www.amzn.com/B07B89YHSB">https://www.amzn.com/B07B89YHSB</URL>), Terasic's website, or other computer parts distributors. Several vendors that sell MiSTer parts also sell just the DE10-Nano, including the ones above.
- Just want one completely made for an extra premium? Buy this: <URL url="https://misteraddons.com/products/mister-bundles">https://misteraddons.com/products/mister-bundles</URL>
//////////////////
//////////////////\
4. What do I need?
–Required– DE10-Nano Kit (buy from various places like Amazon or a MiSTer vendor)
• The kit comes with a 5v 2amp AC adapter that uses a Type M barrel plug, standoffs, an 8gb micro SD card and few male-to-male USB cables.
–Optional - but strongly recommended!– MiSTer IO board (buy from a MiSTer vendor)
• There are two versions, an Analog and Digital.
• These boards connect to the top of the DE10-Nano and provide:
- (Both) A fan mount to cool the DE10-Nano (fan and heastsink usually included wih the board)
- (Analog) Analog video VGA connector (VGA DB15 / YPbPr / RGB) with a Sync on Green switch
- (Both) 3.5mm audio and optical audio port
- (Digital) 3.5mm audio jack for ADC In (Tape Input for old computers)
- (Both) Buttons to reset the system, reset the current game, and open the UI menu (handy if your controller does not have a menu button)
- (Both) External headers for custom case buttons for the above
- (Both) A second micro SD slot that can be used by certain cores (mostly retro computers like the X68000)
- (Both) Status LEDs
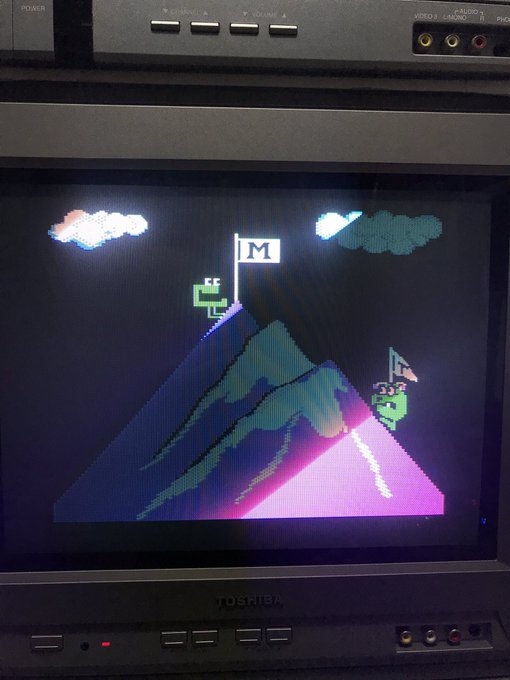
• The Analog board is more common (I’m using one) since it allows you to use a CRT monitor or PVM with low latency.
- VGA to S-Video and composite adapters also exist made by a Antonio Villena: https://www.antoniovillena.es/store/
–Required– Cooling
• A fan and heastink are needed since using MisTer cores will cause the DE10-Nano to run a little hot.
• Fan must be a size 40x10mm at 5v and an aluminum heatsink must be placed onto the SoC (the big chip that says Cyclone V).
• Preassmbled MiSTer IO boards will come with these and the fan will be pre-mounted (a Noctua fan is the quietest).
–Required– Micro SD card
• I use a 64gb one. Games on CDs can be large but 16 or 32gb should be enough for large cartridge libraries.
- Games are typically uncompressed and require proper filename extensions to be recognized by the cores.
–Required– A computer with an SD card slot
• The MiSTer OS can be installed onto the micro SD card using Windows, Mac, or Linux.
- See part 5 for additional software setup information.
–Required– SDRAM Module (buy from a MiSTer vendor)
• 32mb minimum - I’d go with the 128mb version for full game support, like with the NeoGeo.
–Required– Micro USB Adapter for input devices
• A simple OTG cable will work fine or you can get a low-power USB Hub. I got this one: Amazon.com: MakerSpot Micro USB OTG Hub for Raspberry Pi Zero 4 Port High Speed Sync and Extension Cable Adapter Also Works with Android Tablet Raspbian Jessie Linux : Electronics
• You can also get one of the many adapters from the vendors above to use an acutal controller for a console.
• There are more hardcore USB boards and bridges available as well that mount to the bottom such as the BlisSTer.
–Required– A keyboard and controller(s)
• You will need a keyboard for initial setup and to map your controller.
• Common controllers with USB connectors should work fine like DualShock 4, Xbox One pad, or most 8bitdo controllers.
• Here is a google doc of tested controllers with their latencies: https://docs.google.com/spreadsheets/d/1KlRObr3Be4zLch7Zyqg6qCJzGuhyGmXaOIUrpfncXIM/edit?usp=sharing
–Required– AV cables
• You can just use an HDMI 1.4 or better cable to keep things simple (not included) if you have a modern TV.
• If you get the IO Board you can use a VGA cable or an adapter*.
- *Note: The system outputs at 720p 60hz by default, but you can select up to 4 custom config files with different resolutions and refresh rates.
- You can use the HDMI and VGA outputs simultaneously.
• If you get the IO Board and use just the VGA, a 3.5mm stereo audio cable or optical audio cable will be needed for sound.
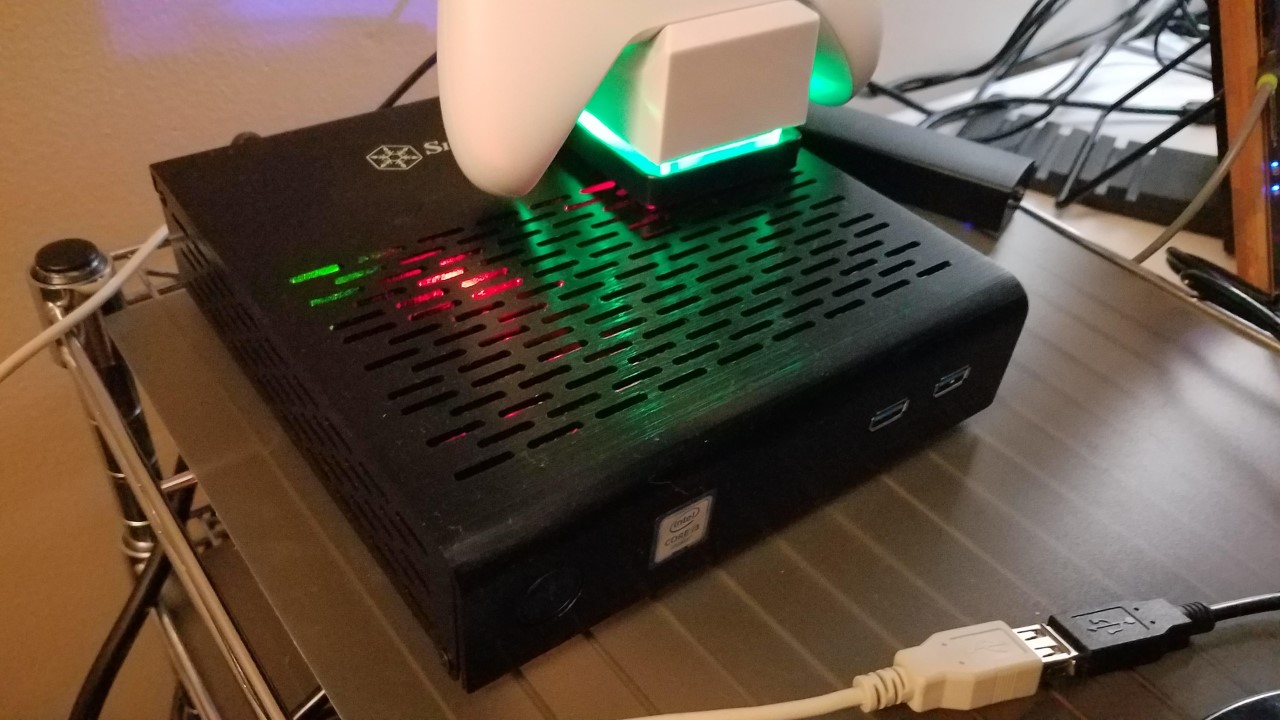
–Optional– Case
• The DE10-Nano includes all needed stand-offs and rubber feet if you like raw boards just hanging out.
• The vendors listed above sell MiSTer cases
• There are also various 3rd party sellers with 3D printed plates (or print your own if you can find the files).
• Or you can get creative and mount the MiSTer into a re-purposed PC case. Just get some motherboard screws and drill some holes!
- I’m using this mini-ITX case (Amazon.com: Silverstone Tek Aluminum Top Cover/Steel Body Thin Mini-ITX Media Center/HTPC Case PT13B - Black : Electronics). The front button and LEDs don’t work (yet) but I just got an adapter for the front USB ports.
–Optional– Power Switch
• To turn the system on or off, you basically just have to plug and unplug it from the wall.
• You can get inline Type M cables or adapters with a toggle switch, but be cautious if they reduce the power throughput.
• Another option is getting a Single Port Power Adapter switch for the AC Adapter (my solution) or just use a power strip.
• There are ways to solder a PC case switch to the power input using a “Momentary to Latching Switch Adapter” or through the GPIO pins (if you’re knowledgeable in the subject unlike me).
–Required– A phillips head screwdriver
Miscellaneous (depending on your needs)
• PC case screws and pads
• Extention cables
• Cable adapters
• External hard drives or USB storage for games
//////////////////
//////////////////\
5. How do I set up the hardware?
- Assuming you have the following parts…
• DE10-Nano board
• MiSTer IO board
• SDRAM module
• USB OTG adapter
• USB keyboard
• USB game controller
• HDMI cable
• A phillips head screwdriver
the MiSTer is assembled as such:
1. Remove the clear acrylic plate from the top of the DE10-Nano and set the 4 screws aside.
2. Stick the heatsink onto the Cyclone V SoC on the DE10-Nano. It’s the largest chip on the board.
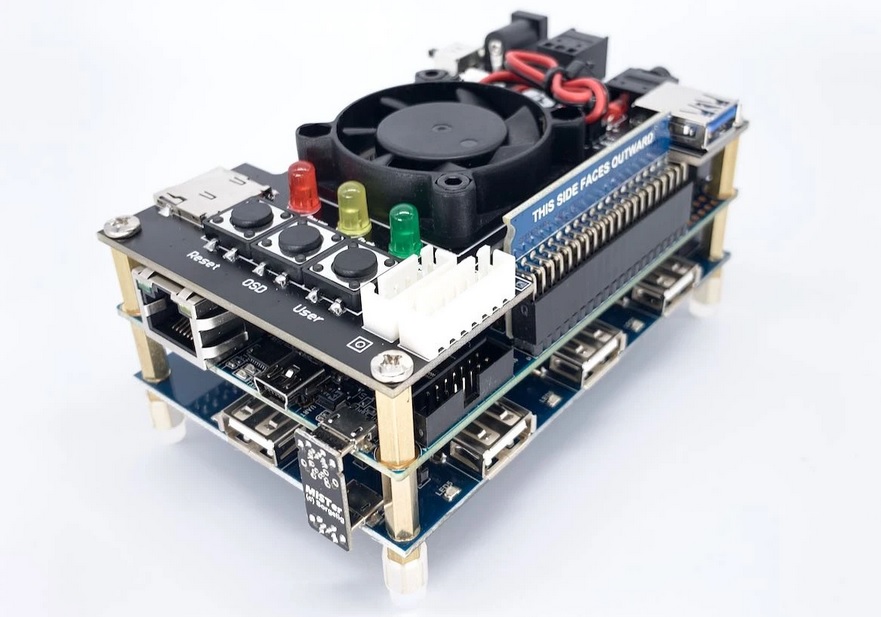
3. Carefully insert the SDRAM module into the DE10-Nano GPIO 0 pins (above the SoC). There should be a label that says “This side faces outward” on the module.
4. Carefully insert the MiSTer IO board into the DE10-Nano GPIO 1 pins. The SDRAM module will fit into the cutaway on the IO board.
5. Fasten the 4 screws from step 1 into the corners of the IO board to secure everything.
6. Plug in the USB OTG adapter/hub into the DE10-Nano’s micro USB port.
7. Plug in your keyboard.
8. Plug in the HDMI cable to the MiSTer and the TV.
9. Setup the micro SD card in Part 6 below, and then plug it into the DE10-Nano SD card slot (NOT the slot on the IO board!)
10. Plug in the AC adapter and let the micro SD card finish it’s initial configuration.
After you’ve got the micro SD card setup you can copy over some games (see Part 6), map your controller from the main menu, and start playing!
//////////////////
//////////////////\
6. How do I set up the software?
• Complete instructions can be found here: <URL url="https://github.com/MiSTer-devel/Main_MiSTer/wiki/Setup-Guide">https://github.com/MiSTer-devel/Main_MiSTer/wiki/Setup-Guide</URL>
• Use the "Mr. Fusion" method on that page if you want a simple full featured installation with handy scripts.
	- You can also go here: <URL url="https://github.com/MiSTer-devel/mr-fusion">https://github.com/MiSTer-devel/mr-fusion</URL>
	- Note: the MiSTer file system uses a strict directory structure and file extensions or the cores and games won't be found.
• You can use the vanilla image if you'd prefer to keep just a few cores on your installation. Just download and copy over the cores you want.
	- Additional information for installation can be found on each core's Github page below including information on which BIOS files might be needed.
	- Link to the main wiki page: <URL url="https://github.com/MiSTer-devel/Main_MiSTer/wiki">https://github.com/MiSTer-devel/Main_MiSTer/wiki</URL>.
• Run the micro SD card on the MiSTer so it can finish configuration.
• After running the micro SD card once on the MiSTer you can then copy over your games
	- Place your ROMs into the appropriate folder under the /games directory (e.g. /games/NES)
	- The ROMS must use a a valid file extension for the core to see them and be uncompressed unless otherwise noted.
• If your MiSTer is on a network, you can run the updater scripts from the MiSTer menu to get the latest cores and system files.
• You can also use updater scripts on the computer and copy the new files onto the SD card manually if you don't have the MiSTer on a network.
• If you are using the IO board and want custom resolutions over VGA you can make .ini files that use custom settings.
	- See this page for more info: <URL url="https://github.com/MiSTer-devel/Main_MiSTer/wiki/Configuration-Files">https://github.com/MiSTer-devel/Main_MiSTer/wiki/Configuration-Files</URL>
	- See Section 7 Tips for more info on proper video output.
• To run a core simply select it from the main menu.
• After it loads you can select a ROM from the Core menu or change the core's settings.
• Press left or right on the main menu to switch between the Misc. Options menu, Core menu, and System menu.
	- Remember to save the settings in the core's System menu by pressing right.
• You can change cores from the menu or reboot the system entirely.
• If you want to change change mister.ini files (e.g. mister_alt_1.ini etc.) for different settings like resolution that can be done from the Misc. Options menu by pressing left.
• You might also want to change your controller mappings per core in the system menu, such as with a 6-button controller like a Saturn or Genesis pad.
• Each core might also have specific hardware options like enabling the Genesis and TurboGrafx16 6-button pads or the SNES mouse.
//////////////////
//////////////////\
7. Tips
• Use the MiSTer main github wiki: <URL url="https://github.com/MiSTer-devel/Main_MiSTer/wiki">https://github.com/MiSTer-devel/Main_MiSTer/wiki</URL>
	- It is by far the most comprehensive source to use and should be the starting point for all of your questions
• Use an external video filter: <URL url="https://github.com/MiSTer-devel/Main_MiSTer/wiki/HDMI-Scaler-Custom-Filter-Coefficients#introduction">https://github.com/MiSTer-devel/Main_MiSTer/wiki/HDMI-Scaler-Custom-Filter-Coefficients#introduction</URL>
	- Since the MiSTer is upscaling a 240p image to 720p the pixels and stretched in ways that can cause unevenness and shimmering.
	- I typically use the Interpolation (Sharp) filter for the cleanest image possible, but the scanlines and LCD grids can be fun too!
	- There are some scandoubler effects (under Video settings) for scanlines but I would not recommend using them because they are not scaled properly
	- A good example game to use is Mega Man on the NES. His health bar should have even lines.
• Be mindful of your setup
	- Read about input and display latency to determine if you can reduce lab in some way.
	- Make sure the system is getting adequate power by reducing the number of external devices. A powered USB might be needed otherewise.
	- Read more about 240p image scaling and modern displays to make the games look correct. 720p is good because it's a perfect 3x scale.
• Be mindful of your content
	- Read each core's github information page before using it.
	- This is especially true for Arcade boards that use mapping files.
	- Use the Mr. Fusion* image and updater scripts** to make sure the system file structure is correct.
		*<URL url="https://github.com/MiSTer-devel/mr-fusion/releases">https://github.com/MiSTer-devel/mr-fusion/releases</URL>
		**<URL url="https://github.com/MiSTer-devel/Updater_script_MiSTer">https://github.com/MiSTer-devel/Updater_script_MiSTer</URL>
	- If a game is not working make sure it's the right format or is a clean dump with good headers.
	- Certain compressed images, such as *.chd files for Sega CD games will not work and they must be in *.bin *.cue format.
	- Again - Read each core's github information page before using it.
• Save your game!
	- Set the core's Backup RAM Autosave setting to ON to make sure your games actually save their progress if they have that feature.
	- Only the GBA core supports save states at the moment, but if you really want to win you can use Game Genie like cheats added by an updater script and accessed from the core's menu.
• Don't be afraid to tweak the settings
	- Make backups of your custom .ini config files and try out different settings to make the games look how you want them on the displays you are using.
	- Try to use either the native resolution of the display or an evenly scaled integer resolution of 240p like 960p, 720p, or 480p so pixels look correct.
		- 1080p should look fine too (especially on a 4k TV) and there are presets in the *.ini for common resolutions mentioned
	- If you're using VGA output then definitely check out the configuration files on Github (see below) for proper scaling.
//////////////////
//////////////////\
8. Helpful Links
See Section 3 for vendors to buy MiSTer parts.
• MiSTer main Github wiki: Home · MiSTer-devel/Main_MiSTer Wiki · GitHub
• Configuration file Github page: Home · MiSTer-devel/Main_MiSTer Wiki · GitHub
• MiSTer updater scripts: GitHub - MiSTer-devel/Updater_script_MiSTer: Bash script for updating MiSTer
• MiSTer forum: https://misterfpga.org/
• MiSTer on reddit: https://www.reddit.com/r/MiSTerProject/
//////////////////